<?xml version="1.0" encoding="utf-8"?><feed xmlns="http://www.w3.org/2005/Atom" ><generator uri="https://jekyllrb.com/" version="3.10.0">Jekyll</generator><link href="/feed.xml" rel="self" type="application/atom+xml" /><link href="/" rel="alternate" type="text/html" /><updated>2026-05-30T14:31:21+00:00</updated><id>/feed.xml</id><title type="html">A programmer’s pondering</title><subtitle>A blog about software engineering and architecture.</subtitle><entry><title type="html">Using Auth0 with role-based authorization in ASP.NET Core</title><link href="/authentication/2025/07/04/auth0-role-based-auth-aspnet.html" rel="alternate" type="text/html" title="Using Auth0 with role-based authorization in ASP.NET Core" /><published>2025-07-04T07:00:00+00:00</published><updated>2025-07-04T07:00:00+00:00</updated><id>/authentication/2025/07/04/auth0-role-based-auth-aspnet</id><content type="html" xml:base="/authentication/2025/07/04/auth0-role-based-auth-aspnet.html"><![CDATA[<h2 id="introduction">Introduction</h2>

<p>Authentication and authorization are always an interesting topic in the world of web development.
When developing web applications, at some point you’re bound to have a situation where users need to be able to log in to your app.
Subsequently, when users log in to your app, at some point you’re bound to have a situation where only specific users are allowed to access specific parts of your app.</p>

<p>In ASP.NET Core, there are several <a href="https://learn.microsoft.com/en-us/aspnet/core/security/identity-management-solutions?view=aspnetcore-9.0">identity management solutions</a> available to choose from.
One of these solutions is <a href="https://auth0.com/">Auth0</a>.</p>

<p>Auth0 is a comprehensive cloud-based authentication, authorization and user management solution. It has both B2C and B2B options, as well as a generous free tier.</p>

<p>When using Auth0 as your identity management solution in ASP.NET Core applications, you might want to assign roles to users in Auth0 and propagate those to your ASP.NET Core application.
This blog post explains how to set-up your Auth0 tenant so that ASP.NET Core will be able to automatically capture the roles onto the <a href="https://learn.microsoft.com/en-us/dotnet/api/system.security.claims?view=net-9.0">.NET claims-based identity</a> so you can create role-based policies.</p>

<blockquote>
  <p>Disclaimer: This blog post is <em>not</em> sponsored or supported by Auth0 in any way. Everything I mention about Auth0 and ASP.NET Core is my own opinion and experience and does not reflect the Auth0 or .NET communities.</p>
</blockquote>

<h2 id="tldr">TL;DR</h2>

<p>This blogpost is a comprehensive post about setting up an ASP.NET Core application and Auth0 tenant from scratch. If you’re only interested in the part where we configure Auth0 to pass the assigned role to the .NET application, please take a look at the chapter: <a href="#writing-an-auth0-post-login-action">Writing an Auth0 post-login Action</a> and optionally at the preceding chapter: <a href="#creating-pages-in-net-only-authenticated-and-authorized-users-can-visit">Creating pages in .NET only authenticated and authorized users can visit</a>.</p>

<p>In order to use ASP.NET Core’s built-in <a href="https://learn.microsoft.com/en-us/aspnet/core/security/authorization/roles?view=aspnetcore-9.0">role-based-authorization</a> in conjunction with Auth0, we can leverage Auth0’s post-login actions to set Microsoft’s role claim value to the assigned user’s roles. This allows for clean management of users and roles in Auth0 whilst still retaining full out-of-the-box support in ASP.NET Core with roles.</p>

<h2 id="table-of-contents">Table of contents</h2>

<ul>
  <li><a href="#introduction">Introduction</a></li>
  <li><a href="#tldr">TL;DR</a></li>
  <li><a href="#table-of-contents">Table of contents</a></li>
  <li><a href="#setting-up-our-aspnet-core-project">Setting up our ASP.NET Core project</a></li>
  <li><a href="#setting-up-our-auth0-tenant-and-application">Setting up our Auth0 tenant and application</a></li>
  <li><a href="#integrating-our-net-project-with-auth0">Integrating our .NET project with Auth0</a></li>
  <li><a href="#creating-ui-support-for-logging-in-and-out">Creating UI support for logging in and out</a></li>
  <li><a href="#creating-pages-in-net-only-authenticated-and-authorized-users-can-visit">Creating pages in .NET only authenticated and authorized users can visit</a></li>
  <li><a href="#assigning-a-role-to-our-user-in-auth0">Assigning a role to our user in Auth0</a></li>
  <li><a href="#writing-an-auth0-post-login-action">Writing an Auth0 post-login Action</a></li>
  <li><a href="#testing-our-net-application">Testing our .NET application</a></li>
  <li><a href="#wrapping-up">Wrapping up</a></li>
  <li><a href="#references">References</a></li>
</ul>

<h2 id="setting-up-our-aspnet-core-project">Setting up our ASP.NET Core project</h2>

<p>For simplicity this blog post will focus on setting up identity management with an <a href="https://learn.microsoft.com/en-us/aspnet/core/razor-pages/?view=aspnetcore-9.0&amp;tabs=visual-studio">ASP.NET Core Razor Pages</a> project. However, everything mentioned applies to <a href="https://learn.microsoft.com/en-us/aspnet/core/mvc/overview?view=aspnetcore-9.0">ASP.NET Core MVC</a> and <a href="https://learn.microsoft.com/en-us/aspnet/core/blazor/?view=aspnetcore-9.0">ASP.NET Core Blazor</a> applications as well.</p>

<blockquote>
  <p>All development in this blog post by me is done using Visual Studio Code and the .NET CLI on WSL2 with the .NET 9 SDK.</p>
</blockquote>

<p>Let’s go ahead and set up our project!</p>

<p>First we’re going to create a new ASP.NET Core Razor Pages project by running: <code class="language-plaintext highlighter-rouge">dotnet new webapp --name auth0-aspnet-demo</code>. After this has been created, go ahead and open the newly created folder in Visual Studio Code (<code class="language-plaintext highlighter-rouge">code ~/auth0-aspnet-demo</code>).</p>

<p>Verify everything works as expected and you can run the project by running: <code class="language-plaintext highlighter-rouge">dotnet run</code> in your project folder. Your console should output some logging and a URL should be presented like so:</p>

<div class="language-bash highlighter-rouge"><div class="highlight"><pre class="highlight"><code>alex@PC-ALEX:~/auth0-aspnet-demo<span class="nv">$ </span>dotnet run
Using launch settings from /home/alex/auth0-aspnet-demo/Properties/launchSettings.json...
Building...
warn: Microsoft.AspNetCore.DataProtection.KeyManagement.XmlKeyManager[35]
      No XML encryptor configured. Key <span class="o">{</span>91ddaa99-57ac-44a4-9656-7bf833735c45<span class="o">}</span> may be persisted to storage <span class="k">in </span>unencrypted form.
info: Microsoft.Hosting.Lifetime[14]
      Now listening on: http://localhost:5203
info: Microsoft.Hosting.Lifetime[0]
      Application started. Press Ctrl+C to shut down.
info: Microsoft.Hosting.Lifetime[0]
      Hosting environment: Development
info: Microsoft.Hosting.Lifetime[0]
      Content root path: /home/alex/auth0-aspnet-demo
</code></pre></div></div>

<p>Open your browser and navigate to the presented URL (or CTRL+Click) to verify you can see the new Razor Pages project looking something like this:</p>

<p><img src="/assets/images/2025-07-04-auth0-role-based-auth-aspnet/new-razor-pages-project.png" alt="Newly created ASP.NET Core Razor Pages project" /></p>

<p>Perfect! For simplicity’s sake, we’ll keep everything as-is. If you’d like to customize your application and its styling, feel free to do so however!</p>

<p>Now that we’ve set up our Razor Pages project, let’s head over to Auth0 to set up our tenant!</p>

<h2 id="setting-up-our-auth0-tenant-and-application">Setting up our Auth0 tenant and application</h2>

<p>Head over to https://auth0.com and log in or sign up. Select the tenant you want to apply this to or create a new one.</p>

<blockquote>
  <p>I’m on a free plan with my Auth0 tenant.</p>
</blockquote>

<p>I’m not going into details on how to set up a new tenant in Auth0 or what a tenant is exactly. If you’d like more information about this, please view Auth0’s <a href="https://auth0.com/docs/get-started/auth0-overview">Get Started</a> documentation.</p>

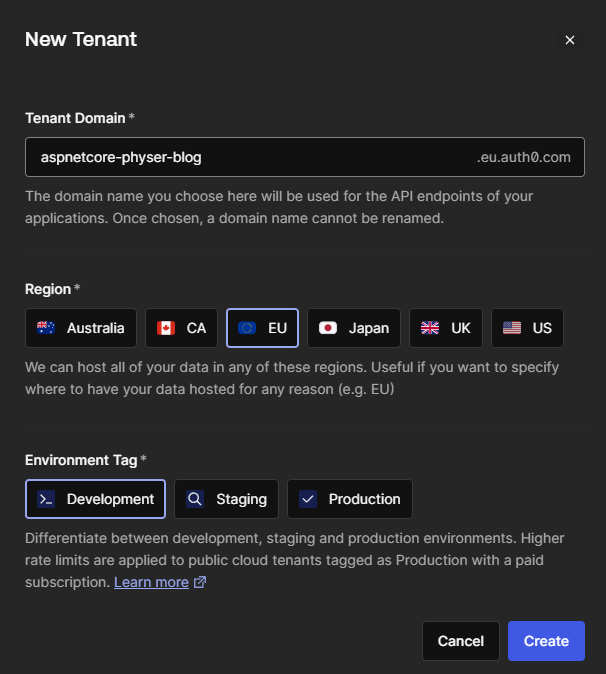
<p>For demo purposes, I have created a new tenant in the EU with the Development environment tag:</p>

<p><img src="/assets/images/2025-07-04-auth0-role-based-auth-aspnet/auth0-new-tenant.png" alt="New Auth0 tenant" /></p>

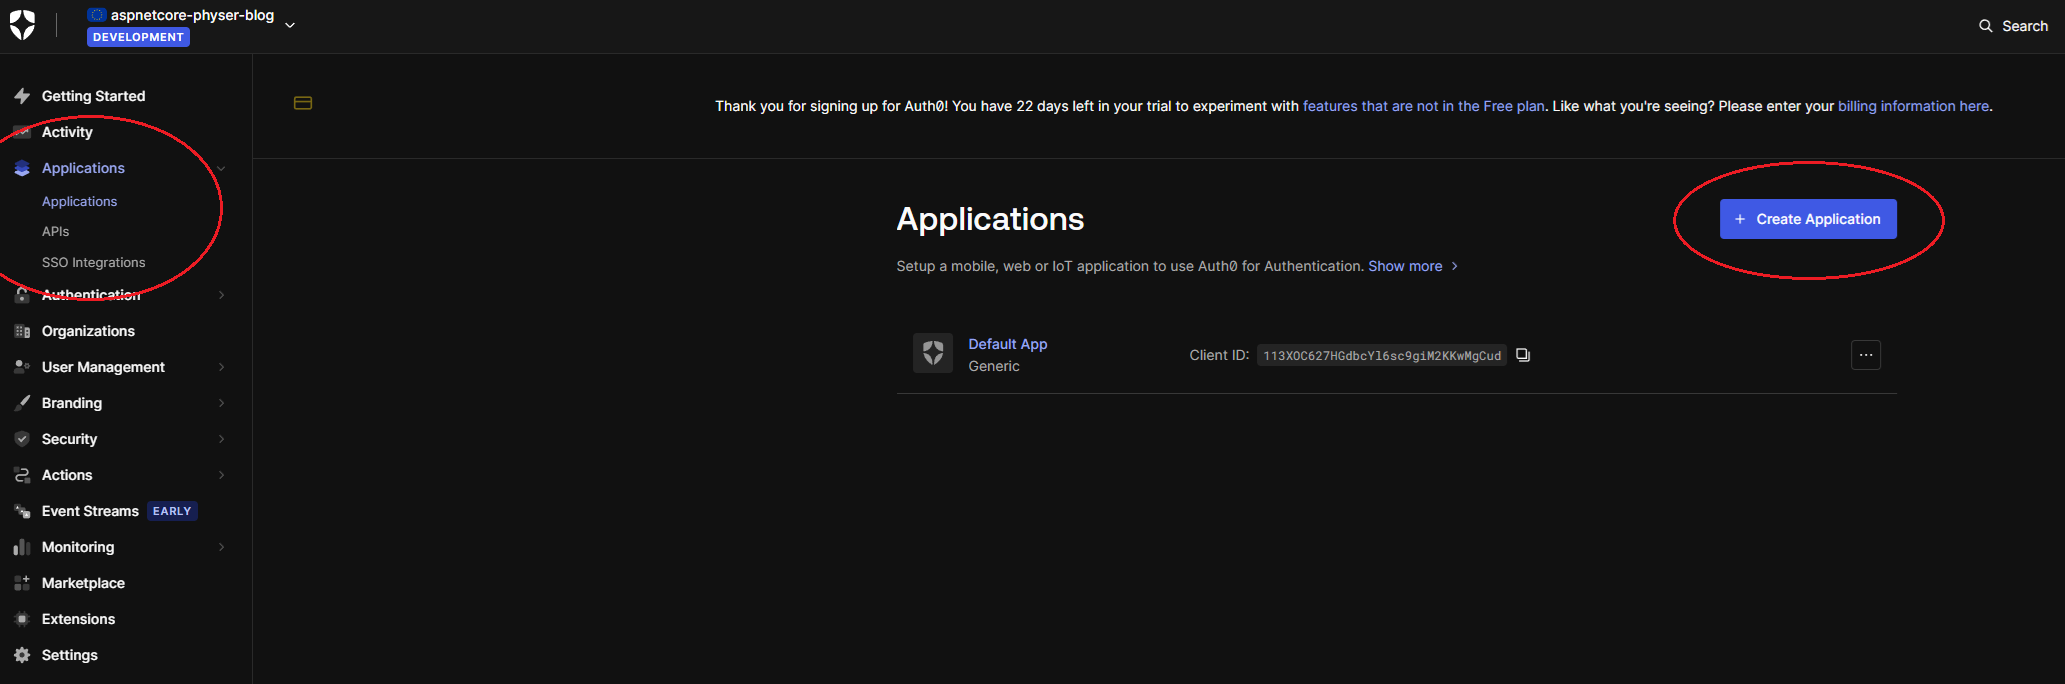
<p>Once your tenant has been created, head over to the Applications tab in the sidebar and select the Applications sub navigation item. Once you’re on the applications page, create a new application by pressing the button: <code class="language-plaintext highlighter-rouge">+ Create Application</code>:</p>

<p><img src="/assets/images/2025-07-04-auth0-role-based-auth-aspnet/auth0-new-application.png" alt="New Auth0 application" /></p>

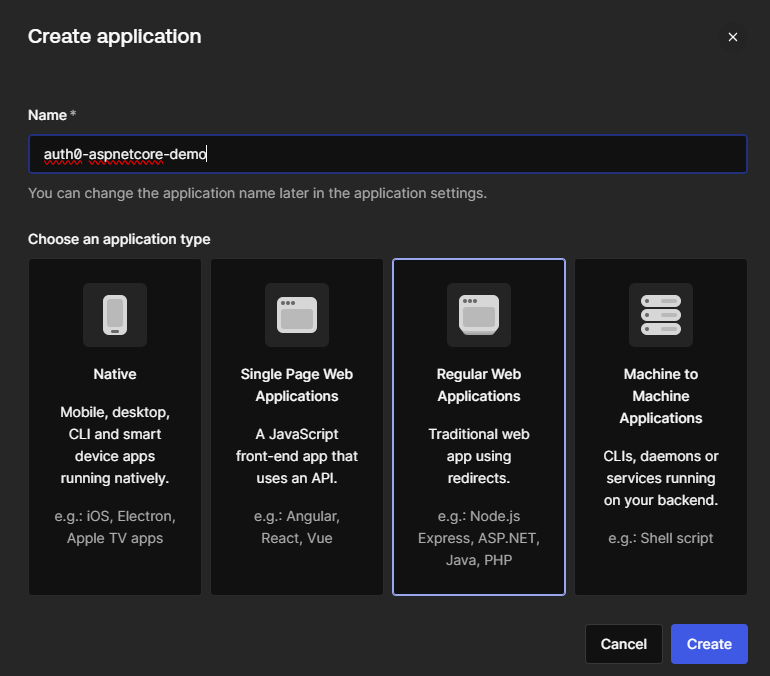
<p>Select the desired type of application, in case of this example: Regular Web Applications and click on create:</p>

<p><img src="/assets/images/2025-07-04-auth0-role-based-auth-aspnet/auth0-create-application-modal.png" alt="Create Auth0 Application modal" /></p>

<p>Feel free to open the Quickstart for ASP.NET Core MVC or follow along with this post to fully set up your tenant for local use.</p>

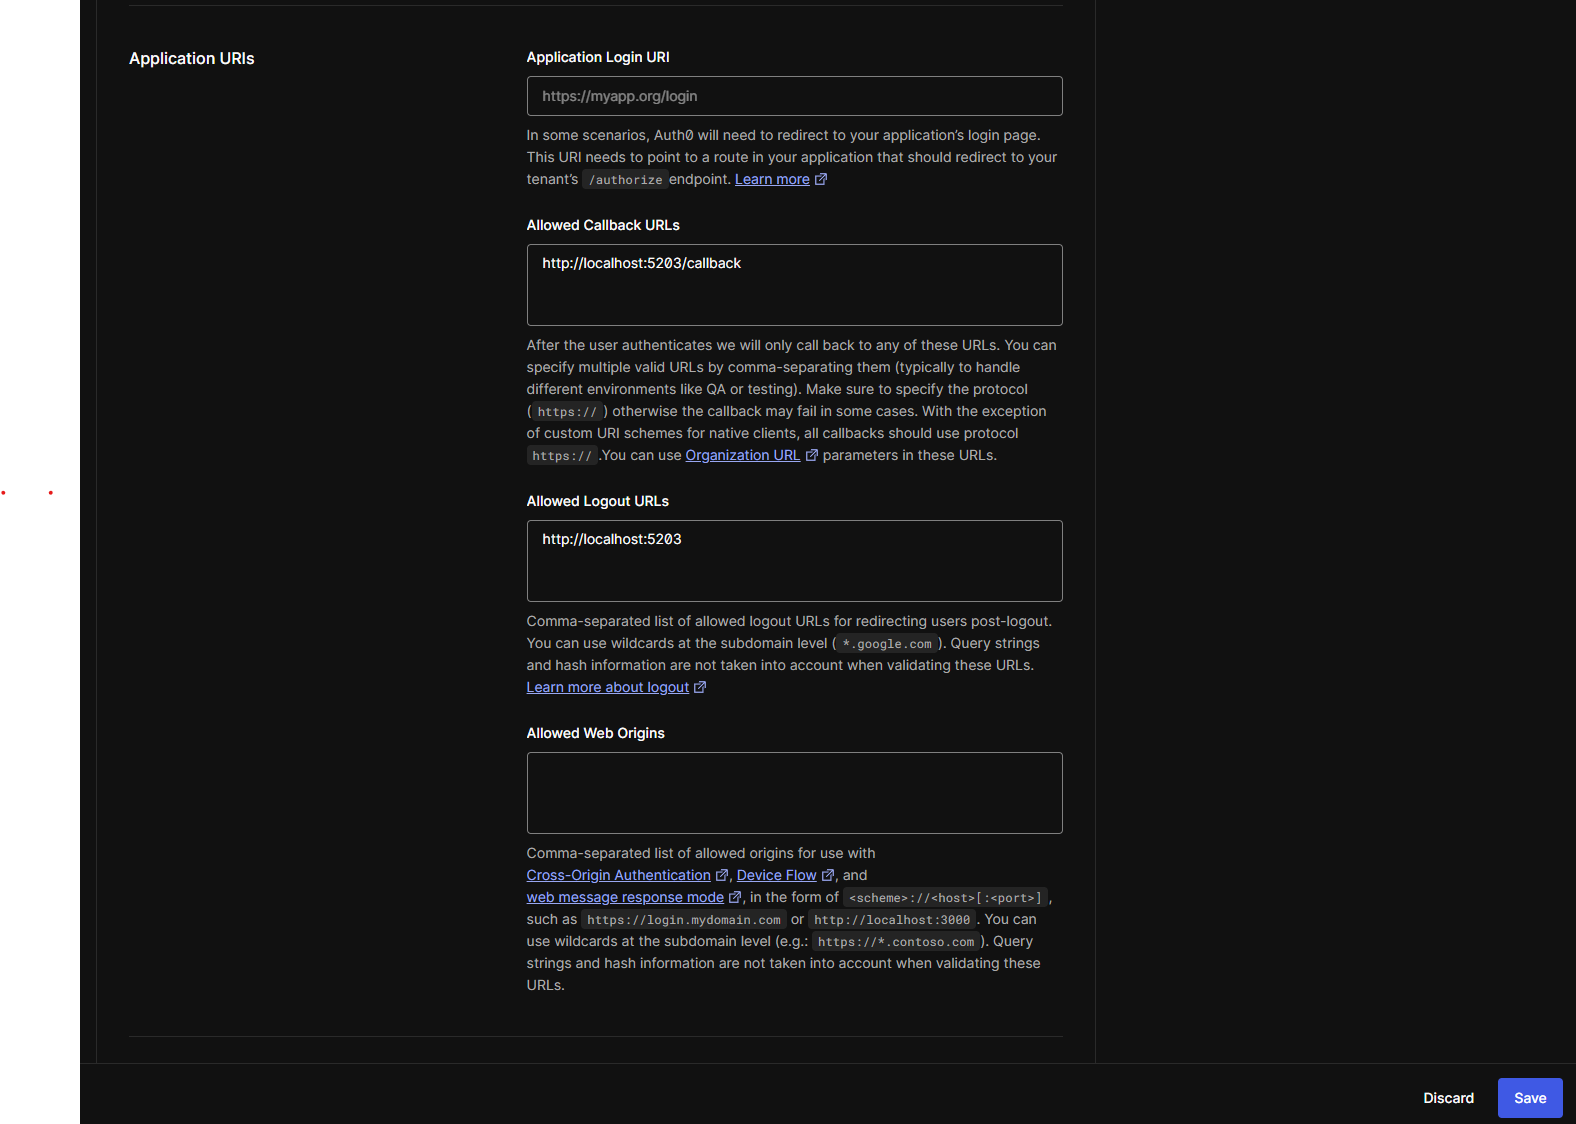
<p>Switch to the Settings tab at the top of the page and scroll down until you find the <code class="language-plaintext highlighter-rouge">Application URIs</code> section.</p>

<p>Copy the URL from your running local .NET application that you created in the previous step and add <code class="language-plaintext highlighter-rouge">/callback</code> to it. Add this URL to the <code class="language-plaintext highlighter-rouge">Allowed Callback URLs</code>. If your application is running on multiple URLs (e.g. HTTP and HTTPS), you can add multiple URLs in Auth0 by comma-separating them.</p>

<p>In my example, the Allowed Callback URL will be: <code class="language-plaintext highlighter-rouge">http://localhost:5203/callback</code>.</p>

<p>Add the URL(s) (without a path) in the <code class="language-plaintext highlighter-rouge">Allowed Logout URLs</code> field. In my example, that would be: <code class="language-plaintext highlighter-rouge">http://localhost:5203</code>.</p>

<p>This will result in your settings looking something like this:</p>

<p><img src="/assets/images/2025-07-04-auth0-role-based-auth-aspnet/auth0-application-uris.png" alt="Application URI settings" /></p>

<p>Don’t forget to smash the save button in the bottom!</p>

<p>That concludes the necessary set up for our Auth0 tenant and application. Let’s switch back to our .NET project to set up the integration with the Auth0 SDK!</p>

<h2 id="integrating-our-net-project-with-auth0">Integrating our .NET project with Auth0</h2>

<p>Now that we’ve got our Auth0 tenant set up and our Auth0 application configured, let’s get back to our .NET project and set up things from that side.</p>

<p>Install the Auth0 SDK for .NET by running <code class="language-plaintext highlighter-rouge">dotnet add Auth0.AspNetCore.Authentication</code> in your previously created folder (e.g. <code class="language-plaintext highlighter-rouge">~/auth0-aspnet-demo</code>).</p>

<p>Configure the .NET project to support Auth0’s authentication provider by updating your <code class="language-plaintext highlighter-rouge">Program.cs</code> with the following code:</p>

<div class="language-csharp highlighter-rouge"><div class="highlight"><pre class="highlight"><code><span class="n">builder</span><span class="p">.</span><span class="n">Services</span><span class="p">.</span><span class="nf">AddAuth0WebAppAuthentication</span><span class="p">(</span><span class="n">options</span> <span class="p">=&gt;</span>
<span class="p">{</span>
    <span class="n">options</span><span class="p">.</span><span class="n">Domain</span> <span class="p">=</span> <span class="n">builder</span><span class="p">.</span><span class="n">Configuration</span><span class="p">[</span><span class="s">"Auth0:Domain"</span><span class="p">]</span> <span class="p">??</span> <span class="k">throw</span> <span class="k">new</span> <span class="nf">InvalidOperationException</span><span class="p">(</span><span class="s">"Auth0:Domain configuration is missing."</span><span class="p">);</span>
    <span class="n">options</span><span class="p">.</span><span class="n">ClientId</span> <span class="p">=</span> <span class="n">builder</span><span class="p">.</span><span class="n">Configuration</span><span class="p">[</span><span class="s">"Auth0:ClientId"</span><span class="p">]</span> <span class="p">??</span> <span class="k">throw</span> <span class="k">new</span> <span class="nf">InvalidOperationException</span><span class="p">(</span><span class="s">"Auth0:ClientId configuration is missing."</span><span class="p">);</span>
<span class="p">});</span>
</code></pre></div></div>

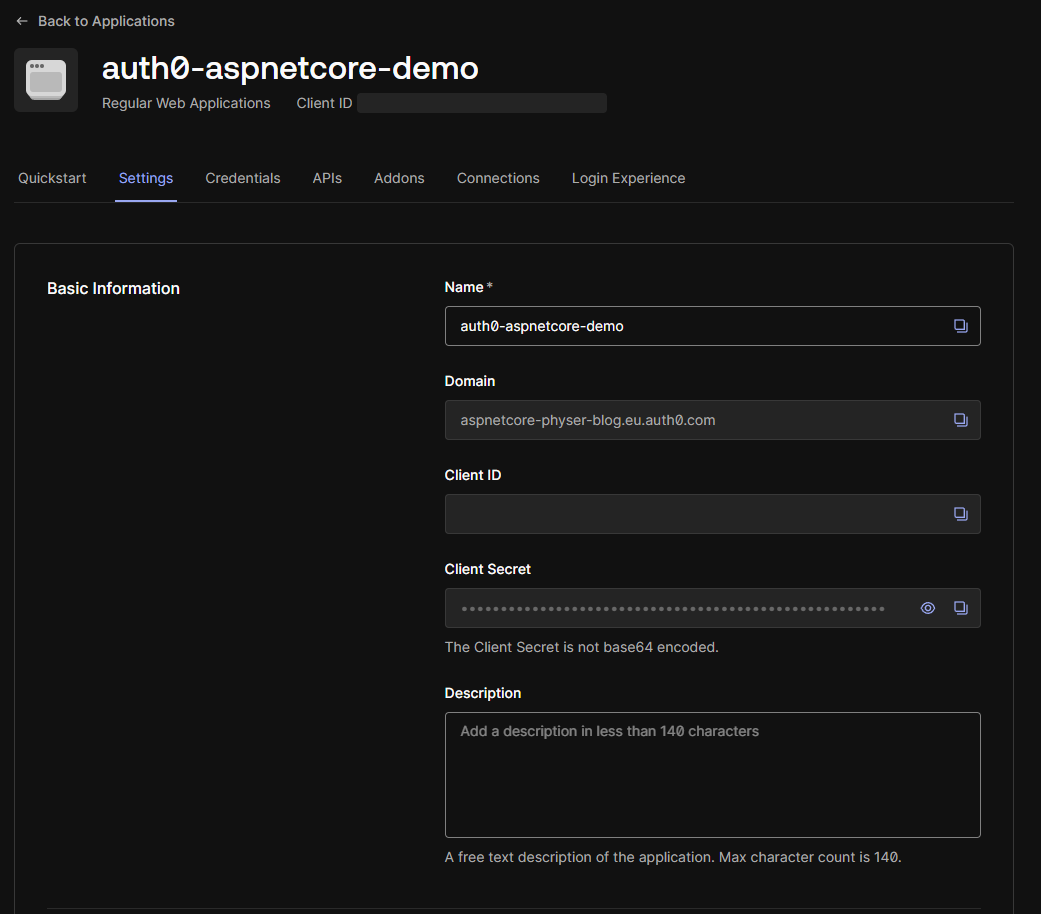
<p>As you can see from the preceding code, the necessary Auth0 tenant settings are retrieved from the <code class="language-plaintext highlighter-rouge">appsettings.json</code>. Open the <code class="language-plaintext highlighter-rouge">appsettings.json</code> file and add the Domain and ClientId. You can find these values on the Settings page of your application in Auth0:</p>

<p><img src="/assets/images/2025-07-04-auth0-role-based-auth-aspnet/auth0-application-basic-info.png" alt="Application's client ID and domain" /></p>

<p>Whilst these values aren’t secret, they are sensitive information. Please be sure to use care when checking these details into a version control system. Where necessary, use <a href="https://learn.microsoft.com/en-us/aspnet/core/security/app-secrets?view=aspnetcore-9.0&amp;tabs=windows">User Secrets</a> for local development and a proper secret management tool for Cloud development such as <a href="https://learn.microsoft.com/en-us/azure/key-vault/general/overview">Azure Key Vault</a>.</p>

<p>For demo purposes, I’m simply going to add them to our <code class="language-plaintext highlighter-rouge">appsettings.json</code> but be sure to not publish your settings online like that.</p>

<p>Your <code class="language-plaintext highlighter-rouge">appsettings.json</code> file should now look like this:</p>

<div class="language-json highlighter-rouge"><div class="highlight"><pre class="highlight"><code><span class="p">{</span><span class="w">
  </span><span class="nl">"Logging"</span><span class="p">:</span><span class="w"> </span><span class="p">{</span><span class="w">
    </span><span class="nl">"LogLevel"</span><span class="p">:</span><span class="w"> </span><span class="p">{</span><span class="w">
      </span><span class="nl">"Default"</span><span class="p">:</span><span class="w"> </span><span class="s2">"Information"</span><span class="p">,</span><span class="w">
      </span><span class="nl">"Microsoft.AspNetCore"</span><span class="p">:</span><span class="w"> </span><span class="s2">"Warning"</span><span class="w">
    </span><span class="p">}</span><span class="w">
  </span><span class="p">},</span><span class="w">
  </span><span class="nl">"AllowedHosts"</span><span class="p">:</span><span class="w"> </span><span class="s2">"*"</span><span class="p">,</span><span class="w">
  </span><span class="nl">"Auth0"</span><span class="p">:</span><span class="w"> </span><span class="p">{</span><span class="w">
    </span><span class="nl">"Domain"</span><span class="p">:</span><span class="w"> </span><span class="s2">"aspnetcore-physer-blog.eu.auth0.com"</span><span class="p">,</span><span class="w">
    </span><span class="nl">"ClientId"</span><span class="p">:</span><span class="w"> </span><span class="s2">"xxxxxxxxxxxxxxxxxxxxxxxxxxxxxxxx"</span><span class="w">
  </span><span class="p">}</span><span class="w">
</span><span class="p">}</span><span class="w">
</span></code></pre></div></div>

<blockquote>
  <p>My ClientId has been redacted in the examples, make sure to fill in your details properly when following along with this blogpost.</p>
</blockquote>

<p>Verify everything is still working correctly by running your program and navigating to your application (<code class="language-plaintext highlighter-rouge">dotnet run</code>).</p>

<p>Cool! Our ASP.NET Core application is now integrated with the Auth0 SDK. In the next stage we will create a way to log in and out of the ASP.NET Core application.</p>

<h2 id="creating-ui-support-for-logging-in-and-out">Creating UI support for logging in and out</h2>

<p>So we’ve set up our Auth0 integration, great! It won’t do us much good though until we’ve set up a way to authenticate. We need to be able to log in (and out, preferably) through our ASP.NET Core application.</p>

<p>Let’s switch back to Visual Studio Code and head over to the <code class="language-plaintext highlighter-rouge">Program.cs</code> file, the entry point of our application.</p>

<p>Near the bottom of the file you can spot a line containing: <code class="language-plaintext highlighter-rouge">app.UseAuthorization();</code>. Add the following line above it: <code class="language-plaintext highlighter-rouge">app.UseAuthentication();</code>. This sets our application up to not only use authorization policies but also support authentication.</p>

<p>This means your <code class="language-plaintext highlighter-rouge">Program.cs</code> file now looks something like this:</p>

<div class="language-csharp highlighter-rouge"><div class="highlight"><pre class="highlight"><code><span class="k">using</span> <span class="nn">Auth0.AspNetCore.Authentication</span><span class="p">;</span>

<span class="kt">var</span> <span class="n">builder</span> <span class="p">=</span> <span class="n">WebApplication</span><span class="p">.</span><span class="nf">CreateBuilder</span><span class="p">(</span><span class="n">args</span><span class="p">);</span>

<span class="c1">// Add services to the container.</span>
<span class="n">builder</span><span class="p">.</span><span class="n">Services</span><span class="p">.</span><span class="nf">AddRazorPages</span><span class="p">();</span>

<span class="n">builder</span><span class="p">.</span><span class="n">Services</span><span class="p">.</span><span class="nf">AddAuth0WebAppAuthentication</span><span class="p">(</span><span class="n">options</span> <span class="p">=&gt;</span>
<span class="p">{</span>
    <span class="n">options</span><span class="p">.</span><span class="n">Domain</span> <span class="p">=</span> <span class="n">builder</span><span class="p">.</span><span class="n">Configuration</span><span class="p">[</span><span class="s">"Auth0:Domain"</span><span class="p">]</span> <span class="p">??</span> <span class="k">throw</span> <span class="k">new</span> <span class="nf">InvalidOperationException</span><span class="p">(</span><span class="s">"Auth0:Domain configuration is missing."</span><span class="p">);</span>
    <span class="n">options</span><span class="p">.</span><span class="n">ClientId</span> <span class="p">=</span> <span class="n">builder</span><span class="p">.</span><span class="n">Configuration</span><span class="p">[</span><span class="s">"Auth0:ClientId"</span><span class="p">]</span> <span class="p">??</span> <span class="k">throw</span> <span class="k">new</span> <span class="nf">InvalidOperationException</span><span class="p">(</span><span class="s">"Auth0:ClientId configuration is missing."</span><span class="p">);</span>
<span class="p">});</span>

<span class="kt">var</span> <span class="n">app</span> <span class="p">=</span> <span class="n">builder</span><span class="p">.</span><span class="nf">Build</span><span class="p">();</span>

<span class="c1">// Configure the HTTP request pipeline.</span>
<span class="k">if</span> <span class="p">(!</span><span class="n">app</span><span class="p">.</span><span class="n">Environment</span><span class="p">.</span><span class="nf">IsDevelopment</span><span class="p">())</span>
<span class="p">{</span>
    <span class="n">app</span><span class="p">.</span><span class="nf">UseExceptionHandler</span><span class="p">(</span><span class="s">"/Error"</span><span class="p">);</span>
    <span class="c1">// The default HSTS value is 30 days. You may want to change this for production scenarios, see https://aka.ms/aspnetcore-hsts.</span>
    <span class="n">app</span><span class="p">.</span><span class="nf">UseHsts</span><span class="p">();</span>
<span class="p">}</span>

<span class="n">app</span><span class="p">.</span><span class="nf">UseHttpsRedirection</span><span class="p">();</span>

<span class="n">app</span><span class="p">.</span><span class="nf">UseRouting</span><span class="p">();</span>

<span class="n">app</span><span class="p">.</span><span class="nf">UseAuthentication</span><span class="p">();</span>
<span class="n">app</span><span class="p">.</span><span class="nf">UseAuthorization</span><span class="p">();</span>

<span class="n">app</span><span class="p">.</span><span class="nf">MapStaticAssets</span><span class="p">();</span>
<span class="n">app</span><span class="p">.</span><span class="nf">MapRazorPages</span><span class="p">()</span>
   <span class="p">.</span><span class="nf">WithStaticAssets</span><span class="p">();</span>

<span class="n">app</span><span class="p">.</span><span class="nf">Run</span><span class="p">();</span>
</code></pre></div></div>

<blockquote>
  <p>Reminder: Authentication is the process of determining the validity of a user’s identity. Is the user who it says it is? Whereas authorization is the process of verifying the access of a user. Once a user is identified, is it allowed to do what it’s trying to do?</p>
</blockquote>

<p>For simplicity, I’m going to create a new Razor Pages page that takes care of logging the user in and another one that takes care of logging the user out. This is not the only way to this though, you could also set up minimal API endpoints.</p>

<p>Let’s add a new empty Razor page and its code-behind file. Run <code class="language-plaintext highlighter-rouge">touch Pages/Login.cshtml &amp; touch Pages/Login.cshtml.cs</code></p>

<p>Open up your <code class="language-plaintext highlighter-rouge">Login.cshtml</code> file and add the following lines:</p>

<div class="language-plaintext highlighter-rouge"><div class="highlight"><pre class="highlight"><code>@page
@model LoginModel
</code></pre></div></div>

<p>Next, add the following code to your <code class="language-plaintext highlighter-rouge">Login.cshtml.cs</code> file:</p>

<div class="language-csharp highlighter-rouge"><div class="highlight"><pre class="highlight"><code><span class="k">using</span> <span class="nn">Auth0.AspNetCore.Authentication</span><span class="p">;</span>
<span class="k">using</span> <span class="nn">Microsoft.AspNetCore.Authentication</span><span class="p">;</span>
<span class="k">using</span> <span class="nn">Microsoft.AspNetCore.Mvc.RazorPages</span><span class="p">;</span>

<span class="k">namespace</span> <span class="nn">auth0_aspnet_demo.Pages</span><span class="p">;</span>

<span class="k">public</span> <span class="k">class</span> <span class="nc">LoginModel</span> <span class="p">:</span> <span class="n">PageModel</span>
<span class="p">{</span>
    <span class="k">public</span> <span class="k">async</span> <span class="n">Task</span> <span class="nf">OnGetAsync</span><span class="p">()</span>
    <span class="p">{</span>
        <span class="kt">var</span> <span class="n">authenticationProperties</span> <span class="p">=</span> <span class="k">new</span> <span class="nf">LoginAuthenticationPropertiesBuilder</span><span class="p">().</span><span class="nf">WithRedirectUri</span><span class="p">(</span><span class="s">"/"</span><span class="p">).</span><span class="nf">Build</span><span class="p">();</span>
        <span class="k">await</span> <span class="n">HttpContext</span><span class="p">.</span><span class="nf">ChallengeAsync</span><span class="p">(</span><span class="n">Auth0Constants</span><span class="p">.</span><span class="n">AuthenticationScheme</span><span class="p">,</span> <span class="n">authenticationProperties</span><span class="p">);</span>
    <span class="p">}</span>
<span class="p">}</span>
</code></pre></div></div>

<p>If you’re following along with the tutorial, verify your namespace and usings are correctly set.</p>

<p>Let’s see if it worked! Run your application (<code class="language-plaintext highlighter-rouge">dotnet run</code>) and navigate to your URL. Go to <code class="language-plaintext highlighter-rouge">/login</code> and you should be redirected to Auth0. Register as a new user or log in as an existing one if you already have an account in Auth0. Afterwards, you should be redirected back to your application!</p>

<blockquote>
  <p>If you run into an error in the Auth0 redirecting process, ensure your callback URL matches the URL you’re visiting, for instance if you’ve set up Auth0 to accept <code class="language-plaintext highlighter-rouge">http://localhost:5203/callback</code>, and you’re on <code class="language-plaintext highlighter-rouge">http:127.0.0.1:5203/callback</code>, Auth0 will not accept the URL.</p>
</blockquote>

<p>To verify we’re actually logged in as a user we can quickly update our homepage to show some data of the logged in user.</p>

<p>Open up your <code class="language-plaintext highlighter-rouge">Pages/Index.cshtml</code> file and below the existing code add the following:</p>

<div class="language-html highlighter-rouge"><div class="highlight"><pre class="highlight"><code>@if (User.Identity?.IsAuthenticated == true) {
<span class="nt">&lt;p&gt;</span>Hello, @User.Identity.Name<span class="nt">&lt;/p&gt;</span>
}
</code></pre></div></div>

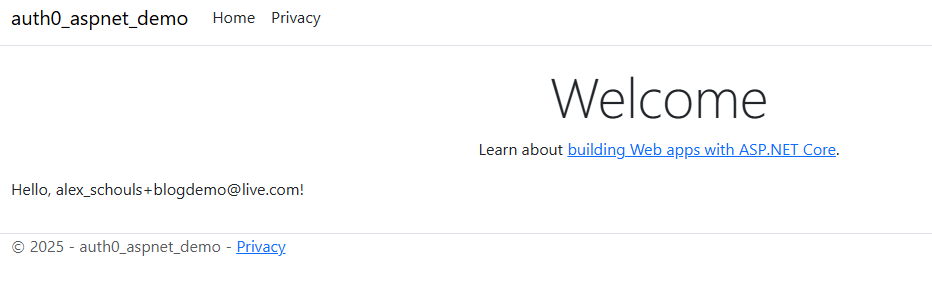
<p>Run your application and if you’re still logged in (you might have to login again by navigating to the <code class="language-plaintext highlighter-rouge">/login</code> page), you should see your e-mail address pop up like so:</p>

<p><img src="/assets/images/2025-07-04-auth0-role-based-auth-aspnet/aspnet-user-identity-details.png" alt="User details from .NET Identity" /></p>

<p>Let’s also quickly add a page to log out from the application. We will create a page similar to the login page, except now it will log you out. Run <code class="language-plaintext highlighter-rouge">touch Pages/Logout.cshtml &amp; touch Pages/Logout.cshtml.cs</code> (or create them in any way you’d like).</p>

<p>Open <code class="language-plaintext highlighter-rouge">Pages/Logout.cshtml</code> and add the following lines:</p>

<div class="language-plaintext highlighter-rouge"><div class="highlight"><pre class="highlight"><code>@page
@model LogoutModel
</code></pre></div></div>

<p>Next, open up the code-behind: <code class="language-plaintext highlighter-rouge">Pages/Logout.cshtml.cs</code> and add these lines:</p>

<div class="language-csharp highlighter-rouge"><div class="highlight"><pre class="highlight"><code><span class="k">using</span> <span class="nn">Auth0.AspNetCore.Authentication</span><span class="p">;</span>
<span class="k">using</span> <span class="nn">Microsoft.AspNetCore.Authentication</span><span class="p">;</span>
<span class="k">using</span> <span class="nn">Microsoft.AspNetCore.Authentication.Cookies</span><span class="p">;</span>
<span class="k">using</span> <span class="nn">Microsoft.AspNetCore.Mvc.RazorPages</span><span class="p">;</span>

<span class="k">namespace</span> <span class="nn">auth0_aspnet_demo.Pages</span><span class="p">;</span>

<span class="k">public</span> <span class="k">class</span> <span class="nc">LogoutModel</span> <span class="p">:</span> <span class="n">PageModel</span>
<span class="p">{</span>
    <span class="k">public</span> <span class="k">async</span> <span class="n">Task</span> <span class="nf">OnGetAsync</span><span class="p">()</span>
    <span class="p">{</span>
        <span class="kt">var</span> <span class="n">authenticationProperties</span> <span class="p">=</span> <span class="k">new</span> <span class="nf">LogoutAuthenticationPropertiesBuilder</span><span class="p">().</span><span class="nf">WithRedirectUri</span><span class="p">(</span><span class="s">"/"</span><span class="p">).</span><span class="nf">Build</span><span class="p">();</span>
        <span class="k">await</span> <span class="n">HttpContext</span><span class="p">.</span><span class="nf">SignOutAsync</span><span class="p">(</span><span class="n">Auth0Constants</span><span class="p">.</span><span class="n">AuthenticationScheme</span><span class="p">,</span> <span class="n">authenticationProperties</span><span class="p">);</span>
        <span class="k">await</span> <span class="n">HttpContext</span><span class="p">.</span><span class="nf">SignOutAsync</span><span class="p">(</span><span class="n">CookieAuthenticationDefaults</span><span class="p">.</span><span class="n">AuthenticationScheme</span><span class="p">);</span>
    <span class="p">}</span>
<span class="p">}</span>
</code></pre></div></div>

<p>Ensure you’re signing out of both the Auth0 authentication scheme and the Cookie authentication scheme and spin up your application to test it out!</p>

<p>First <code class="language-plaintext highlighter-rouge">/login</code> as a user, head over the homepage to verify you’re logged in and then navigate to <code class="language-plaintext highlighter-rouge">/logout</code>. If you head over to the homepage after logging out (you should already be there since you get redirect to it) you won’t see your user information anymore.</p>

<blockquote>
  <p>The logging out process can happen very quickly, don’t be surprised if you don’t notice a lot happening. At the very least the user information should be gone from the homepage though.</p>
</blockquote>

<p>Awesome! We can log in using Auth0 as an identity management platform and we can see that it’s tied into the .NET ecosystem by simply reading from the User object available in the .NET SDK. Now let’s create some pages that only logged in (and privileged) users can access.</p>

<h2 id="creating-pages-in-net-only-authenticated-and-authorized-users-can-visit">Creating pages in .NET only authenticated and authorized users can visit</h2>

<p>Okay, now that we’re able to log in (and out) as a user, let’s set up some pages that only (privileged) users can access.</p>

<p>Let’s create a page only an authenticated user can access, regardless of their roles and rights. We’ll create a page and its code-behind like so: <code class="language-plaintext highlighter-rouge">touch Pages/Authenticated.cshtml &amp; touch Pages/Authenticated.cshtml.cs</code>.</p>

<p>Open up the <code class="language-plaintext highlighter-rouge">Pages/Authenticated.cshtml</code> file and add the following lines:</p>

<div class="language-plaintext highlighter-rouge"><div class="highlight"><pre class="highlight"><code>@page
@model AuthenticatedModel
@{
    ViewData["Title"] = "A very secure page";
}

&lt;div&gt;Congratulations! You're logged in, otherwise you wouldn't be able to see this.&lt;/div&gt;
</code></pre></div></div>

<p>Next, open its code-behind (<code class="language-plaintext highlighter-rouge">Pages/Authenticated.cshtml.cs</code>) and add these lines:</p>

<div class="language-csharp highlighter-rouge"><div class="highlight"><pre class="highlight"><code><span class="k">using</span> <span class="nn">Microsoft.AspNetCore.Authorization</span><span class="p">;</span>
<span class="k">using</span> <span class="nn">Microsoft.AspNetCore.Mvc.RazorPages</span><span class="p">;</span>

<span class="k">namespace</span> <span class="nn">auth0_aspnet_demo.Pages</span><span class="p">;</span>

<span class="p">[</span><span class="n">Authorize</span><span class="p">]</span>
<span class="k">public</span> <span class="k">class</span> <span class="nc">AuthenticatedModel</span> <span class="p">:</span> <span class="n">PageModel</span><span class="p">;</span>
</code></pre></div></div>

<blockquote>
  <p>There are different ways of setting authentication and authorization conventions in ASP.NET Core Razor Pages but for simplicity, we are creating an empty page model here to decorate it with the proper attribute.</p>
</blockquote>

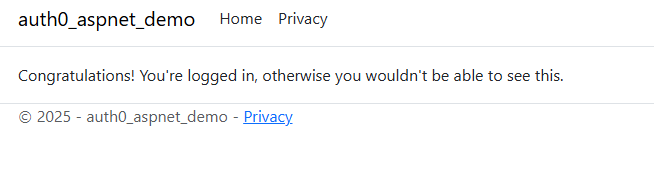
<p>Now to verify it works, run your application. Make sure you’re logged out by navigating to the <code class="language-plaintext highlighter-rouge">/logout</code> URL and try to navigate to the <code class="language-plaintext highlighter-rouge">/authenticated</code> URL. You will probably end up on a 404 with a weird URL saying something like <code class="language-plaintext highlighter-rouge">/Account/Login?ReturnUrl=%2Fauthenticated</code>. Don’t worry about this for now, this is simply because we haven’t configured the URL unauthorized users will land on. Log in by navigating to the <code class="language-plaintext highlighter-rouge">/login</code> URL and try to go to the <code class="language-plaintext highlighter-rouge">/authenticated</code> URL again. You should now be able to access the page and see something like this:</p>

<p><img src="/assets/images/2025-07-04-auth0-role-based-auth-aspnet/aspnet-authenticated-page.png" alt="The /authenticated page when you're logged in" /></p>

<p>Now that we have a page that every authenticated user can access, let’s add a page that only a user in a specific <em>role</em> can access. This is called <a href="https://learn.microsoft.com/en-us/aspnet/core/security/authorization/roles?view=aspnetcore-9.0">role-based authorization</a> in ASP.NET Core.</p>

<p>We’ll create a page that only users that belong to the <code class="language-plaintext highlighter-rouge">Admin</code> role can access. Remember the name of this role, we’ll need this later in Auth0. Let’s create an admin page: <code class="language-plaintext highlighter-rouge">touch Pages/Admin.cshtml &amp; touch Pages/Admin.cshtml.cs</code>.</p>

<p>Open the <code class="language-plaintext highlighter-rouge">Pages/Admin.cshtml</code> file and add:</p>

<div class="language-plaintext highlighter-rouge"><div class="highlight"><pre class="highlight"><code>@page
@model AdminModel
@{
    ViewData["Title"] = "Area 51";
}

&lt;div&gt;Wow, you're an admin! So cool!&lt;/div&gt;
</code></pre></div></div>

<p>Then open up the code-behind (<code class="language-plaintext highlighter-rouge">Pages/Admin.cshtml.cs</code>) and add:</p>

<div class="language-csharp highlighter-rouge"><div class="highlight"><pre class="highlight"><code><span class="k">using</span> <span class="nn">Microsoft.AspNetCore.Authorization</span><span class="p">;</span>
<span class="k">using</span> <span class="nn">Microsoft.AspNetCore.Mvc.RazorPages</span><span class="p">;</span>

<span class="k">namespace</span> <span class="nn">auth0_aspnet_demo.Pages</span><span class="p">;</span>

<span class="p">[</span><span class="nf">Authorize</span><span class="p">(</span><span class="n">Roles</span> <span class="p">=</span> <span class="s">"Admin"</span><span class="p">)]</span>
<span class="k">public</span> <span class="k">class</span> <span class="nc">AdminModel</span> <span class="p">:</span> <span class="n">PageModel</span><span class="p">;</span>
</code></pre></div></div>

<p>Notice how we have specified a specific role in our <code class="language-plaintext highlighter-rouge">[Authorize]</code> attribute. Now only users that will have the <code class="language-plaintext highlighter-rouge">Admin</code> role as a specific claim will be able to access this page.</p>

<p>At this point in time we are not yet able to assign an Admin role to our user. We will take care of that in the next chapter. We can, however, verify a ‘regular’ logged-in user does not have access to this page.</p>

<p>Run your application, verify you’re logged in by navigating to the <code class="language-plaintext highlighter-rouge">/login</code> endpoint and try to navigate to the <code class="language-plaintext highlighter-rouge">/admin</code> page. You should (again) end up on a non-existing URL like <code class="language-plaintext highlighter-rouge">/Account/AccessDenied?ReturnUrl=%2Fadmin</code> which is (again) because we haven’t configured the redirects.</p>

<p>As you can see, we can’t access our page even though we’re logged in. We don’t have the proper role assigned to our logged-in user! Let’s fix that in Auth0.</p>

<h2 id="assigning-a-role-to-our-user-in-auth0">Assigning a role to our user in Auth0</h2>

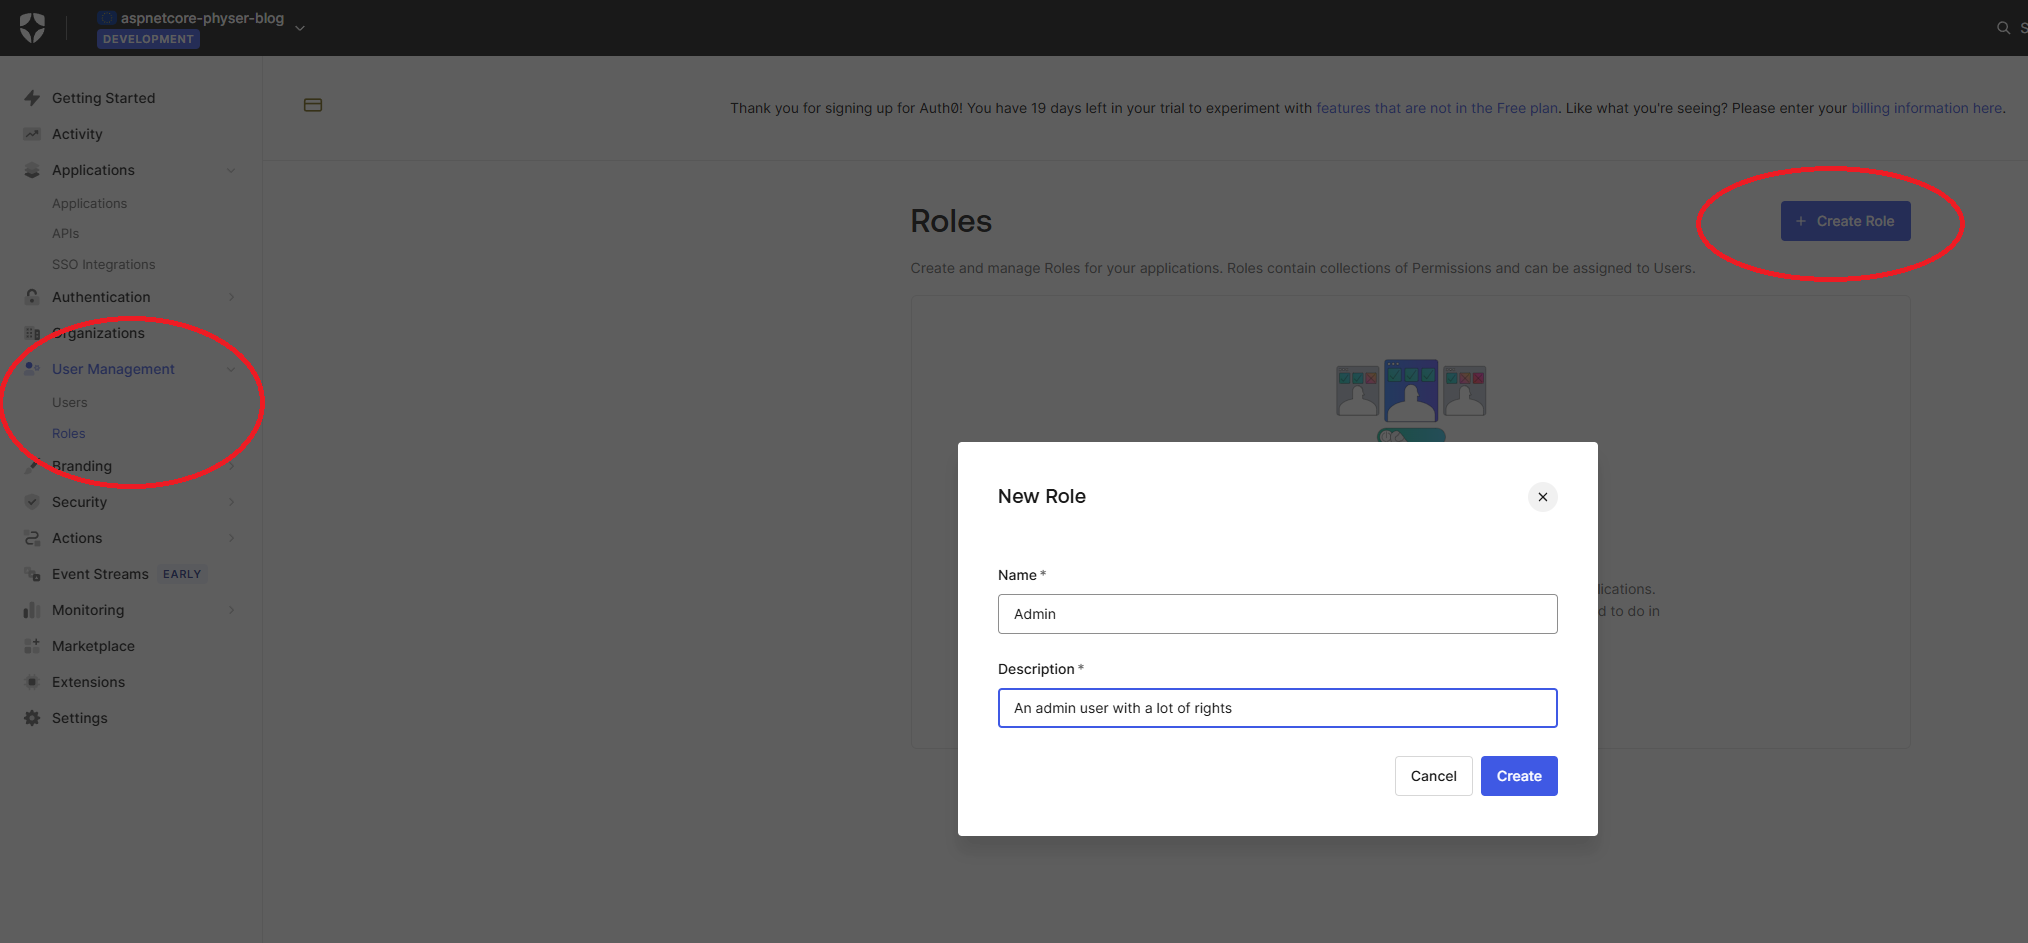
<p>Auth0 offers the capability of creating, managing and assigning roles to users. To do so, head over to the <a href="https://manage.auth0.com/">management dashboard</a> of your Auth0 tenant and select the sub item <code class="language-plaintext highlighter-rouge">Roles</code> under the <code class="language-plaintext highlighter-rouge">User Management</code> menu item on the left-hand side.</p>

<p>Click on the big <code class="language-plaintext highlighter-rouge">+ Create Role</code> button on the top-right side and enter your role name and description. Remember, in the previous chapter we’ve mentioned how important it is that your role in your code matches the role in Auth0. For us, that means we will enter the name <code class="language-plaintext highlighter-rouge">Admin</code> here. Don’t forget to hit <code class="language-plaintext highlighter-rouge">Create</code>!</p>

<p><img src="/assets/images/2025-07-04-auth0-role-based-auth-aspnet/auth0-create-role.png" alt="Creating an admin role in Auth0" /></p>

<p>Once our role is created, we can assign it to our user. You can do this through multiple screens in the Auth0 management dashboard but since we’re already on the role details of our Admin role, we’ll do it from there.</p>

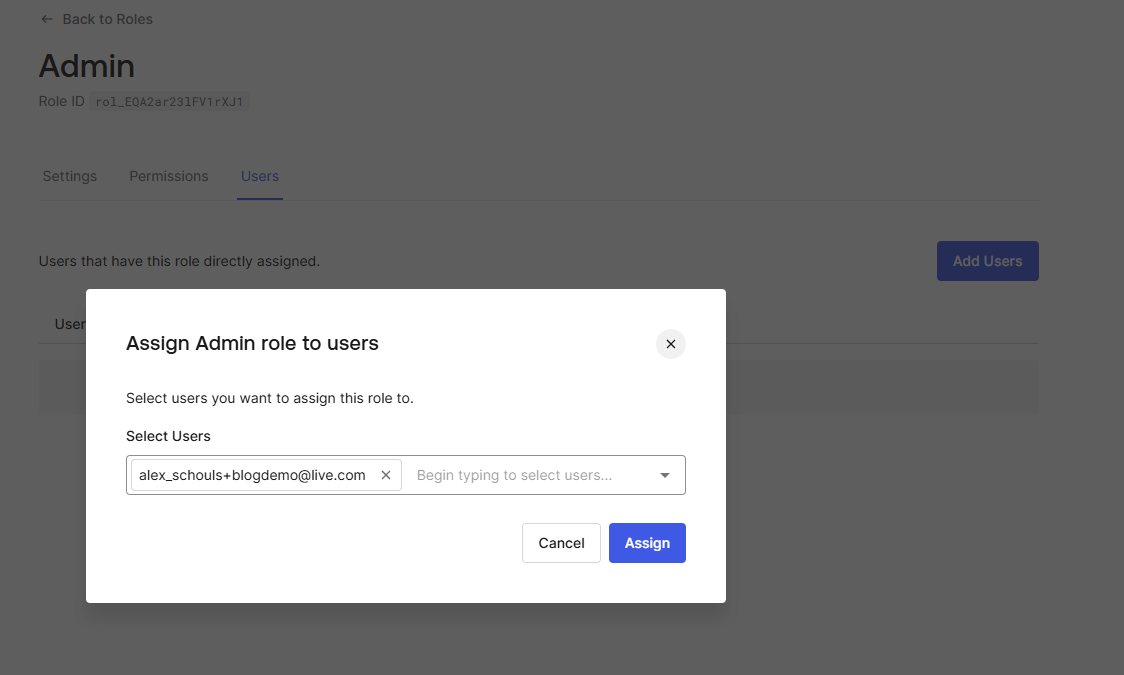
<p>Head over to the <code class="language-plaintext highlighter-rouge">Users</code> tab on the role details screen of your Admin role. Press <code class="language-plaintext highlighter-rouge">Add Users</code> and find the user you’d like to give admin rights. Note you’ll have to type first in order for your user to pop-up. Select the user and press <code class="language-plaintext highlighter-rouge">Assign</code>.</p>

<p><img src="/assets/images/2025-07-04-auth0-role-based-auth-aspnet/auth0-assign-role.png" alt="Assign a role to a user in Auth0" /></p>

<p>Great! We now have a user with an assigned <code class="language-plaintext highlighter-rouge">Admin</code> role. However, by default Auth0 does not expose any roles to the ID token that .NET parses for user identification.</p>

<p>This means that we need to be somehow able to pass the role claim to the ID token. Luckily, Auth0 has just the thing for this! We can write custom <a href="https://auth0.com/docs/customize/actions">Actions</a> in Auth0 that can access the Auth0 authentication objects and interact with them.</p>

<h2 id="writing-an-auth0-post-login-action">Writing an Auth0 post-login Action</h2>

<p>By default, simply assigning a role to a user does not include the role as a claim on the token that’s passed down to the application.</p>

<p>To achieve this, we can leverage the <a href="https://auth0.com/docs/customize/actions">Auth0 Actions</a>. These Actions are small pieces of JavaScript code that can hook into the Auth0 ecosystem and the user registration and login pipelines.</p>

<blockquote>
  <p>This is not an in-depth guide about Auth0 Actions. Please view the linked documentation for a more detailed look.</p>
</blockquote>

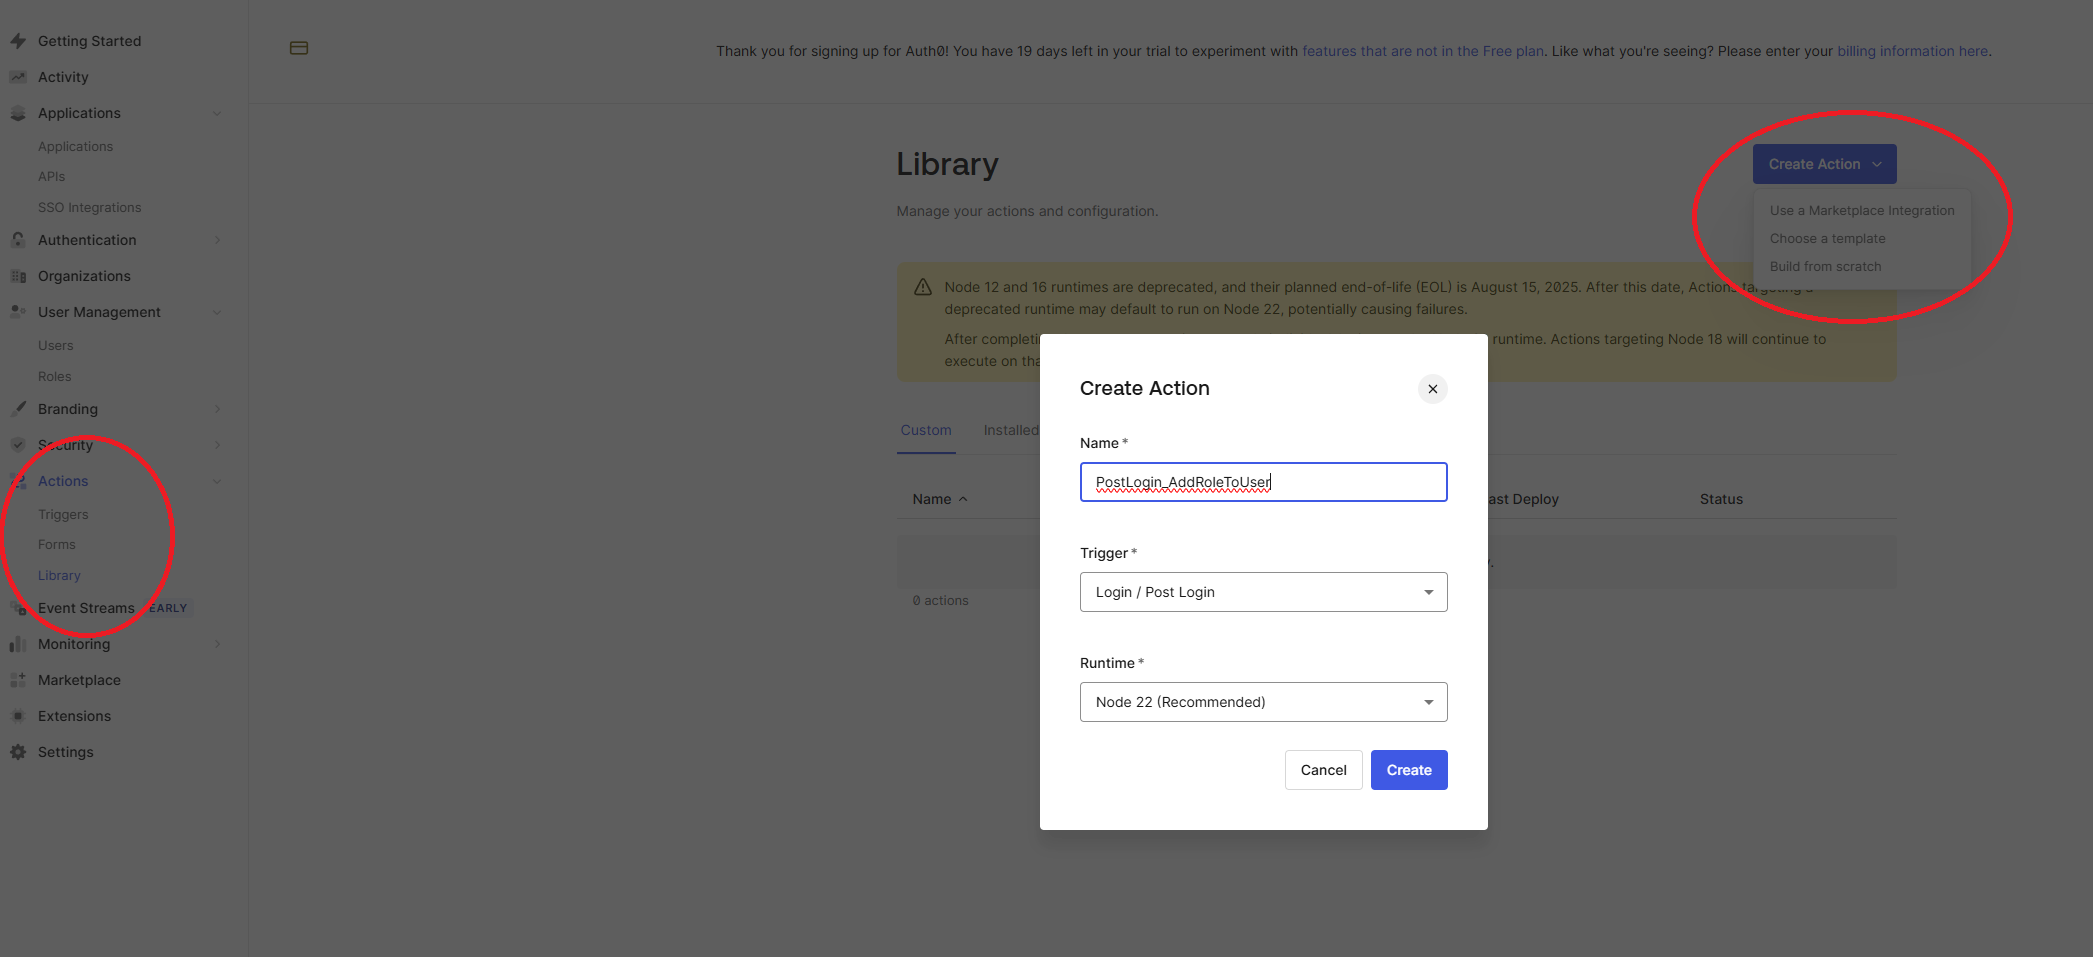
<p>Let’s open up our Auth0 management dashboard and navigate to the <code class="language-plaintext highlighter-rouge">Library</code> sub item under the <code class="language-plaintext highlighter-rouge">Actions</code> menu item. Once there, on the right-hand side, click the <code class="language-plaintext highlighter-rouge">Create Action</code> button and select <code class="language-plaintext highlighter-rouge">Build from scratch</code>.</p>

<p>In the popup that opens, fill in a meaningful name (e.g. <code class="language-plaintext highlighter-rouge">PostLogin_AddRoleToUser</code>). For trigger make sure you select the <code class="language-plaintext highlighter-rouge">Login / Post Login</code> trigger and for the runtime select the recommended runtime (at the time of writing that would be Node v22).</p>

<p><img src="/assets/images/2025-07-04-auth0-role-based-auth-aspnet/auth0-create-action.png" alt="Create an action in Auth0" /></p>

<p>Once you’ve created the trigger, you’ll be redirected to the editing view. Here you’ll get a small template with a single (not commented-out) method in JavaScript with a bunch of comments explaining it:</p>

<div class="language-js highlighter-rouge"><div class="highlight"><pre class="highlight"><code><span class="nx">exports</span><span class="p">.</span><span class="nx">onExecutePostLogin</span> <span class="o">=</span> <span class="k">async</span> <span class="p">(</span><span class="nx">event</span><span class="p">,</span> <span class="nx">api</span><span class="p">)</span> <span class="o">=&gt;</span> <span class="p">{};</span>
</code></pre></div></div>

<p>This method can capture Auth0 API objects and interact with them. In our case, we want to set a custom claim on the ID token. However, not just any claim will suffice (unless you’d like to change the .NET code to accept your custom claim, in which case that’s perfectly valid). Since .NET specifically looks at a certain claim name for a role, we can set this as our custom claim in Auth0.</p>

<p>Update the previously mentioned method like so:</p>

<div class="language-js highlighter-rouge"><div class="highlight"><pre class="highlight"><code><span class="nx">exports</span><span class="p">.</span><span class="nx">onExecutePostLogin</span> <span class="o">=</span> <span class="k">async</span> <span class="p">(</span><span class="nx">event</span><span class="p">,</span> <span class="nx">api</span><span class="p">)</span> <span class="o">=&gt;</span> <span class="p">{</span>
  <span class="kd">const</span> <span class="nx">roles</span> <span class="o">=</span> <span class="nx">event</span><span class="p">.</span><span class="nx">authorization</span><span class="p">?.</span><span class="nx">roles</span><span class="p">;</span>
  <span class="k">if</span> <span class="p">(</span><span class="nx">roles</span><span class="p">)</span> <span class="p">{</span>
    <span class="nx">api</span><span class="p">.</span><span class="nx">idToken</span><span class="p">.</span><span class="nx">setCustomClaim</span><span class="p">(</span>
      <span class="dl">"</span><span class="s2">http://schemas.microsoft.com/ws/2008/06/identity/claims/role</span><span class="dl">"</span><span class="p">,</span>
      <span class="nx">roles</span><span class="p">,</span>
    <span class="p">);</span>
  <span class="p">}</span>
<span class="p">};</span>
</code></pre></div></div>

<p>This implementation will set the value of <code class="language-plaintext highlighter-rouge">roles</code>, which is an array of assigned roles to the user, to the value of the claim type <code class="language-plaintext highlighter-rouge">http://schemas.microsoft.com/ws/2008/06/identity/claims/role</code>. .NET uses this claim to determine the roles for its <a href="https://learn.microsoft.com/en-us/aspnet/core/security/authorization/roles?view=aspnetcore-9.0">role-based authorization</a>.</p>

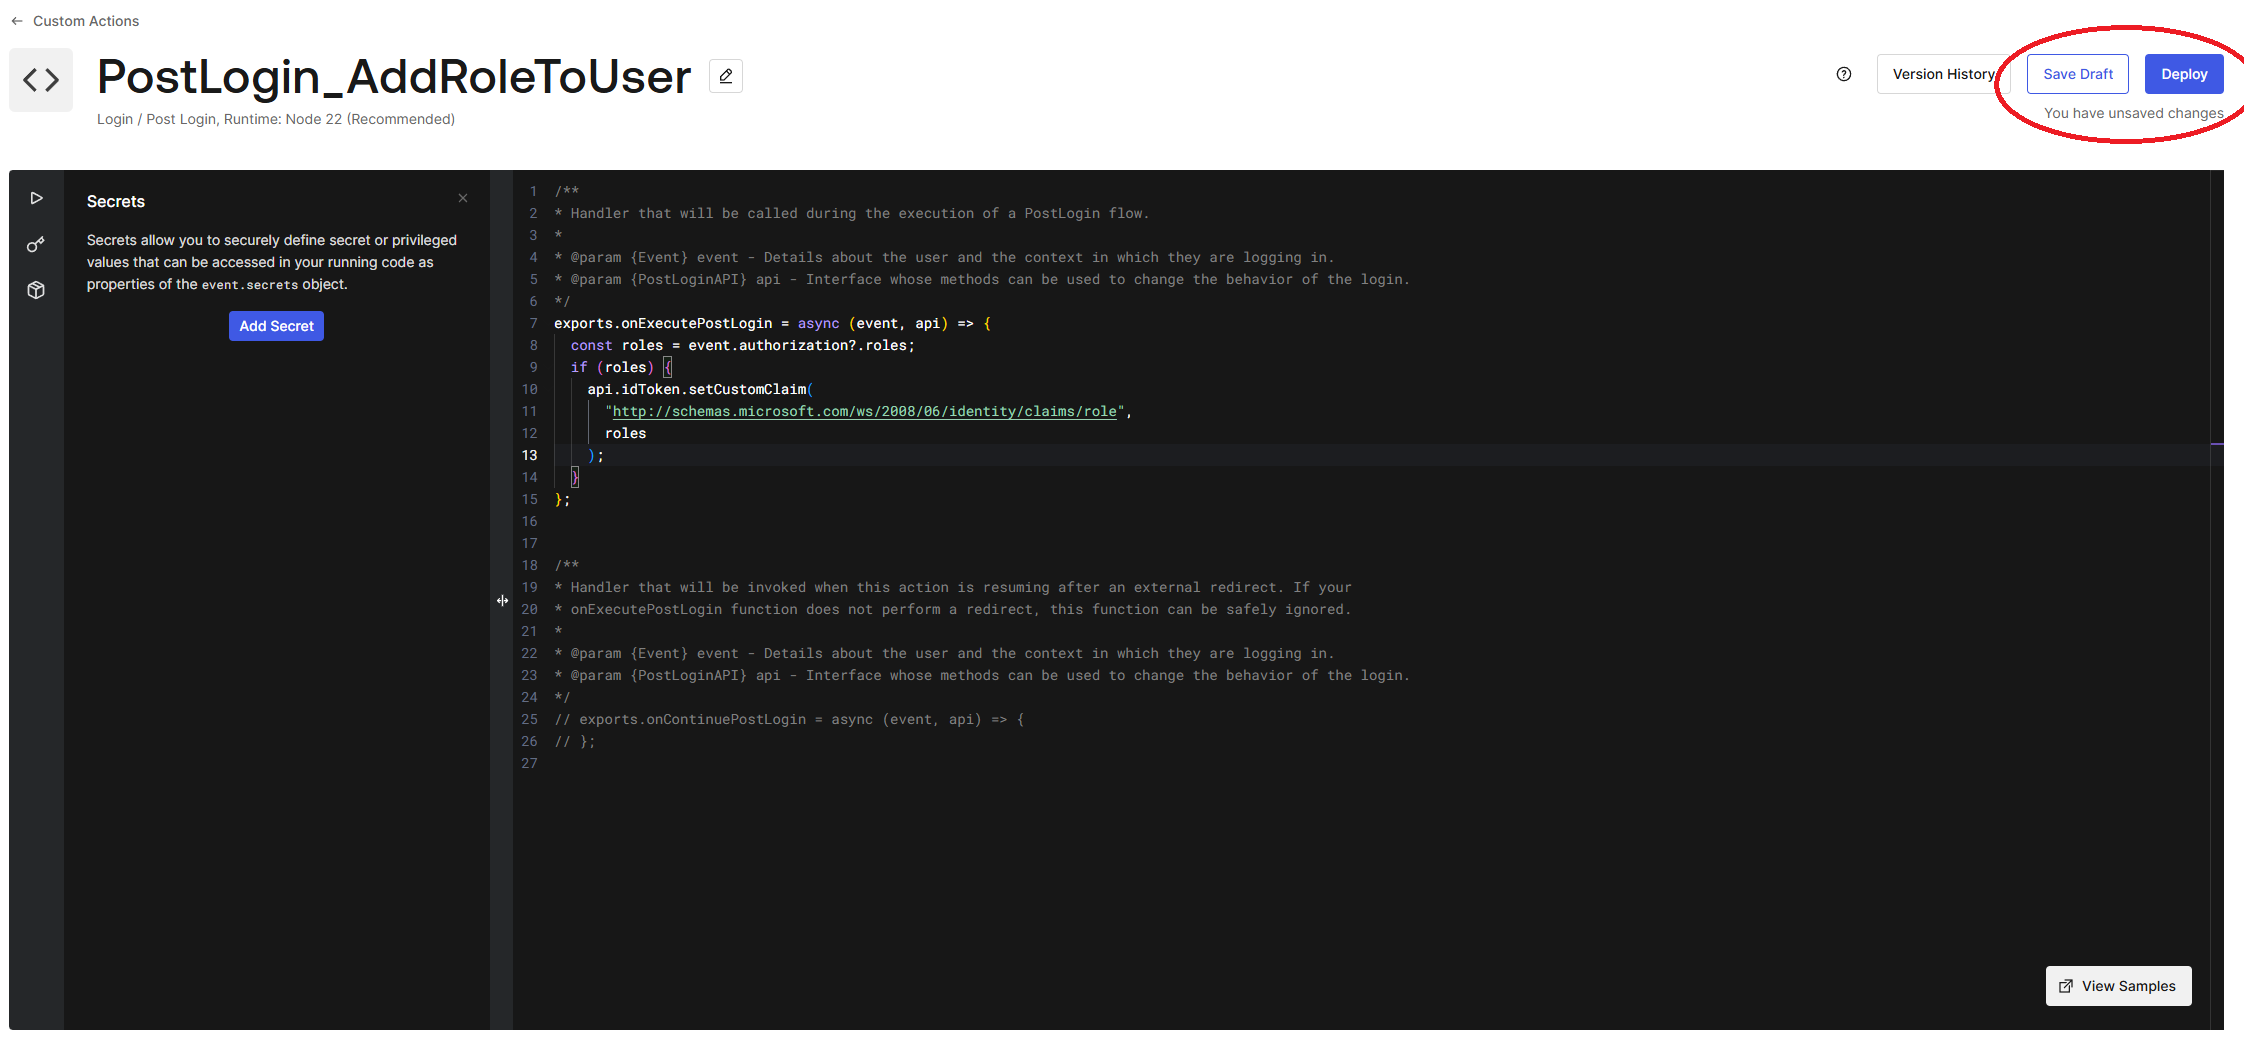
<p>Make sure you save and deploy your newly defined trigger, using the buttons on the top right:</p>

<p><img src="/assets/images/2025-07-04-auth0-role-based-auth-aspnet/auth0-deploy-trigger.png" alt="Deploy your Auth0 trigger" /></p>

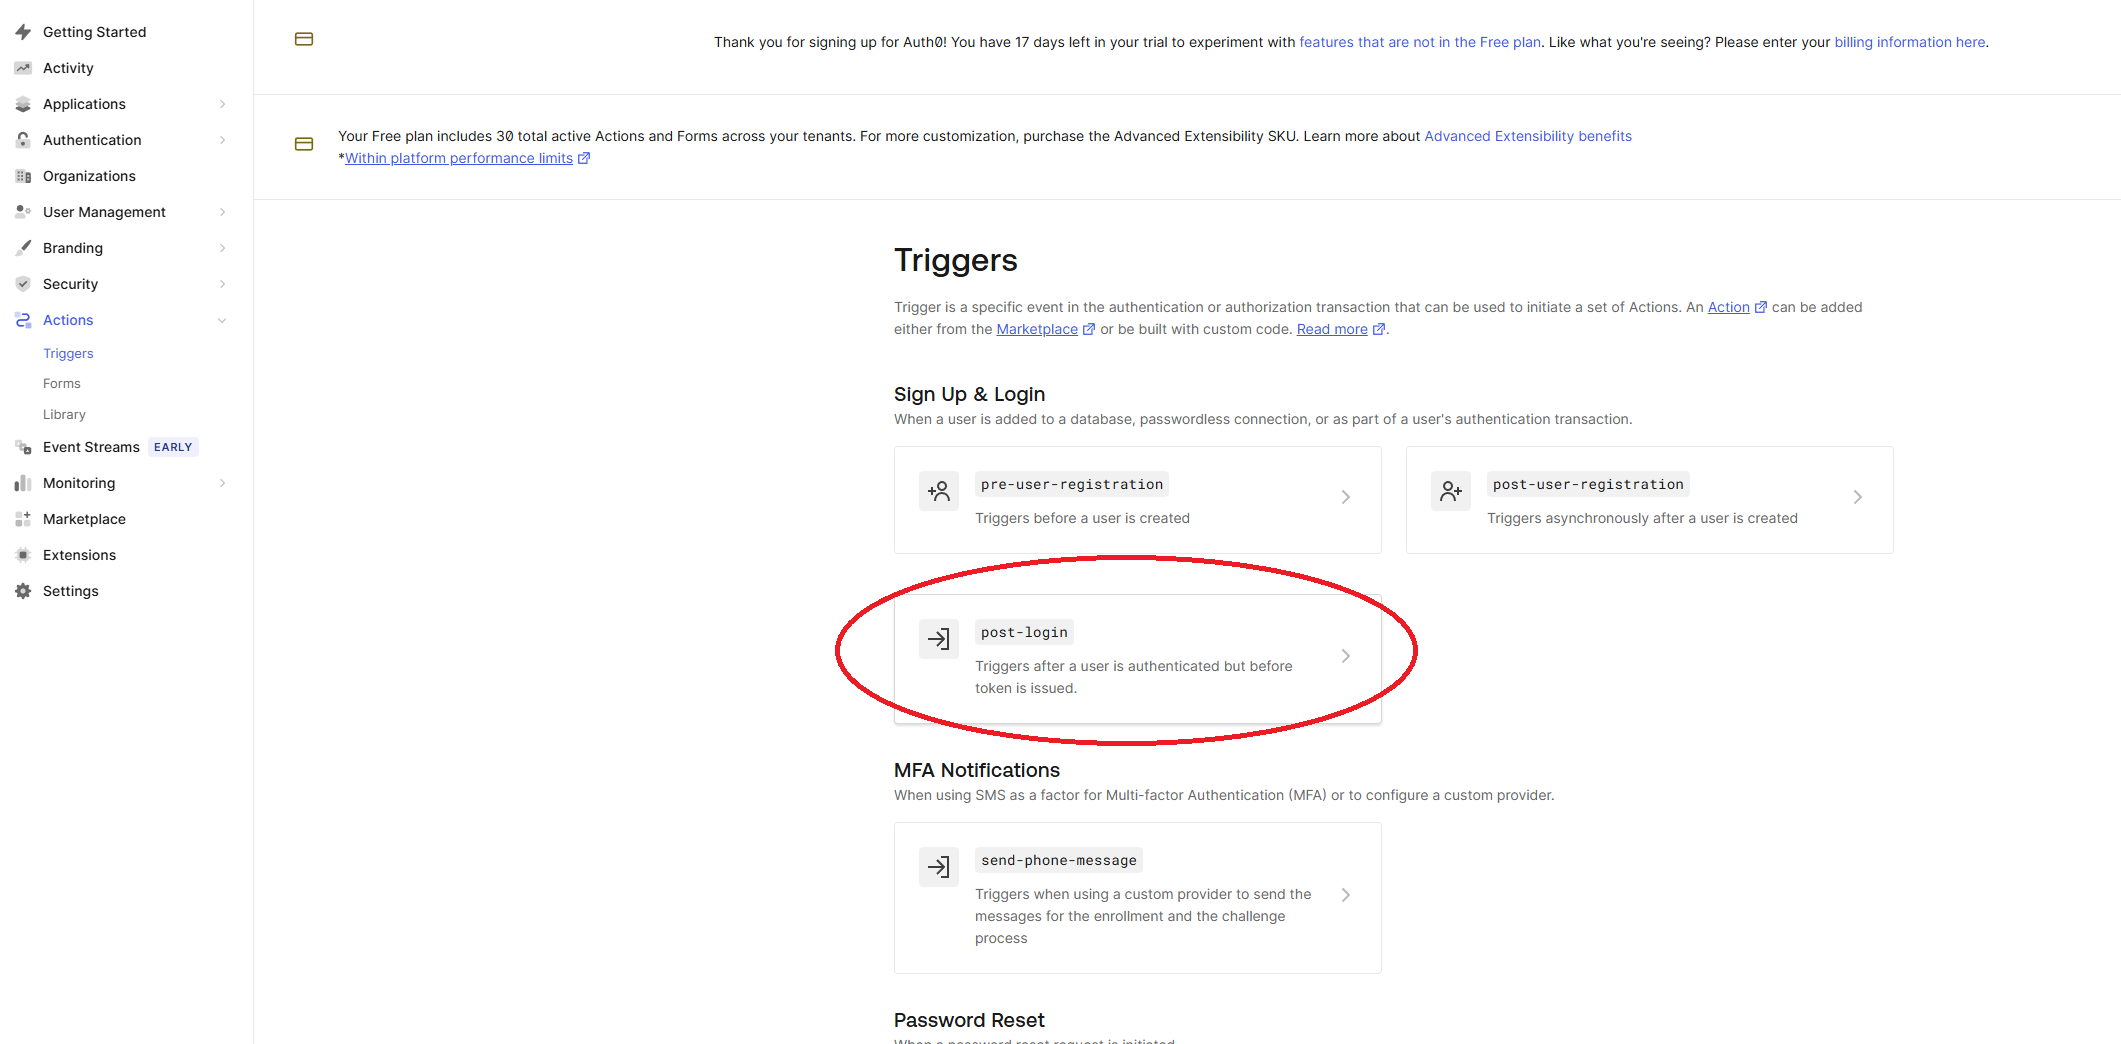
<p>Once our trigger has been deployed to Auth0, we can link it to the post-login pipeline. Head over to the <code class="language-plaintext highlighter-rouge">Triggers</code> sub navigation item in the left-hand menu. Select <code class="language-plaintext highlighter-rouge">post-login</code> from the <code class="language-plaintext highlighter-rouge">Sign up &amp; Login</code> trigger list.</p>

<p><img src="/assets/images/2025-07-04-auth0-role-based-auth-aspnet/auth0-post-login-trigger.png" alt="Post-login trigger selection in Auth0" /></p>

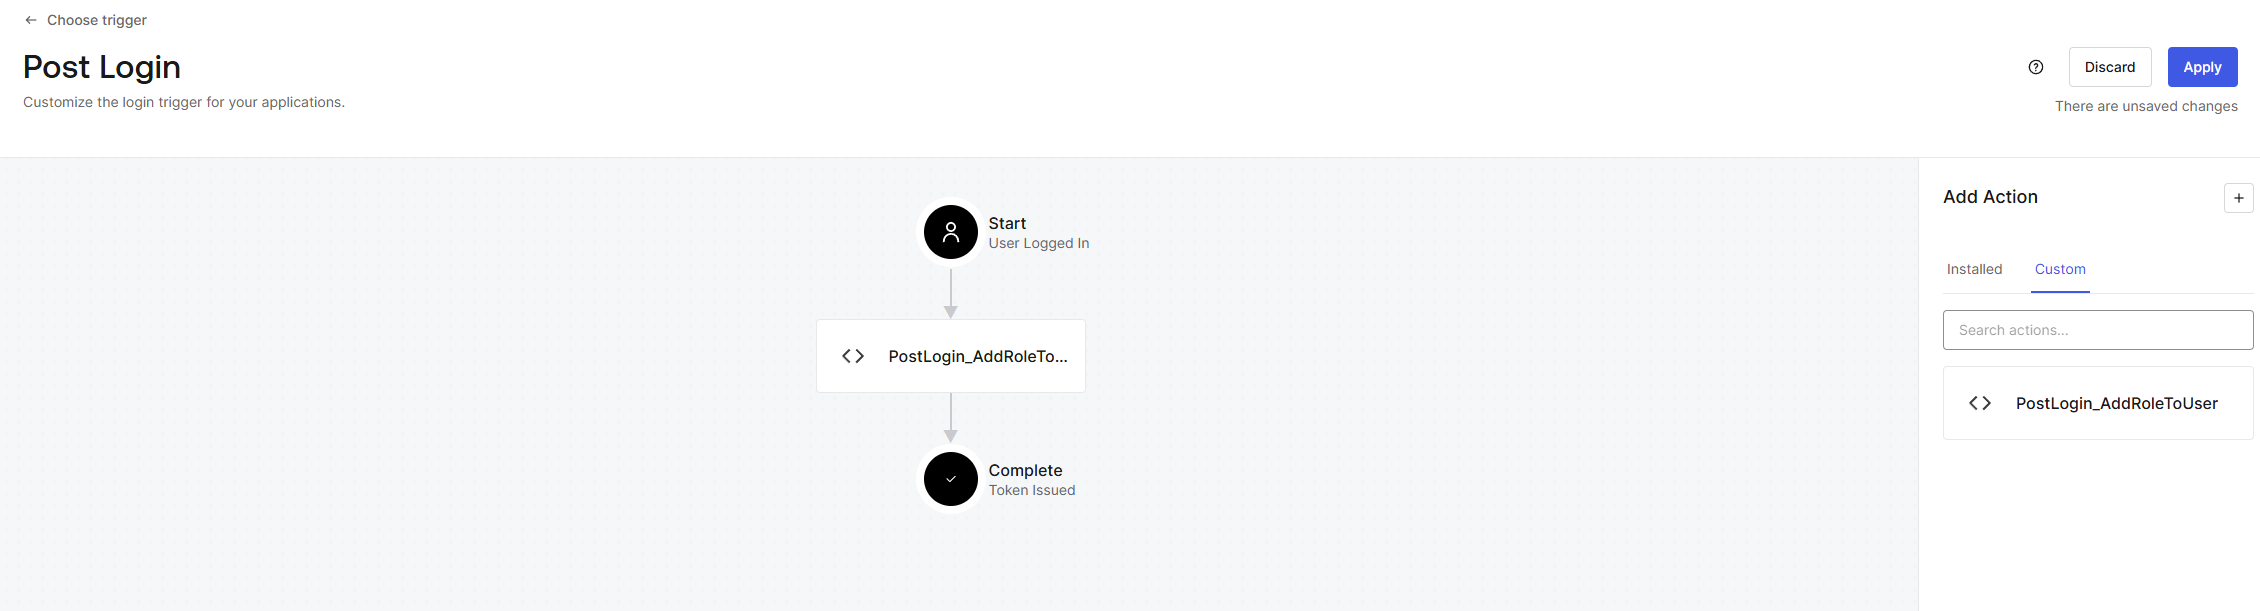
<p>A Post Login flow will pop up. On the right-hand side you can switch to the <code class="language-plaintext highlighter-rouge">Custom</code> tab and select your newly deployed trigger. Drag this trigger in between <code class="language-plaintext highlighter-rouge">Start</code> and <code class="language-plaintext highlighter-rouge">Complete</code> like so:</p>

<p><img src="/assets/images/2025-07-04-auth0-role-based-auth-aspnet/auth0-post-login-flow.png" alt="The post login flow in Auth0" /></p>

<p>Don’t forget to press the <code class="language-plaintext highlighter-rouge">Apply</code> button in the top right!</p>

<p>Now that we’re able to pass the role information in our token, our .NET application will use this information to check on the proper roles.</p>

<h2 id="testing-our-net-application">Testing our .NET application</h2>

<p>Let’s head over to our .NET application and run it (<code class="language-plaintext highlighter-rouge">dotnet run</code>). Open the application in your browser and make sure you’re logged out by going to the <code class="language-plaintext highlighter-rouge">/logout</code> endpoint (after all, the claim is only set when a user logs in - so it has not effect on already logged in users).</p>

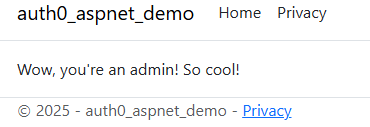
<p>Go to the <code class="language-plaintext highlighter-rouge">/login</code> endpoint and log in with your admin account. Once logged in, navigate to the <code class="language-plaintext highlighter-rouge">/admin</code> endpoint and you should see a page that says you’re an admin!</p>

<p><img src="/assets/images/2025-07-04-auth0-role-based-auth-aspnet/aspnet-admin-page.png" alt="The Admin page in your ASP.NET application" /></p>

<p>If you’d like to test that this works properly with a non-admin user too, feel free to create another user that does not have the role assigned in Auth0 to check it. You won’t be able to access the <code class="language-plaintext highlighter-rouge">/admin</code> page anymore with that user.</p>

<p>Note how we haven’t changed anything in our authentication and authorization process in order to make this role-based authorization work! That’s because we use Microsoft’s claim to assign the role.</p>

<h2 id="wrapping-up">Wrapping up</h2>

<p>In this blogpost you’ve seen how to set-up a .NET application using ASP.NET Core Razor Pages and Auth0 authentication from scratch, implementing .NET’s role-based authorization with a post-login trigger in Auth0.</p>

<p>This way you can easily use Auth0 as your identity management solution without having to resort to writing custom code to sort out your authorization. You can easily assign roles to users in Auth0 and use these in .NET’s built-in role-based authorization mechanism.</p>

<p>I hope this blogpost has been useful to you. Feel free to get in touch with my at my <a href="https://blog.alexschouls.nl/about/">about page</a> if you have any comments, questions or concerns.</p>

<p>As with all my blog posts, the full code is available in the repository of this site: <a href="https://github.com/Physer/physer.github.io/tree/main/code/2025-07-04-auth0-role-based-auth-aspnet">physer.github.io</a>.</p>

<h2 id="references">References</h2>

<ul>
  <li><a href="https://learn.microsoft.com/en-us/aspnet/core/security/identity-management-solutions?view=aspnetcore-9.0">Microsoft - Identity management solutions in ASP.NET Core</a></li>
  <li><a href="https://auth0.com/">Auth0 - Homepage</a></li>
  <li><a href="https://learn.microsoft.com/en-us/dotnet/api/system.security.claims?view=net-9.0">Microsoft - .NET Claims API reference</a></li>
  <li><a href="https://learn.microsoft.com/en-us/aspnet/core/security/authorization/roles?view=aspnetcore-9.0">Microsoft - ASP.NET Core role-based authorization</a></li>
  <li><a href="https://learn.microsoft.com/en-us/aspnet/core/razor-pages/?view=aspnetcore-9.0&amp;tabs=visual-studio">Microsoft - ASP.NET Core Razor Pages introduction</a></li>
  <li><a href="https://learn.microsoft.com/en-us/aspnet/core/mvc/overview?view=aspnetcore-9.0">Microsoft - ASP.NET Core MVC overview</a></li>
  <li><a href="https://learn.microsoft.com/en-us/aspnet/core/blazor/?view=aspnetcore-9.0">Microsoft - ASP.NET Core Blazor overview</a></li>
  <li><a href="https://auth0.com/docs/get-started/auth0-overview">Auth0 - Getting started</a></li>
  <li><a href="https://learn.microsoft.com/en-us/aspnet/core/security/app-secrets?view=aspnetcore-9.0&amp;tabs=windows">Microsoft - User secrets in ASP.NET Core</a></li>
  <li><a href="https://learn.microsoft.com/en-us/azure/key-vault/general/overview">Microsoft - Azure Key Vault overview</a></li>
  <li><a href="https://manage.auth0.com/">Auth0 - Management dashboard</a></li>
  <li><a href="https://auth0.com/docs/customize/actions">Auth0 - Actions documentation</a></li>
</ul>]]></content><author><name></name></author><category term="authentication" /><summary type="html"><![CDATA[Introduction]]></summary></entry><entry><title type="html">Accessing Azure Storage services without storing secrets using Azurite, Docker, HTTPS and Azure - Part 1</title><link href="/azure/2024/08/07/azurite-with-https-in-docker-part-1.html" rel="alternate" type="text/html" title="Accessing Azure Storage services without storing secrets using Azurite, Docker, HTTPS and Azure - Part 1" /><published>2024-08-07T13:00:00+00:00</published><updated>2024-08-07T13:00:00+00:00</updated><id>/azure/2024/08/07/azurite-with-https-in-docker-part-1</id><content type="html" xml:base="/azure/2024/08/07/azurite-with-https-in-docker-part-1.html"><![CDATA[<h2 id="introduction">Introduction</h2>

<p>Hey there!</p>

<p>Lots of buzzwords, this title! Right? Well, let’s break it down a little.</p>

<p><a href="https://learn.microsoft.com/en-us/azure/storage/common/storage-use-azurite?tabs=visual-studio%2Cblob-storage">Azurite</a> is the official open-source Azure Storage emulator. If you’re familiar with the old-school Azure Storage Emulator, Azurite is its successor. You can use Azurite to emulate the Azure Blob, Queue and Table Storage cloud services on your local machine.</p>

<p>If you’re using these Azure services, there’s a high probability you’re using the Azure Storage client libraries. Whether you’re using these for .NET, Python, JavaScript or any other language is irrelevant to this blog post.</p>

<p>When using the Azure Storage client libraries (or any other Azure libraries), you’re going to want to authenticate to Azure at some point. Whether that’s on your local development environment already or in a cloud environment at a later stage, doesn’t matter.</p>

<p>Handling authentication to Azure or its emulators on your local machine and in Azure without too much hassle can be daunting. For this purpose, the <a href="https://learn.microsoft.com/en-us/dotnet/api/overview/azure/identity-readme?view=azure-dotnet#defaultazurecredential">DefaultAzureCredential</a> has been created by Microsoft. This mechanism allows you to write your code agnostic to your credentials. You no longer need to store identifiers and secrets in your application.</p>

<p>Using the Azure client libraries and the DefaultAzureCredential in conjunction with Azurite requires communicating over <a href="https://www.cloudflare.com/learning/ssl/what-is-https/">HTTPS</a>.</p>

<p>In this blog series, we’ll cover how to set up Azurite in Docker, using HTTPS and a self-signed certificate. We’ll connect our Azurite emulator to an example application using the Azure client libraries without storing any secrets in our application. Our example application will be capable of connecting to both our local emulator and an Azure cloud environment. Additionally, we’ll cover how to use Azurite over HTTPS with the Azure Storage Explorer to view and manage the storage in your emulator.</p>

<p>The first part of this blog series will focus on setting up our environment. We’ll set up Azurite in Docker and set up the Azure Storage Explorer.</p>

<p>Read the other parts here:</p>

<ul>
  <li><a href="https://blog.alexschouls.nl/azure/2024/08/07/azurite-with-https-in-docker-part-2.html">Part 2 - Setting up a sample .NET application for interacting with Azure Blobs</a></li>
  <li><a href="https://blog.alexschouls.nl/azure/2024/08/07/azurite-with-https-in-docker-part-3.html">Part 3 - Using the DefaultAzureCredential and configuring Azurite for HTTPS with a self-signed certificate</a></li>
  <li><a href="https://blog.alexschouls.nl/azure/2024/08/07/azurite-with-https-in-docker-part-4.html">Part 4 - Containerizing our application and communicating with the Azurite container</a></li>
  <li><a href="https://blog.alexschouls.nl/azure/2024/08/07/azurite-with-https-in-docker-part-5.html">Part 5 - Optimizing our application’s Docker image and using environment variables</a></li>
  <li><a href="https://blog.alexschouls.nl/azure/2024/08/07/azurite-with-https-in-docker-part-6.html">Part 6 - Provisioning, deploying to and using real Azure components</a></li>
</ul>

<p>Part 1, 2 and 3 are mainly focussing on the technical aspect of integrating with Azurite on your machine, using a self-signed TLS certificate. On the other hand, part 4, 5 and 6 are focussed on deploying the same application to a real-world Azure environment. Either way, this series will allow you to connect to both Azurite and real-world Azure Storage Accounts without keeping any kind of security credential such as a connection string or key in your code or application settings/environment variables.</p>

<h2 id="prerequisites">Prerequisites</h2>

<p>If you want to follow along with this blog series, you will need the following software and services:</p>

<ul>
  <li><a href="https://www.docker.com/products/docker-desktop/">Docker</a></li>
  <li><a href="https://docs.docker.com/compose/">Docker Compose</a></li>
  <li><a href="https://dotnet.microsoft.com/en-us/download/dotnet/8.0">.NET 8 SDK</a></li>
  <li>OpenSSL (<a href="https://slproweb.com/products/Win32OpenSSL.html">Windows binaries</a>/Linux has package manager support if required)</li>
  <li><a href="https://azure.microsoft.com/en-us/products/storage/storage-explorer">Azure Storage Explorer</a></li>
  <li><a href="https://azure.microsoft.com/en-us/free">An Azure account</a></li>
  <li><a href="https://learn.microsoft.com/en-us/cli/azure/get-started-with-azure-cli">Azure CLI</a></li>
</ul>

<p>Note that I’m doing this on a Windows machine using WSL2 and Visual Studio Code. All applications and tools are available cross-platform. The code is available in my <a href="https://github.com/Physer/physer.github.io/tree/main/code/2024-07-08-azurite-https-in-docker">Github repository</a> as well.</p>

<h2 id="setting-up-azurite-in-docker-using-compose">Setting up Azurite in Docker using Compose</h2>

<p>Let’s get started!</p>

<p>We will begin by setting up Azurite in Docker. Let’s create a Compose file in a new directory.</p>

<ul>
  <li><code class="language-plaintext highlighter-rouge">mkdir ~/azurite-demo</code></li>
  <li><code class="language-plaintext highlighter-rouge">cd ~/azurite-demo</code></li>
  <li><code class="language-plaintext highlighter-rouge">touch compose.yaml</code></li>
</ul>

<p>Let’s open up our Compose file and add Azurite as a service. I’m using <a href="https://code.visualstudio.com/">Visual Studio Code</a> but you can use any editor you prefer of course.</p>

<p>Taking a look at <a href="https://learn.microsoft.com/en-us/azure/storage/common/storage-use-azurite?tabs=docker-hub%2Cblob-storage#install-azurite">Microsoft’s documentation on Azurite</a>, we can see how to run Azurite in Docker. We’ll use this information to create our Compose file.</p>

<p>Our Compose file should look something like this:</p>

<div class="language-yml highlighter-rouge"><div class="highlight"><pre class="highlight"><code><span class="na">services</span><span class="pi">:</span>
  <span class="na">azurite</span><span class="pi">:</span>
    <span class="na">container_name</span><span class="pi">:</span> <span class="s">azurite</span>
    <span class="na">image</span><span class="pi">:</span> <span class="s">mcr.microsoft.com/azure-storage/azurite</span>
    <span class="na">ports</span><span class="pi">:</span>
      <span class="pi">-</span> <span class="s">10000:10000</span>
      <span class="pi">-</span> <span class="s">10001:10001</span>
      <span class="pi">-</span> <span class="s">10002:10002</span>
</code></pre></div></div>

<p>Let’s run our Compose file: <code class="language-plaintext highlighter-rouge">docker compose up -d</code>.</p>

<p>Azurite is now running as a Docker container on ports 10000, 10001 and 10002. If we inspect the container’s logs we’ll see this confirmed (<code class="language-plaintext highlighter-rouge">docker logs azurite</code>):</p>

<div class="language-plaintext highlighter-rouge"><div class="highlight"><pre class="highlight"><code>Azurite Blob service is starting at http://0.0.0.0:10000
Azurite Blob service is successfully listening at http://0.0.0.0:10000
Azurite Queue service is starting at http://0.0.0.0:10001
Azurite Queue service is successfully listening at http://0.0.0.0:10001
Azurite Table service is starting at http://0.0.0.0:10002
Azurite Table service is successfully listening at http://0.0.0.0:10002
</code></pre></div></div>

<p>We now have a very simple Azurite docker container running with <a href="https://docs.docker.com/storage/">ephemeral storage</a> (meaning all data is removed once the container is removed).</p>

<h2 id="setting-up-data-persistence-for-our-azurite-container">Setting up data persistence for our Azurite container</h2>

<p>When the container gets restarted, deleted or otherwise inconvenienced, all our data disappears. Obviously this is quite annoying, so let’s set up a persistent location for Azurite. There are two approaches to persisting data for Docker containers. One of them is a <em>volume</em> while the other is a <em>bind mount</em>. You can read more about these two mechanisms in <a href="https://docs.docker.com/guides/docker-concepts/running-containers/sharing-local-files/">Docker’s documentation</a>.</p>

<p>For this scenario I’m going to choose a volume, since we won’t be interacting <em>directly</em> with the files in the Azure Storage, but rather through Azure Storage Explorer. Of course, if you do want to choose a bind mount, that’s perfectly fine as well and will work just fine too.</p>

<blockquote>
  <p>Fun fact! We are going to use a bind mount for the certificate sharing in our Azurite and .NET application containers in <a href="https://blog.alexschouls.nl/azure/2024/08/07/azurite-with-https-in-docker-part-4.html">part 4</a>.</p>
</blockquote>

<p>Let’s open up our Compose file (<code class="language-plaintext highlighter-rouge">~/azurite-demo/compose.yaml</code>) and at the bottom of the file add a new volume called <code class="language-plaintext highlighter-rouge">blobs</code> like so:</p>

<div class="language-yml highlighter-rouge"><div class="highlight"><pre class="highlight"><code><span class="na">volumes</span><span class="pi">:</span>
  <span class="na">blobs</span><span class="pi">:</span>
</code></pre></div></div>

<p>Next, we’ll reference it in our Azurite service, below our ports definition:</p>

<div class="language-yml highlighter-rouge"><div class="highlight"><pre class="highlight"><code><span class="na">services</span><span class="pi">:</span>
  <span class="na">azurite</span><span class="pi">:</span>
    <span class="na">container_name</span><span class="pi">:</span> <span class="s">azurite</span>
    <span class="na">image</span><span class="pi">:</span> <span class="s">mcr.microsoft.com/azure-storage/azurite</span>
    <span class="na">ports</span><span class="pi">:</span>
      <span class="pi">-</span> <span class="s">10000:10000</span>
      <span class="pi">-</span> <span class="s">10001:10001</span>
      <span class="pi">-</span> <span class="s">10002:10002</span>
    <span class="na">volumes</span><span class="pi">:</span>
      <span class="pi">-</span> <span class="s">blobs:/data</span>
</code></pre></div></div>

<p>Now your Compose file looks like:</p>

<div class="language-yml highlighter-rouge"><div class="highlight"><pre class="highlight"><code><span class="na">services</span><span class="pi">:</span>
  <span class="na">azurite</span><span class="pi">:</span>
    <span class="na">container_name</span><span class="pi">:</span> <span class="s">azurite</span>
    <span class="na">image</span><span class="pi">:</span> <span class="s">mcr.microsoft.com/azure-storage/azurite</span>
    <span class="na">ports</span><span class="pi">:</span>
      <span class="pi">-</span> <span class="s">10000:10000</span>
      <span class="pi">-</span> <span class="s">10001:10001</span>
      <span class="pi">-</span> <span class="s">10002:10002</span>
    <span class="na">volumes</span><span class="pi">:</span>
      <span class="pi">-</span> <span class="s">blobs:/data</span>

<span class="na">volumes</span><span class="pi">:</span>
  <span class="na">blobs</span><span class="pi">:</span>
</code></pre></div></div>

<blockquote>
  <p>If you do bind your volume to the <code class="language-plaintext highlighter-rouge">/data</code> path of the container, you need to specify the location in the startup command. More on the startup command will be covered in <a href="https://blog.alexschouls.nl/azure/2024/08/07/azurite-with-https-in-docker-part-3.html">part 3</a>.</p>
</blockquote>

<p>Run the Compose services by executing <code class="language-plaintext highlighter-rouge">docker compose up -d</code>. You can now stop and delete the Azurite container (<code class="language-plaintext highlighter-rouge">docker rm -f azurite</code>), re-run it by running <code class="language-plaintext highlighter-rouge">docker compose up -d</code> and you’d keep your data.</p>

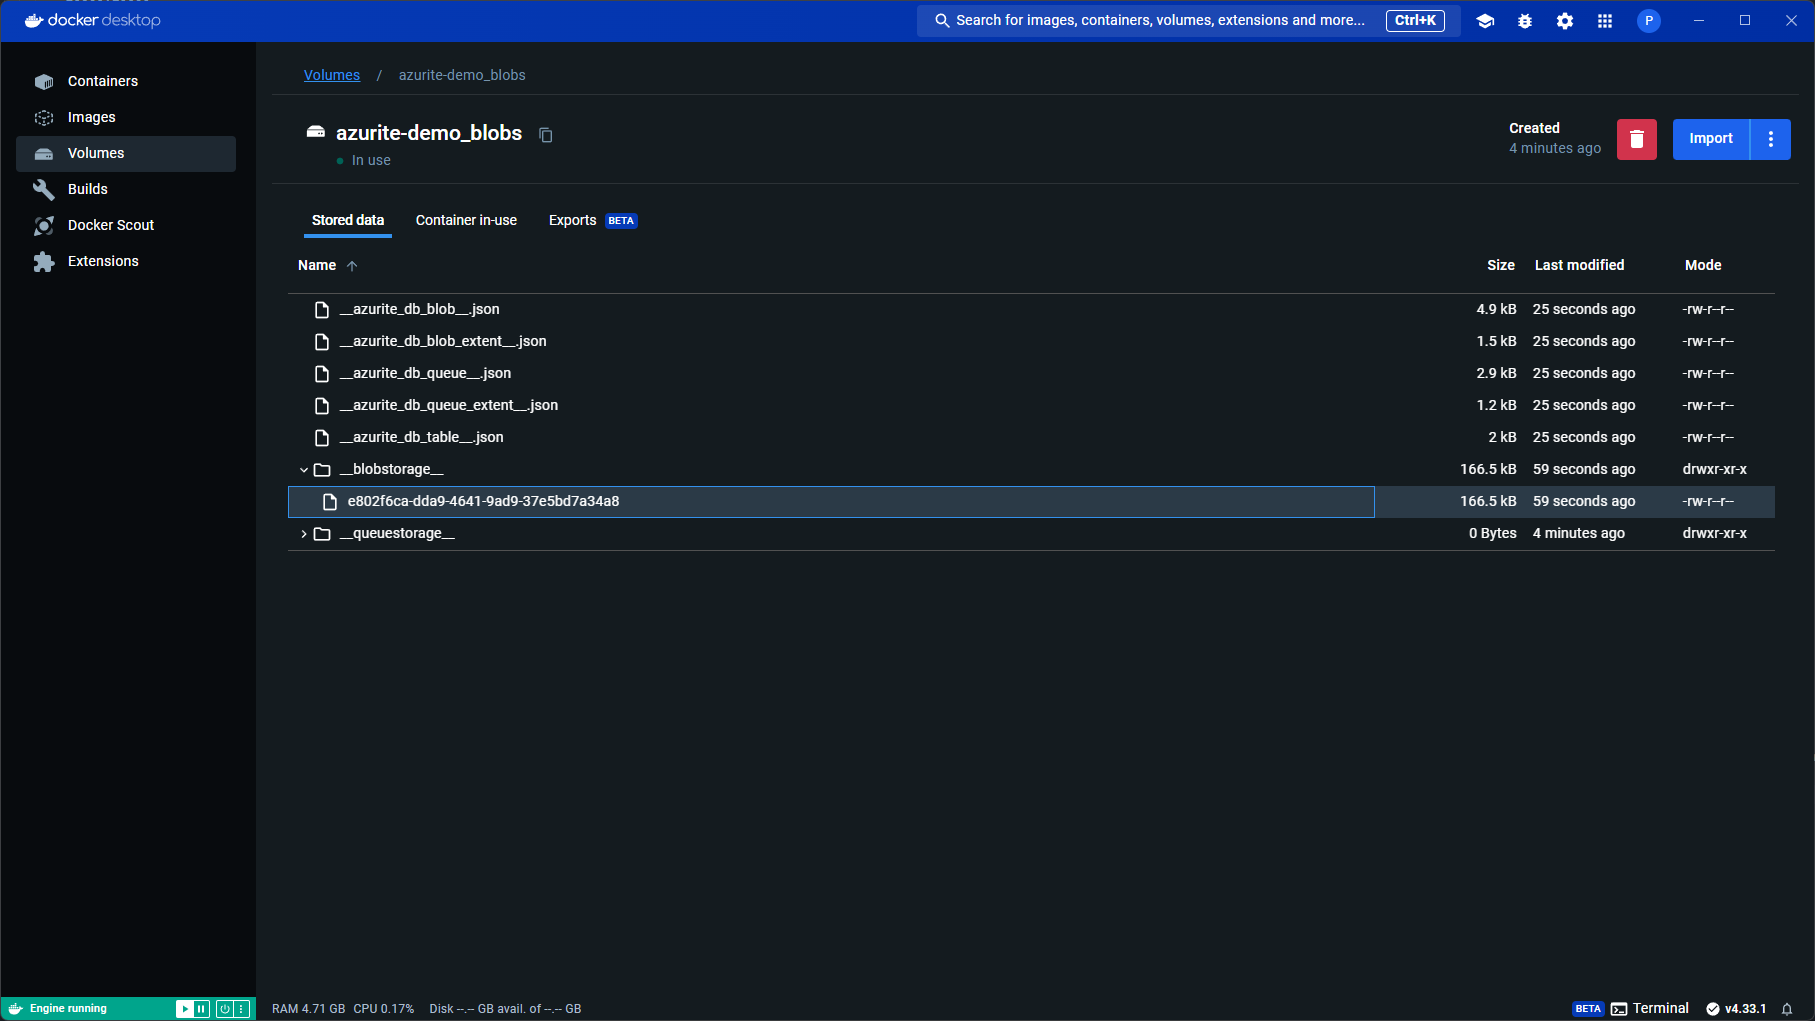
<p>You can also inspect the Docker volume (<code class="language-plaintext highlighter-rouge">docker volume inspect azurite-demo_blobs</code>) or use Docker Desktop to view the volume like so:
<img src="/assets/images/2024-08-07-azurite-with-https-in-docker/docker-desktop-volume-inspect.png" alt="Docker Desktop volume inspect" /></p>

<h2 id="setting-up-the-azure-storage-explorer">Setting up the Azure Storage Explorer</h2>

<p>Great! We’ve got Azurite up and running. However, currently we don’t have an easy way to manage and view its data. Let’s fix that!</p>

<p>Grab the Azure Storage Explorer tool from <a href="https://azure.microsoft.com/en-us/products/storage/storage-explorer">Microsoft’s website</a>. Download the version for your operating system and run it after installing.</p>

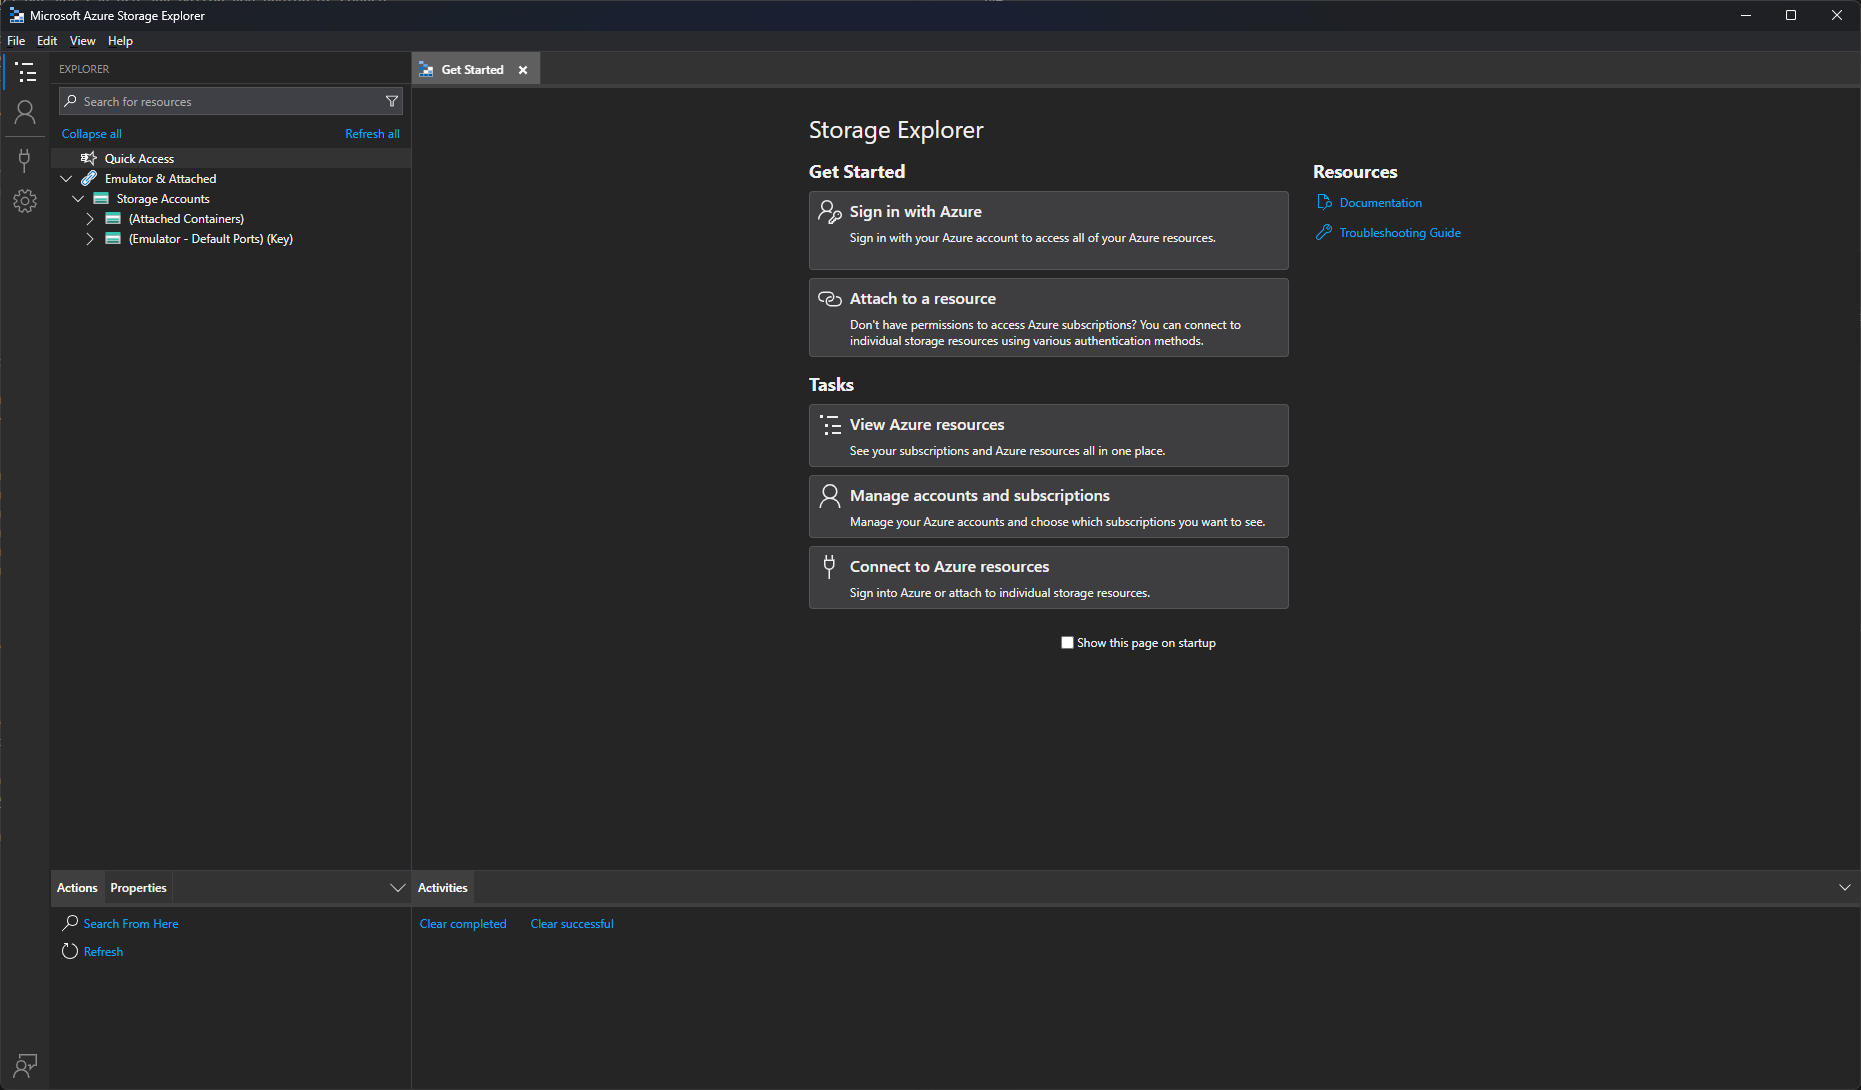
<p>You should be greeted by a screen similar to this:
<img src="/assets/images/2024-08-07-azurite-with-https-in-docker/azure-storage-explorer-welcome.png" alt="Azure Storage Explorer starting screen" /></p>

<p>Azure Storage Explorer has attached the Storage Emulator by default (whether that’s the legacy Azure Storage Emulator, or Azurite).</p>

<ul>
  <li>Expand the <code class="language-plaintext highlighter-rouge">(Emulator - Default Ports) (Key)</code> node in the Explorer on the left hand side.</li>
  <li>Open the <code class="language-plaintext highlighter-rouge">Blob Containers</code> node</li>
</ul>

<p>You’ll see that there aren’t any containers at the moment. You’ll just see a <code class="language-plaintext highlighter-rouge">View all</code> button that won’t show you anything no matter how often you mash it.</p>

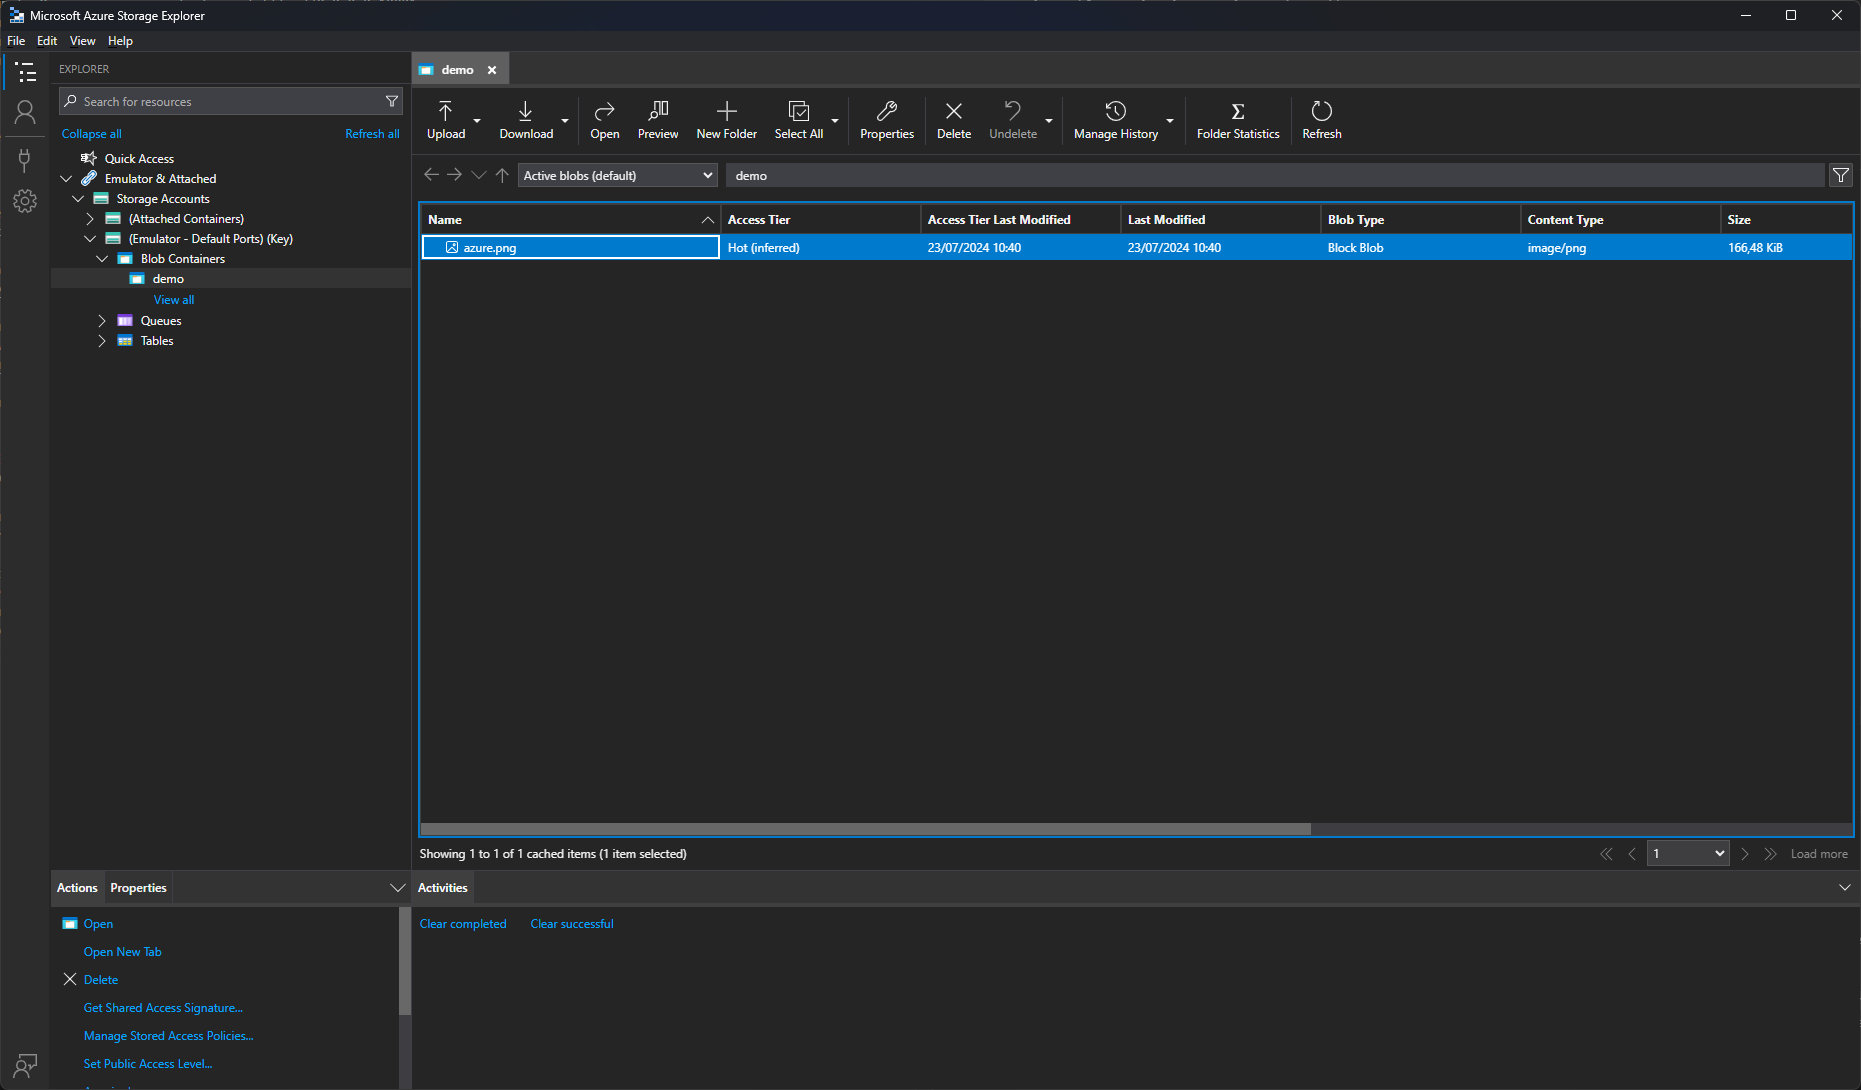
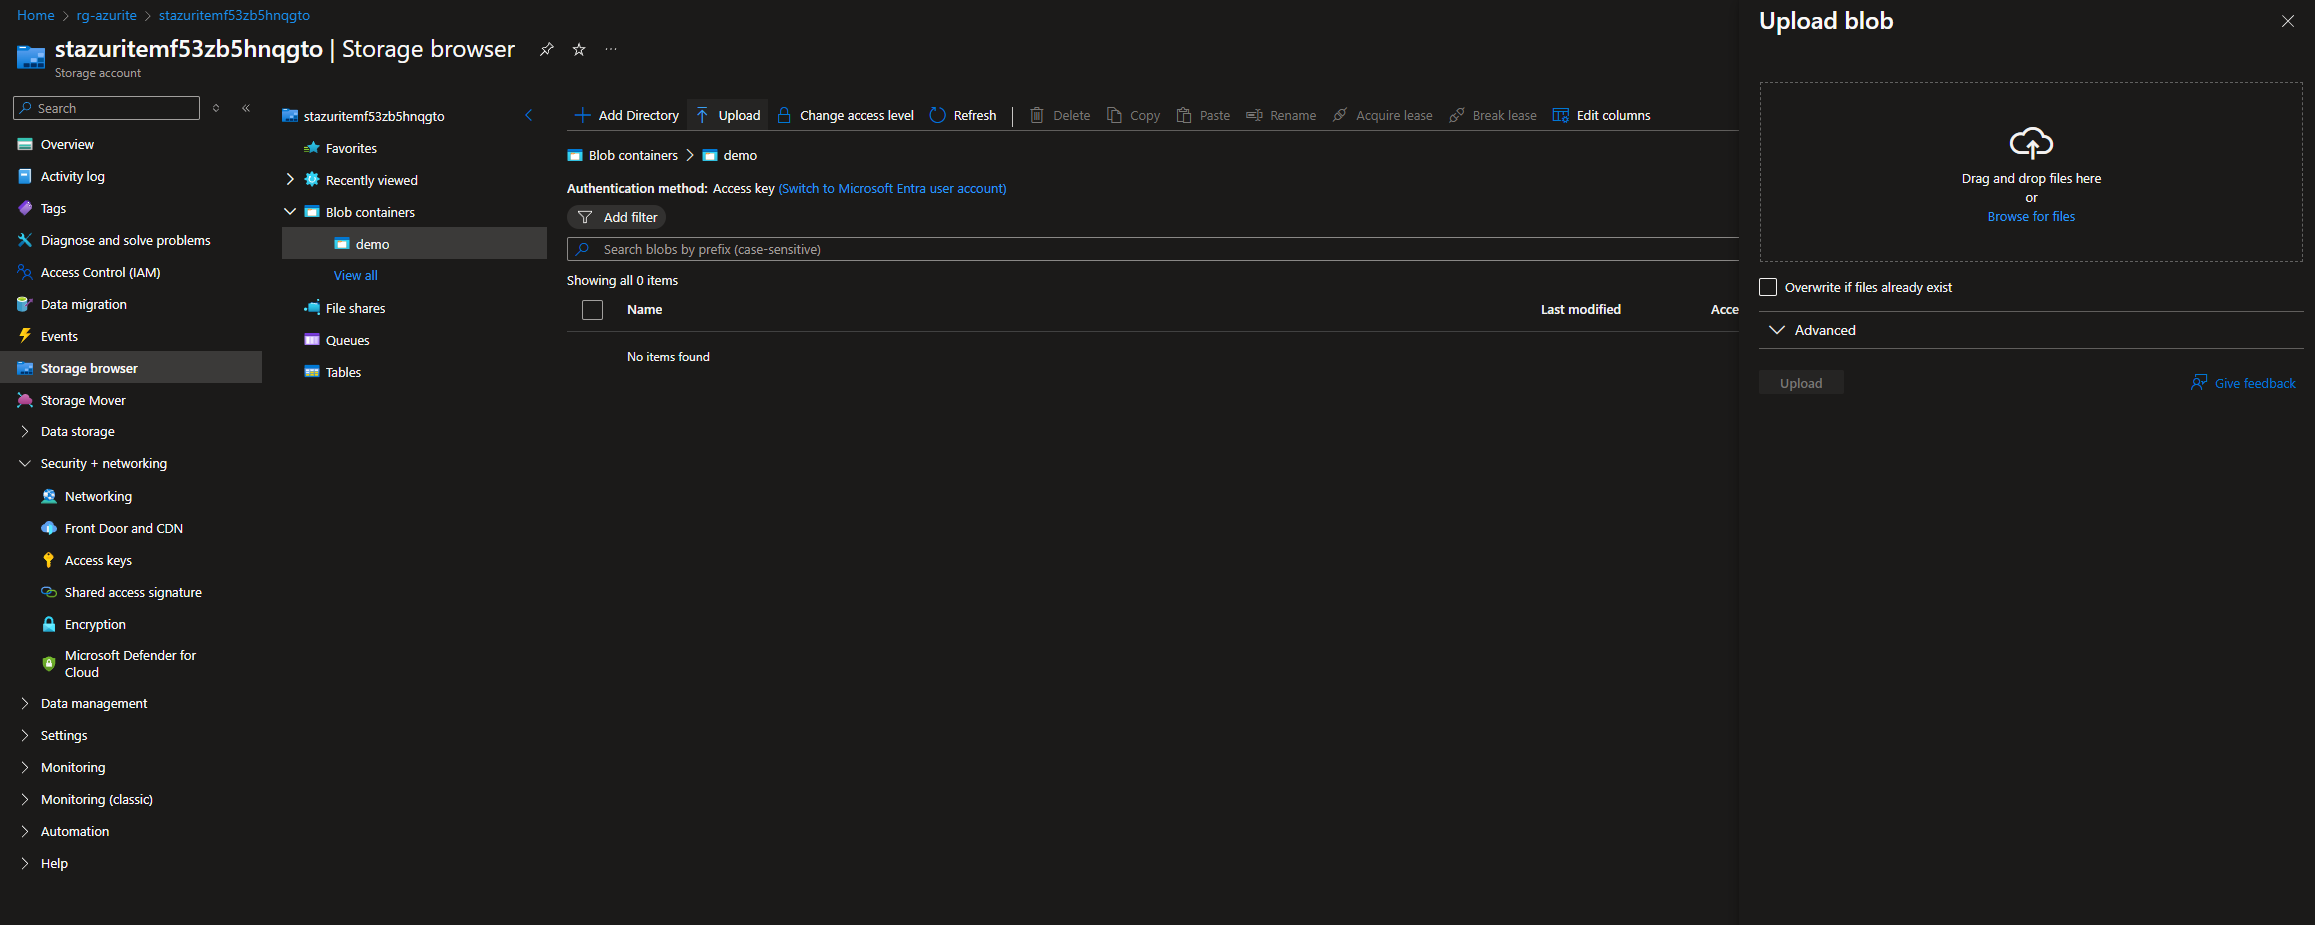
<p>Let’s create a container to verify we can access Azurite properly. Right-click the <code class="language-plaintext highlighter-rouge">Blob Containers</code> node and select <code class="language-plaintext highlighter-rouge">Create Blob Container</code>. Enter a name for your container (e.g. <code class="language-plaintext highlighter-rouge">demo</code>) and confirm. The container has been created. If you wish, you can even upload a file but creating a container tells us enough already. Azurite and the Azure Storage Explorer are connected.</p>

<p>Finally your Azure Storage Explorer could look something like this:</p>

<p><img src="/assets/images/2024-08-07-azurite-with-https-in-docker/azure-storage-explorer-demo-upload.png" alt="Azure Storage Explorer demo upload" /></p>

<h2 id="next-up">Next up</h2>

<p>This concludes the first part of this blog series! Setting up Azurite and the Storage Explorer will give us a solid foundation for setting up our example application where we’ll connect our Docker container to so we can actually interact with Azure Storage.</p>

<p>Continue to <a href="https://blog.alexschouls.nl/azure/2024/08/07/azurite-with-https-in-docker-part-2.html">part 2 here</a>.</p>]]></content><author><name></name></author><category term="azure" /><summary type="html"><![CDATA[Introduction]]></summary></entry><entry><title type="html">Accessing Azure Storage services without storing secrets using Azurite, Docker, HTTPS and Azure - Part 2</title><link href="/azure/2024/08/07/azurite-with-https-in-docker-part-2.html" rel="alternate" type="text/html" title="Accessing Azure Storage services without storing secrets using Azurite, Docker, HTTPS and Azure - Part 2" /><published>2024-08-07T13:00:00+00:00</published><updated>2024-08-07T13:00:00+00:00</updated><id>/azure/2024/08/07/azurite-with-https-in-docker-part-2</id><content type="html" xml:base="/azure/2024/08/07/azurite-with-https-in-docker-part-2.html"><![CDATA[<h2 id="introduction">Introduction</h2>

<p>Welcome back to the blog series about setting up Azurite using HTTPS in Docker!</p>

<p>If you haven’t read part 1, you can do so <a href="https://blog.alexschouls.nl/azure/2024/08/07/azurite-with-https-in-docker-part-1.html">here</a>.</p>

<p>In this part of the blog series, we’ll focus on setting up an example application using the Azure Storage SDKs to communicate with Azure (or Azurite in this case). Our example application will be a very simple application, returning the first available file in a Blob Container.</p>

<p>In this post I’ll be using .NET 8 and C# to communicate with Azure. The principles are the same when using Python, JavaScript or any other language, as long as you’re using the <a href="https://learn.microsoft.com/en-us/azure/storage/common/storage-introduction#storage-apis-libraries-and-tools">Azure Storage Client Libraries</a>.</p>

<h2 id="setting-up-an-example-project">Setting up an example project</h2>

<p>Let’s start by creating a new empty .NET project in our project folder (<code class="language-plaintext highlighter-rouge">~/azurite-demo</code>): <code class="language-plaintext highlighter-rouge">dotnet new web --name demo-app</code>.</p>

<p>Next we’ll verify if everything has been set-up correctly. Navigate to your newly created application: <code class="language-plaintext highlighter-rouge">cd demo-app</code>.</p>

<p>Execute the <code class="language-plaintext highlighter-rouge">dotnet run</code> command.</p>

<p>The output should be something similar to:</p>

<div class="language-plaintext highlighter-rouge"><div class="highlight"><pre class="highlight"><code>Building...
info: Microsoft.Hosting.Lifetime[14]
      Now listening on: http://localhost:5004
info: Microsoft.Hosting.Lifetime[0]
      Application started. Press Ctrl+C to shut down.
info: Microsoft.Hosting.Lifetime[0]
      Hosting environment: Development
info: Microsoft.Hosting.Lifetime[0]
      Content root path: /home/alex/azurite-demo/demo-app
</code></pre></div></div>

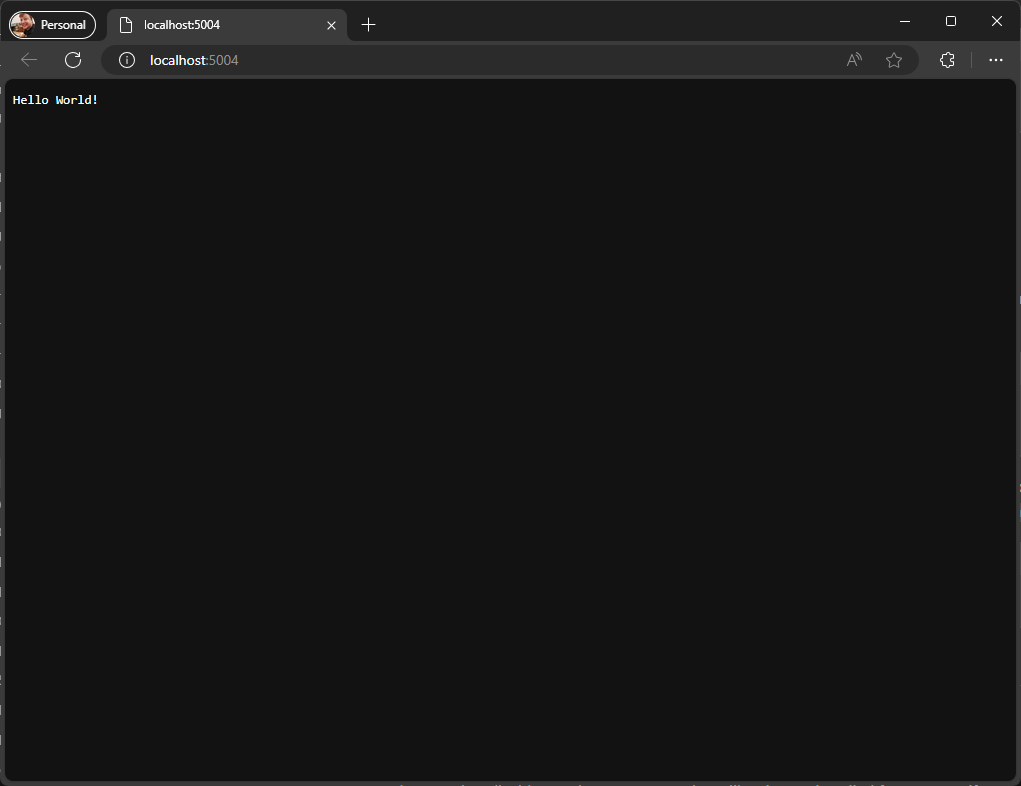
<p>Verify the application is up and running on the specified URL. In the case of the example, if we navigate to http://localhost:5004, we’ll see <code class="language-plaintext highlighter-rouge">Hello World!</code>:
<img src="/assets/images/2024-08-07-azurite-with-https-in-docker/empty-dotnet-application.png" alt="empty dotnet application" /></p>

<blockquote>
  <p>Note that our application currently doesn’t run using HTTPS. If you wish to do so, feel free but the focus of this blog series is communicating with Azurite through HTTPS, regardless of what the application itself is exposed through.</p>
</blockquote>

<h2 id="adding-the-azure-sdk">Adding the Azure SDK</h2>

<p>Now that we’ve got our project set-up, let’s add the Azure SDK libraries required for communicating with our Azure environment (and by extension, Azurite), as well as the necessary Identity library.</p>

<p>Update your project with the following packages:</p>

<ul>
  <li><a href="https://github.com/Azure/azure-sdk-for-net/blob/Microsoft.Extensions.Azure_1.7.4/sdk/extensions/Microsoft.Extensions.Azure/README.md">Microsoft.Extensions.Azure</a></li>
  <li><a href="https://github.com/Azure/azure-sdk-for-net/blob/Azure.Identity_1.12.0/sdk/identity/Azure.Identity/README.md">Azure.Identity</a></li>
  <li><a href="https://github.com/Azure/azure-sdk-for-net/blob/Azure.Identity_1.12.0/sdk/storage/Azure.Storage.Blobs/README.md">Azure.Storage.Blobs</a></li>
</ul>

<blockquote>
  <p>Note that we’re focusing on the Storage library here but all the code surrounding dependency injection and identity applies (to a certain extent) to other Azure services as well such as Service Bus and Key Vault.</p>
</blockquote>

<p>You can run the following commands if you want to use the dotnet CLI to add the packages:</p>

<div class="language-sh highlighter-rouge"><div class="highlight"><pre class="highlight"><code>dotnet add package Microsoft.Extensions.Azure
dotnet add package Azure.Identity
dotnet add package Azure.Storage.Blobs
</code></pre></div></div>

<p>Next up is wiring up the Azure SDK using dependency injection. We can follow along with <a href="https://learn.microsoft.com/en-us/dotnet/azure/sdk/dependency-injection?tabs=web-app-builder">Microsoft’s documentation</a> for this part as well.</p>

<p>Microsoft shows the following code to be added to your <code class="language-plaintext highlighter-rouge">Program.cs</code>.</p>

<div class="language-csharp highlighter-rouge"><div class="highlight"><pre class="highlight"><code><span class="n">builder</span><span class="p">.</span><span class="n">Services</span><span class="p">.</span><span class="nf">AddAzureClients</span><span class="p">(</span><span class="n">clientBuilder</span> <span class="p">=&gt;</span>
<span class="p">{</span>
  <span class="n">clientBuilder</span><span class="p">.</span><span class="nf">AddBlobServiceClient</span><span class="p">(</span><span class="k">new</span> <span class="nf">Uri</span><span class="p">(</span><span class="s">"&lt;storage_url&gt;"</span><span class="p">));</span>
  <span class="n">clientBuilder</span><span class="p">.</span><span class="nf">UseCredential</span><span class="p">(</span><span class="k">new</span> <span class="nf">DefaultAzureCredential</span><span class="p">());</span>
<span class="p">});</span>
</code></pre></div></div>

<p>We’ll change this a little bit so we have a working version first. We’ll move on to HTTPS in a later part of this blog series.
Let’s stick to the <code class="language-plaintext highlighter-rouge">AddAzureClients</code> and <code class="language-plaintext highlighter-rouge">AddBlobServiceClient</code> extension methods, but we’ll no longer use the <code class="language-plaintext highlighter-rouge">DefaultAzureCredential</code>. Instead, we will directly connect to the Azurite Blob service by using the connection string.</p>

<p>The connection data for Azurite can be found in <a href="https://learn.microsoft.com/en-us/azure/storage/common/storage-use-azurite?tabs=visual-studio%2Cblob-storage#connect-to-azurite-with-sdks-and-tools">Microsoft’s documentation</a>.The account name and account key are the so called ‘Well-known storage account and key’.</p>

<p>Your entire <code class="language-plaintext highlighter-rouge">Program.cs</code> class should now look something along these lines:</p>

<div class="language-csharp highlighter-rouge"><div class="highlight"><pre class="highlight"><code><span class="k">using</span> <span class="nn">Microsoft.Extensions.Azure</span><span class="p">;</span>

<span class="kt">var</span> <span class="n">builder</span> <span class="p">=</span> <span class="n">WebApplication</span><span class="p">.</span><span class="nf">CreateBuilder</span><span class="p">(</span><span class="n">args</span><span class="p">);</span>
<span class="n">builder</span><span class="p">.</span><span class="n">Services</span><span class="p">.</span><span class="nf">AddAzureClients</span><span class="p">(</span><span class="n">clientBuilder</span> <span class="p">=&gt;</span>
<span class="p">{</span>
  <span class="n">clientBuilder</span><span class="p">.</span><span class="nf">AddBlobServiceClient</span><span class="p">(</span><span class="s">"DefaultEndpointsProtocol=http;AccountName=devstoreaccount1;AccountKey=Eby8vdM02xNOcqFlqUwJPLlmEtlCDXJ1OUzFT50uSRZ6IFsuFq2UVErCz4I6tq/K1SZFPTOtr/KBHBeksoGMGw==;BlobEndpoint=http://127.0.0.1:10000/devstoreaccount1;"</span><span class="p">);</span>
<span class="p">});</span>
<span class="kt">var</span> <span class="n">app</span> <span class="p">=</span> <span class="n">builder</span><span class="p">.</span><span class="nf">Build</span><span class="p">();</span>

<span class="n">app</span><span class="p">.</span><span class="nf">MapGet</span><span class="p">(</span><span class="s">"/"</span><span class="p">,</span> <span class="p">()</span> <span class="p">=&gt;</span> <span class="s">"Hello World!"</span><span class="p">);</span>

<span class="n">app</span><span class="p">.</span><span class="nf">Run</span><span class="p">();</span>
</code></pre></div></div>

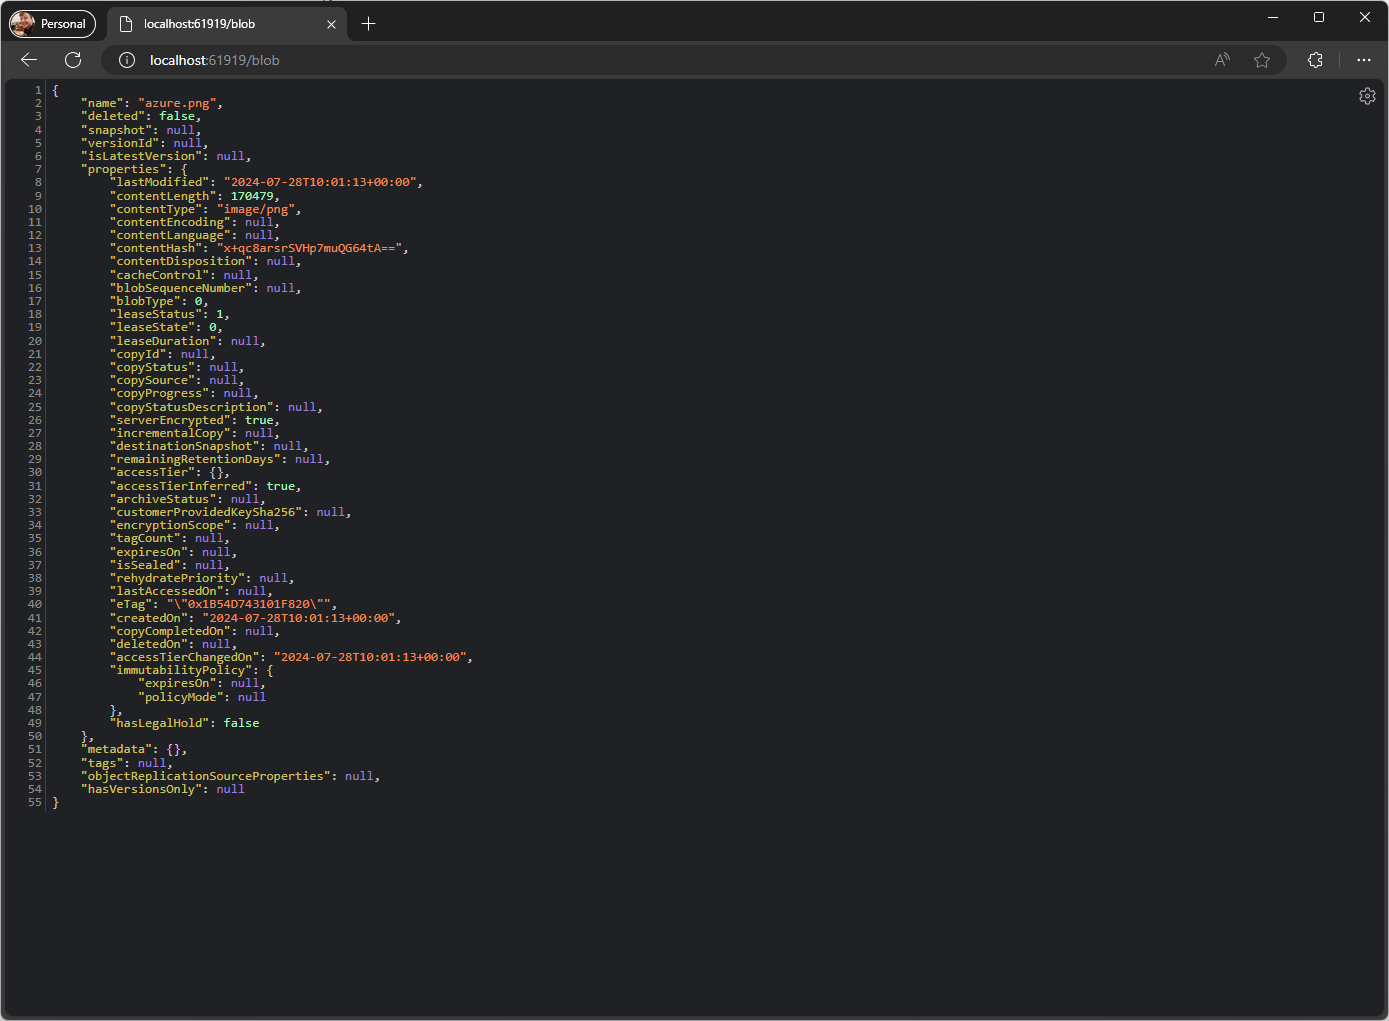
<p>Let’s quickly add some code so we can interact with a blob. We’ll create an endpoint that returns the first Blob it can find.</p>

<p>We’ll create a separate endpoint named <code class="language-plaintext highlighter-rouge">/blob</code> that simply returns the item if it can be found in a HTTP 200 OK result, or an HTTP 200 OK status with a simple message.</p>

<blockquote>
  <p>Please let’s not have a discussion about the proper use of 200 OKs here 😉</p>
</blockquote>

<p>Since we’ve wired up the <code class="language-plaintext highlighter-rouge">BlobServiceClient</code> through dependency injection, we can inject it into our endpoint. Our endpoint will create a container called <code class="language-plaintext highlighter-rouge">demo</code> if it does not exist and grab the first item in that container. It will then be returned as a JSON object to the client.</p>

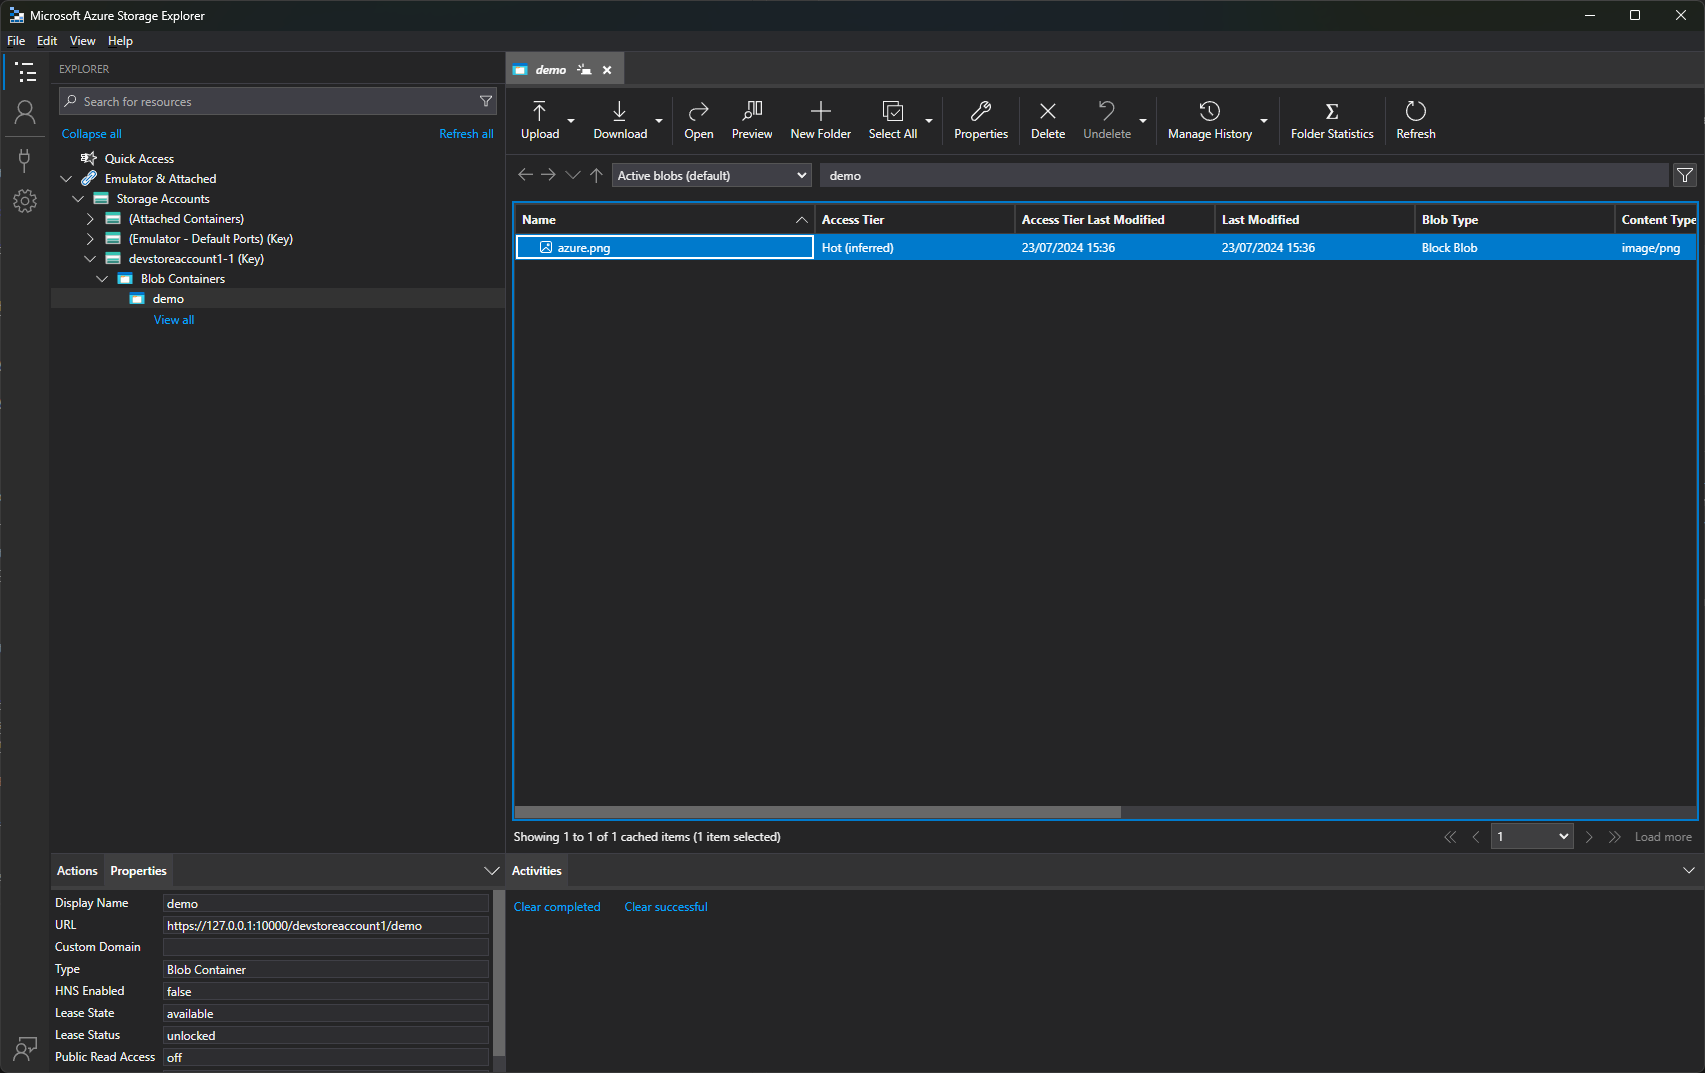
<p>I’ve uploaded a PNG image called <code class="language-plaintext highlighter-rouge">azure.png</code> to my container through the Azure Storage Explorer.</p>

<p>My endpoint looks like this:</p>

<div class="language-csharp highlighter-rouge"><div class="highlight"><pre class="highlight"><code><span class="n">app</span><span class="p">.</span><span class="nf">MapGet</span><span class="p">(</span><span class="s">"/blob"</span><span class="p">,</span> <span class="p">([</span><span class="n">FromServices</span><span class="p">]</span> <span class="n">BlobServiceClient</span> <span class="n">blobServiceClient</span><span class="p">)</span> <span class="p">=&gt;</span>
<span class="p">{</span>
  <span class="n">BlobContainerClient</span> <span class="n">blobContainerClient</span> <span class="p">=</span> <span class="n">blobServiceClient</span><span class="p">.</span><span class="nf">GetBlobContainerClient</span><span class="p">(</span><span class="s">"demo"</span><span class="p">);</span>
  <span class="n">blobContainerClient</span><span class="p">.</span><span class="nf">CreateIfNotExists</span><span class="p">();</span>

  <span class="kt">var</span> <span class="n">blob</span> <span class="p">=</span> <span class="n">blobContainerClient</span><span class="p">.</span><span class="nf">GetBlobs</span><span class="p">()?.</span><span class="nf">FirstOrDefault</span><span class="p">();</span>
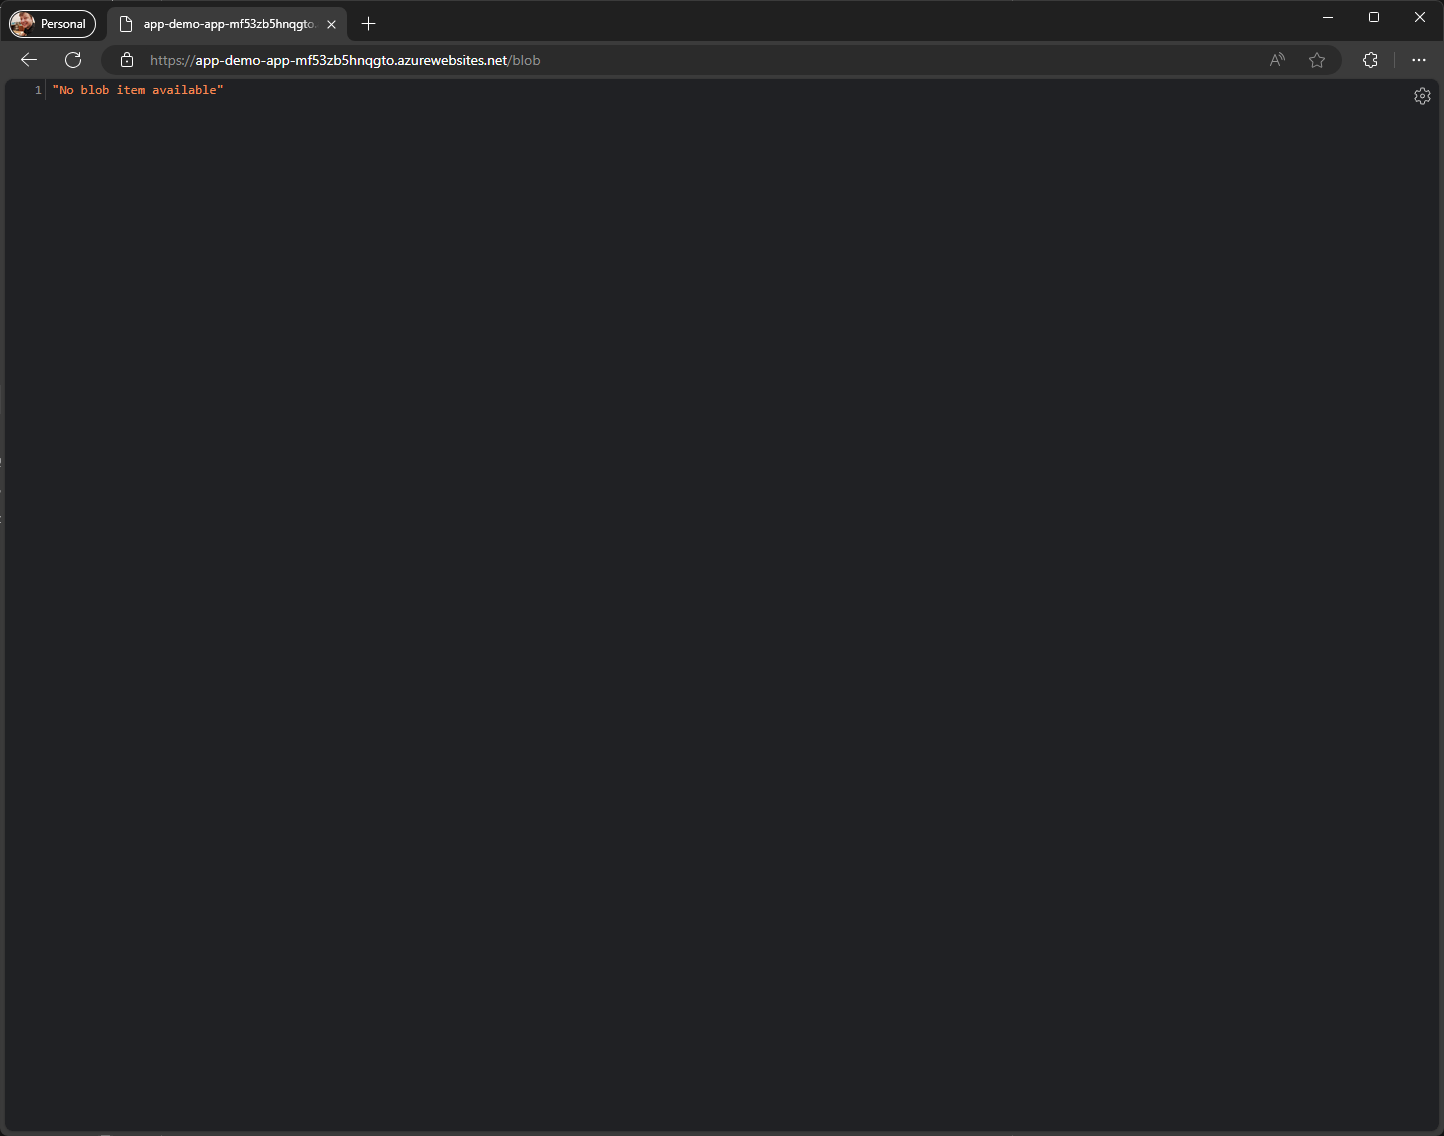
  <span class="k">return</span> <span class="n">blob</span> <span class="k">is</span> <span class="k">null</span> <span class="p">?</span> <span class="n">Results</span><span class="p">.</span><span class="nf">Ok</span><span class="p">(</span><span class="s">"No blob item available"</span><span class="p">)</span> <span class="p">:</span> <span class="n">Results</span><span class="p">.</span><span class="nf">Ok</span><span class="p">(</span><span class="n">blob</span><span class="p">);</span>
<span class="p">});</span>
</code></pre></div></div>

<blockquote>
  <p>Note that if you do not see your <code class="language-plaintext highlighter-rouge">demo</code> container, you’ll have to call the <code class="language-plaintext highlighter-rouge">/blob</code> endpoint first, in order for the container to be created.</p>
</blockquote>

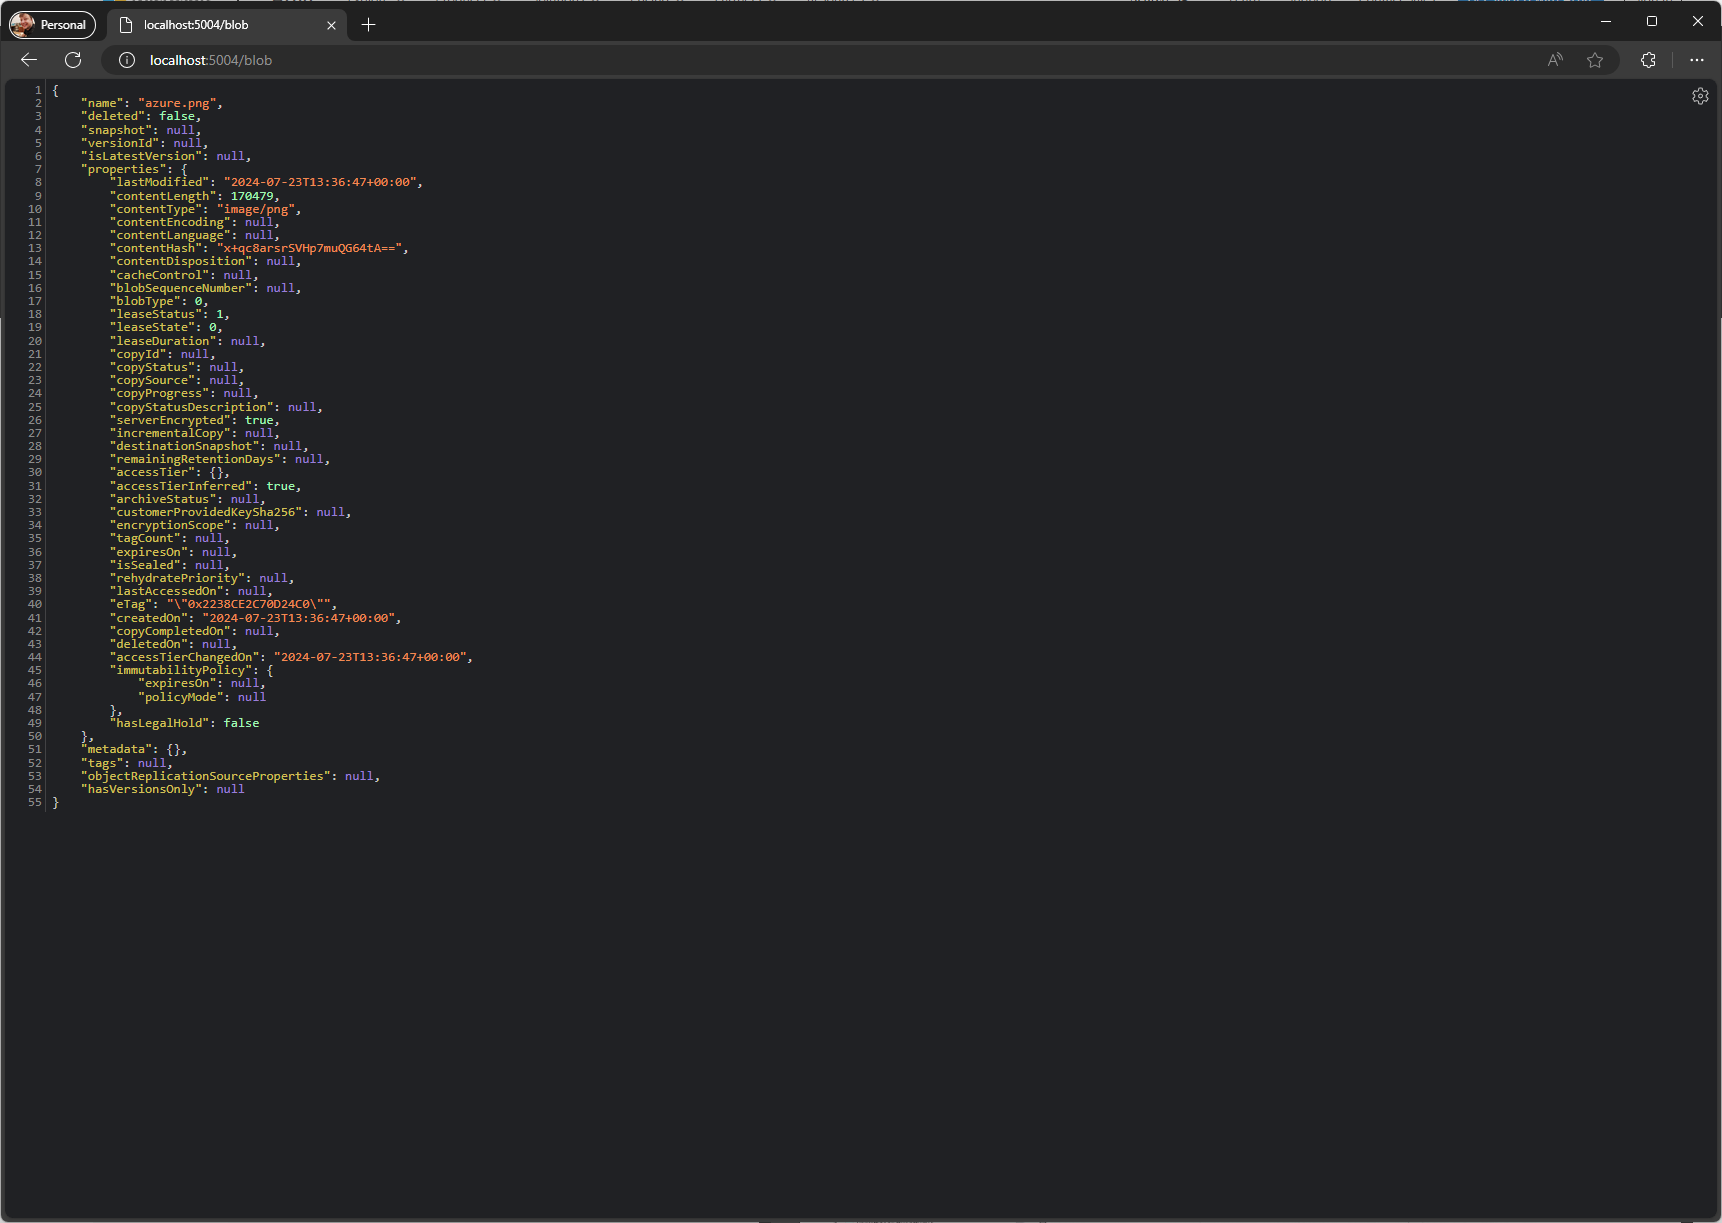
<p>If I now call this newly created endpoint, I get my blob data served back:</p>

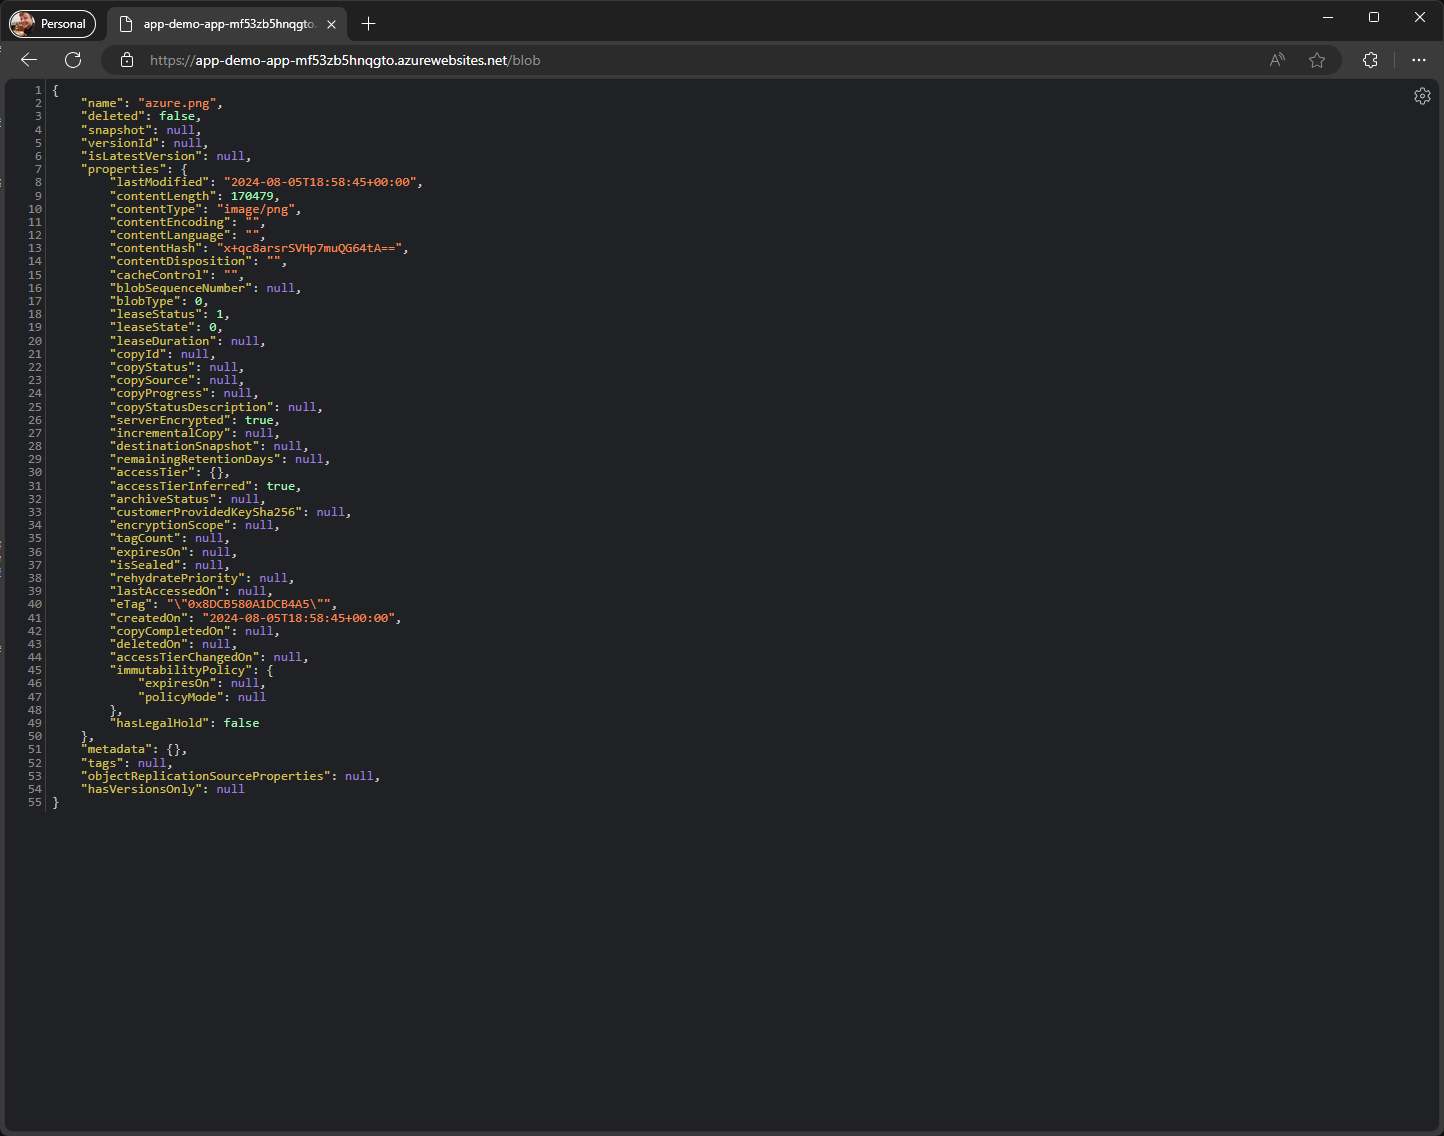
<div class="language-sh highlighter-rouge"><div class="highlight"><pre class="highlight"><code>curl http://localhost:5004/blob
<span class="o">{</span><span class="s2">"name"</span>:<span class="s2">"azure.png"</span>,<span class="s2">"deleted"</span>:false,<span class="s2">"snapshot"</span>:null,<span class="s2">"versionId"</span>:null,<span class="s2">"isLatestVersion"</span>:null,<span class="s2">"properties"</span>:<span class="o">{</span><span class="s2">"lastModified"</span>:<span class="s2">"2024-08-07T11:55:54+00:00"</span>,<span class="s2">"contentLength"</span>:170479,<span class="s2">"contentType"</span>:<span class="s2">"image/png"</span>,<span class="s2">"contentEncoding"</span>:null,<span class="s2">"contentLanguage"</span>:null,<span class="s2">"contentHash"</span>:<span class="s2">"x+qc8arsrSVHp7muQG64tA=="</span>,<span class="s2">"contentDisposition"</span>:null,<span class="s2">"cacheControl"</span>:null,<span class="s2">"blobSequenceNumber"</span>:null,<span class="s2">"blobType"</span>:0,<span class="s2">"leaseStatus"</span>:1,<span class="s2">"leaseState"</span>:0,<span class="s2">"leaseDuration"</span>:null,<span class="s2">"copyId"</span>:null,<span class="s2">"copyStatus"</span>:null,<span class="s2">"copySource"</span>:null,<span class="s2">"copyProgress"</span>:null,<span class="s2">"copyStatusDescription"</span>:null,<span class="s2">"serverEncrypted"</span>:true,<span class="s2">"incrementalCopy"</span>:null,<span class="s2">"destinationSnapshot"</span>:null,<span class="s2">"remainingRetentionDays"</span>:null,<span class="s2">"accessTier"</span>:<span class="o">{}</span>,<span class="s2">"accessTierInferred"</span>:true,<span class="s2">"archiveStatus"</span>:null,<span class="s2">"customerProvidedKeySha256"</span>:null,<span class="s2">"encryptionScope"</span>:null,<span class="s2">"tagCount"</span>:null,<span class="s2">"expiresOn"</span>:null,<span class="s2">"isSealed"</span>:null,<span class="s2">"rehydratePriority"</span>:null,<span class="s2">"lastAccessedOn"</span>:null,<span class="s2">"eTag"</span>:<span class="s2">"</span><span class="se">\"</span><span class="s2">0x1DADFD25E7ADE40</span><span class="se">\"</span><span class="s2">"</span>,<span class="s2">"createdOn"</span>:<span class="s2">"2024-08-07T11:55:54+00:00"</span>,<span class="s2">"copyCompletedOn"</span>:null,<span class="s2">"deletedOn"</span>:null,<span class="s2">"accessTierChangedOn"</span>:<span class="s2">"2024-08-07T11:55:54+00:00"</span>,<span class="s2">"immutabilityPolicy"</span>:<span class="o">{</span><span class="s2">"expiresOn"</span>:null,<span class="s2">"policyMode"</span>:null<span class="o">}</span>,<span class="s2">"hasLegalHold"</span>:false<span class="o">}</span>,<span class="s2">"metadata"</span>:<span class="o">{}</span>,<span class="s2">"tags"</span>:null,<span class="s2">"objectReplicationSourceProperties"</span>:null,<span class="s2">"hasVersionsOnly"</span>:null<span class="o">}</span>
</code></pre></div></div>

<p>Or in a more readable format:</p>

<div class="language-json highlighter-rouge"><div class="highlight"><pre class="highlight"><code><span class="p">{</span><span class="w">
  </span><span class="nl">"name"</span><span class="p">:</span><span class="w"> </span><span class="s2">"azure.png"</span><span class="p">,</span><span class="w">
  </span><span class="nl">"deleted"</span><span class="p">:</span><span class="w"> </span><span class="kc">false</span><span class="p">,</span><span class="w">
  </span><span class="nl">"snapshot"</span><span class="p">:</span><span class="w"> </span><span class="kc">null</span><span class="p">,</span><span class="w">
  </span><span class="nl">"versionId"</span><span class="p">:</span><span class="w"> </span><span class="kc">null</span><span class="p">,</span><span class="w">
  </span><span class="nl">"isLatestVersion"</span><span class="p">:</span><span class="w"> </span><span class="kc">null</span><span class="p">,</span><span class="w">
  </span><span class="nl">"properties"</span><span class="p">:</span><span class="w"> </span><span class="p">{</span><span class="w">
    </span><span class="nl">"lastModified"</span><span class="p">:</span><span class="w"> </span><span class="s2">"2024-08-07T11:55:54+00:00"</span><span class="p">,</span><span class="w">
    </span><span class="nl">"contentLength"</span><span class="p">:</span><span class="w"> </span><span class="mi">170479</span><span class="p">,</span><span class="w">
    </span><span class="nl">"contentType"</span><span class="p">:</span><span class="w"> </span><span class="s2">"image/png"</span><span class="p">,</span><span class="w">
    </span><span class="nl">"contentEncoding"</span><span class="p">:</span><span class="w"> </span><span class="kc">null</span><span class="p">,</span><span class="w">
    </span><span class="nl">"contentLanguage"</span><span class="p">:</span><span class="w"> </span><span class="kc">null</span><span class="p">,</span><span class="w">
    </span><span class="nl">"contentHash"</span><span class="p">:</span><span class="w"> </span><span class="s2">"x+qc8arsrSVHp7muQG64tA=="</span><span class="p">,</span><span class="w">
    </span><span class="nl">"contentDisposition"</span><span class="p">:</span><span class="w"> </span><span class="kc">null</span><span class="p">,</span><span class="w">
    </span><span class="nl">"cacheControl"</span><span class="p">:</span><span class="w"> </span><span class="kc">null</span><span class="p">,</span><span class="w">
    </span><span class="nl">"blobSequenceNumber"</span><span class="p">:</span><span class="w"> </span><span class="kc">null</span><span class="p">,</span><span class="w">
    </span><span class="nl">"blobType"</span><span class="p">:</span><span class="w"> </span><span class="mi">0</span><span class="p">,</span><span class="w">
    </span><span class="nl">"leaseStatus"</span><span class="p">:</span><span class="w"> </span><span class="mi">1</span><span class="p">,</span><span class="w">
    </span><span class="nl">"leaseState"</span><span class="p">:</span><span class="w"> </span><span class="mi">0</span><span class="p">,</span><span class="w">
    </span><span class="nl">"leaseDuration"</span><span class="p">:</span><span class="w"> </span><span class="kc">null</span><span class="p">,</span><span class="w">
    </span><span class="nl">"copyId"</span><span class="p">:</span><span class="w"> </span><span class="kc">null</span><span class="p">,</span><span class="w">
    </span><span class="nl">"copyStatus"</span><span class="p">:</span><span class="w"> </span><span class="kc">null</span><span class="p">,</span><span class="w">
    </span><span class="nl">"copySource"</span><span class="p">:</span><span class="w"> </span><span class="kc">null</span><span class="p">,</span><span class="w">
    </span><span class="nl">"copyProgress"</span><span class="p">:</span><span class="w"> </span><span class="kc">null</span><span class="p">,</span><span class="w">
    </span><span class="nl">"copyStatusDescription"</span><span class="p">:</span><span class="w"> </span><span class="kc">null</span><span class="p">,</span><span class="w">
    </span><span class="nl">"serverEncrypted"</span><span class="p">:</span><span class="w"> </span><span class="kc">true</span><span class="p">,</span><span class="w">
    </span><span class="nl">"incrementalCopy"</span><span class="p">:</span><span class="w"> </span><span class="kc">null</span><span class="p">,</span><span class="w">
    </span><span class="nl">"destinationSnapshot"</span><span class="p">:</span><span class="w"> </span><span class="kc">null</span><span class="p">,</span><span class="w">
    </span><span class="nl">"remainingRetentionDays"</span><span class="p">:</span><span class="w"> </span><span class="kc">null</span><span class="p">,</span><span class="w">
    </span><span class="nl">"accessTier"</span><span class="p">:</span><span class="w"> </span><span class="p">{},</span><span class="w">
    </span><span class="nl">"accessTierInferred"</span><span class="p">:</span><span class="w"> </span><span class="kc">true</span><span class="p">,</span><span class="w">
    </span><span class="nl">"archiveStatus"</span><span class="p">:</span><span class="w"> </span><span class="kc">null</span><span class="p">,</span><span class="w">
    </span><span class="nl">"customerProvidedKeySha256"</span><span class="p">:</span><span class="w"> </span><span class="kc">null</span><span class="p">,</span><span class="w">
    </span><span class="nl">"encryptionScope"</span><span class="p">:</span><span class="w"> </span><span class="kc">null</span><span class="p">,</span><span class="w">
    </span><span class="nl">"tagCount"</span><span class="p">:</span><span class="w"> </span><span class="kc">null</span><span class="p">,</span><span class="w">
    </span><span class="nl">"expiresOn"</span><span class="p">:</span><span class="w"> </span><span class="kc">null</span><span class="p">,</span><span class="w">
    </span><span class="nl">"isSealed"</span><span class="p">:</span><span class="w"> </span><span class="kc">null</span><span class="p">,</span><span class="w">
    </span><span class="nl">"rehydratePriority"</span><span class="p">:</span><span class="w"> </span><span class="kc">null</span><span class="p">,</span><span class="w">
    </span><span class="nl">"lastAccessedOn"</span><span class="p">:</span><span class="w"> </span><span class="kc">null</span><span class="p">,</span><span class="w">
    </span><span class="nl">"eTag"</span><span class="p">:</span><span class="w"> </span><span class="s2">"</span><span class="se">\"</span><span class="s2">0x1DADFD25E7ADE40</span><span class="se">\"</span><span class="s2">"</span><span class="p">,</span><span class="w">
    </span><span class="nl">"createdOn"</span><span class="p">:</span><span class="w"> </span><span class="s2">"2024-08-07T11:55:54+00:00"</span><span class="p">,</span><span class="w">
    </span><span class="nl">"copyCompletedOn"</span><span class="p">:</span><span class="w"> </span><span class="kc">null</span><span class="p">,</span><span class="w">
    </span><span class="nl">"deletedOn"</span><span class="p">:</span><span class="w"> </span><span class="kc">null</span><span class="p">,</span><span class="w">
    </span><span class="nl">"accessTierChangedOn"</span><span class="p">:</span><span class="w"> </span><span class="s2">"2024-08-07T11:55:54+00:00"</span><span class="p">,</span><span class="w">
    </span><span class="nl">"immutabilityPolicy"</span><span class="p">:</span><span class="w"> </span><span class="p">{</span><span class="w">
      </span><span class="nl">"expiresOn"</span><span class="p">:</span><span class="w"> </span><span class="kc">null</span><span class="p">,</span><span class="w">
      </span><span class="nl">"policyMode"</span><span class="p">:</span><span class="w"> </span><span class="kc">null</span><span class="w">
    </span><span class="p">},</span><span class="w">
    </span><span class="nl">"hasLegalHold"</span><span class="p">:</span><span class="w"> </span><span class="kc">false</span><span class="w">
  </span><span class="p">},</span><span class="w">
  </span><span class="nl">"metadata"</span><span class="p">:</span><span class="w"> </span><span class="p">{},</span><span class="w">
  </span><span class="nl">"tags"</span><span class="p">:</span><span class="w"> </span><span class="kc">null</span><span class="p">,</span><span class="w">
  </span><span class="nl">"objectReplicationSourceProperties"</span><span class="p">:</span><span class="w"> </span><span class="kc">null</span><span class="p">,</span><span class="w">
  </span><span class="nl">"hasVersionsOnly"</span><span class="p">:</span><span class="w"> </span><span class="kc">null</span><span class="w">
</span><span class="p">}</span><span class="w">
</span></code></pre></div></div>

<h2 id="next-up">Next up</h2>

<p>Alright then! Now we’ve got our Azurite emulating an Azure Blob Storage as well as a small .NET application capable of interacting with these Blobs.</p>

<p>We’ve also seen how to wire up the Azure SDK with its <code class="language-plaintext highlighter-rouge">BlobServiceClient</code> through dependency injection.</p>

<p>However, there’s a major flaw with this approach at the moment. We’ve directly entered the Azurite connection string into our <code class="language-plaintext highlighter-rouge">Program.cs</code> class. This connection string contains an account key. This account key should not be exposed.</p>

<p>Sure, we could simply move this to a configuration file such as the <code class="language-plaintext highlighter-rouge">appsettings.json</code> files and let the application configuration take care of choosing a different connection string based on its environment, but then your appsettings or your environment where you’d deploy to later on would still need the connection string <em>somewhere</em>. Not to mention you’d have to be in charge of rotation keys, which is always a pain in the, well, you know where.</p>

<p>The next step will be to leverage the <code class="language-plaintext highlighter-rouge">DefaultAzureCredential</code> class from the <code class="language-plaintext highlighter-rouge">Azure.Identity</code> package to make our code agnostic of both the specific credentials required as well as the <em>type</em> of credential being used. This means that we can use environment variables, interactive credentials or managed identities all with the same bit of code!</p>

<p>Continue to <a href="https://blog.alexschouls.nl/azure/2024/08/07/azurite-with-https-in-docker-part-3.html">part 3 here</a>.</p>]]></content><author><name></name></author><category term="azure" /><summary type="html"><![CDATA[Introduction]]></summary></entry><entry><title type="html">Accessing Azure Storage services without storing secrets using Azurite, Docker, HTTPS and Azure - Part 3</title><link href="/azure/2024/08/07/azurite-with-https-in-docker-part-3.html" rel="alternate" type="text/html" title="Accessing Azure Storage services without storing secrets using Azurite, Docker, HTTPS and Azure - Part 3" /><published>2024-08-07T13:00:00+00:00</published><updated>2024-08-07T13:00:00+00:00</updated><id>/azure/2024/08/07/azurite-with-https-in-docker-part-3</id><content type="html" xml:base="/azure/2024/08/07/azurite-with-https-in-docker-part-3.html"><![CDATA[<h2 id="introduction">Introduction</h2>

<p>Welcome back to the third part in the blog series about using Azurite over HTTPS with the DefaultAzureCredential and Docker!</p>

<p>You can read the previous parts here:</p>

<ul>
  <li><a href="https://blog.alexschouls.nl/azure/2024/08/07/azurite-with-https-in-docker-part-1.html">Part 1</a></li>
  <li><a href="https://blog.alexschouls.nl/azure/2024/08/07/azurite-with-https-in-docker-part-2.html">Part 2</a></li>
</ul>

<p>In the previous two parts of this blog series, we’ve focused on setting up our development environment. We have a working Azure Storage emulator in the form of Azurite and we have a simple .NET API that can interact with a blob in this Azure Storage emulator.</p>

<p>However, we’re still very much dependent on the connection string. Using a connection string is only <em>one</em> way of authenticating with an Azure Storage service (whether that’s Azurite or the real deal). Not only is only one way, it’s also not the <em>ideal</em> way.</p>

<p>In the world of Azure there are things called <a href="https://learn.microsoft.com/en-us/entra/identity/managed-identities-azure-resources/overview">managed identities</a>. These special type of service principals allow you to get access to Azure services from other services (e.g. an App Service running your beautiful .NET application). Managed identities have several advantages over using a connection string or storing identifiers and secrets in your application settings or code. Most notably, you don’t have to manage credentials yourself.</p>

<p>That’s all nice and well, but we’re dealing with Azurite here. That’s not a full blown Azure service that lives somewhere in the cloud so those managed identities are of no use to us. However, if we’d were to use managed identities (for instance, or another kind of authentication method) <em>and</em> a connection string in our code for our local development, we’d have to write (at least) two different mechanisms to authenticate to Azure based on which authentication method we are using.</p>

<p>Luckily Microsoft is one step ahead of us (as usual 😉).</p>

<p>This part of this blog series will cover what the <code class="language-plaintext highlighter-rouge">DefaultAzureCredential</code> is, how to implement it and how to setup Azurite in Docker with HTTPS.</p>

<h2 id="setting-up-defaultazurecredential">Setting up DefaultAzureCredential</h2>

<h3 id="overview">Overview</h3>

<p>If there ever was a silver bullet for simplifying authentication through code, it’s the <a href="https://learn.microsoft.com/en-us/dotnet/api/overview/azure/identity-readme?view=azure-dotnet#key-concepts">DefaultAzureCredential</a>.</p>

<p>The <code class="language-plaintext highlighter-rouge">DefaultAzureCredential</code> mechanism goes through different types of authentication methods chronologically. Stopping when a certain method is satisfied.</p>

<p>You can see the order in this diagram. More information can be found at the link above.
<img src="/assets/images/2024-08-07-azurite-with-https-in-docker/default-azure-credential-authentication-flow-expanded.png" alt="authentication flow" /></p>

<p>As you can see, these can be credentials meant for deployed services (e.g. an Azure App Service), as well as for development credentials in Visual Studio or interactive through a user input dialog.</p>

<h3 id="connecting-your-azure-account">Connecting your Azure account</h3>

<p>Due to the nature of the <code class="language-plaintext highlighter-rouge">DefaultAzureCredential</code> class, it’s imperative that we at least log in to our Azure account. There are multiple ways to do so (as described in the diagram above).</p>

<p>In this blog series, we’ll use the <a href="https://learn.microsoft.com/en-us/cli/azure/get-started-with-azure-cli">Azure CLI</a>.</p>

<p>Verify your Azure CLI is available in your terminal. Run <code class="language-plaintext highlighter-rouge">az version</code>. When your Azure CLI is available, log in to your Azure account by running <code class="language-plaintext highlighter-rouge">az login</code>. We’re not going to use any real Azure services (yet) so don’t worry about too much about setting the subscription.</p>

<h3 id="wiring-it-up">Wiring it up</h3>

<p>In <a href="https://blog.alexschouls.nl/azure/2024/08/07/azurite-with-https-in-docker-part-2.html">part 2</a> of this blog series we’ve created a simple .NET application to interact with our Blob service from Azurite. Let’s open up our application and navigate to the <code class="language-plaintext highlighter-rouge">Program.cs</code> file.</p>

<p>Remember that we’ve installed the <code class="language-plaintext highlighter-rouge">Azure.Identity</code> package? We haven’t used this package yet but we will now.</p>

<p>Looking at <a href="https://learn.microsoft.com/en-us/dotnet/azure/sdk/dependency-injection?tabs=web-app-builder">Microsoft’s documentation</a> on how to configure the Azure SDK for dependency injection, we can see that the <code class="language-plaintext highlighter-rouge">DefaultAzureCredential</code> class is used with the <code class="language-plaintext highlighter-rouge">UseCredential</code> extension method.</p>

<p>Let’s remove our full connection string and add our <code class="language-plaintext highlighter-rouge">DefaultAzureCredential</code>. Replace the entire connection string with an URI that points to the Blob service. In the case of Azurite that’s: <code class="language-plaintext highlighter-rouge">http://127.0.0.1:10000/devstoreaccount1</code>.</p>

<p>This will change your argument for the <code class="language-plaintext highlighter-rouge">AddBlobServiceClient</code> method to:</p>

<div class="language-csharp highlighter-rouge"><div class="highlight"><pre class="highlight"><code><span class="n">clientBuilder</span><span class="p">.</span><span class="nf">AddBlobServiceClient</span><span class="p">(</span><span class="k">new</span> <span class="nf">Uri</span><span class="p">(</span><span class="s">"http://127.0.0.1:10000/devstoreaccount1"</span><span class="p">));</span>
</code></pre></div></div>

<p>Next, add a line below where you use the <code class="language-plaintext highlighter-rouge">DefaultAzureCredential</code>. Now your <code class="language-plaintext highlighter-rouge">AddAzureClients</code> method should look something like this:</p>

<div class="language-csharp highlighter-rouge"><div class="highlight"><pre class="highlight"><code><span class="n">builder</span><span class="p">.</span><span class="n">Services</span><span class="p">.</span><span class="nf">AddAzureClients</span><span class="p">(</span><span class="n">clientBuilder</span> <span class="p">=&gt;</span>
<span class="p">{</span>
  <span class="n">clientBuilder</span><span class="p">.</span><span class="nf">AddBlobServiceClient</span><span class="p">(</span><span class="k">new</span> <span class="nf">Uri</span><span class="p">(</span><span class="s">"http://127.0.0.1:10000/devstoreaccount1"</span><span class="p">));</span>
  <span class="n">clientBuilder</span><span class="p">.</span><span class="nf">UseCredential</span><span class="p">(</span><span class="k">new</span> <span class="nf">DefaultAzureCredential</span><span class="p">());</span>
<span class="p">});</span>
</code></pre></div></div>

<p>Resulting in a <code class="language-plaintext highlighter-rouge">Program.cs</code> file that looks like this:</p>

<div class="language-csharp highlighter-rouge"><div class="highlight"><pre class="highlight"><code><span class="k">using</span> <span class="nn">Azure.Identity</span><span class="p">;</span>
<span class="k">using</span> <span class="nn">Azure.Storage.Blobs</span><span class="p">;</span>
<span class="k">using</span> <span class="nn">Microsoft.AspNetCore.Mvc</span><span class="p">;</span>
<span class="k">using</span> <span class="nn">Microsoft.Extensions.Azure</span><span class="p">;</span>

<span class="kt">var</span> <span class="n">builder</span> <span class="p">=</span> <span class="n">WebApplication</span><span class="p">.</span><span class="nf">CreateBuilder</span><span class="p">(</span><span class="n">args</span><span class="p">);</span>
<span class="n">builder</span><span class="p">.</span><span class="n">Services</span><span class="p">.</span><span class="nf">AddAzureClients</span><span class="p">(</span><span class="n">clientBuilder</span> <span class="p">=&gt;</span>
<span class="p">{</span>
  <span class="n">clientBuilder</span><span class="p">.</span><span class="nf">AddBlobServiceClient</span><span class="p">(</span><span class="k">new</span> <span class="nf">Uri</span><span class="p">(</span><span class="s">"http://127.0.0.1:10000/devstoreaccount1"</span><span class="p">));</span>
  <span class="n">clientBuilder</span><span class="p">.</span><span class="nf">UseCredential</span><span class="p">(</span><span class="k">new</span> <span class="nf">DefaultAzureCredential</span><span class="p">());</span>
<span class="p">});</span>
<span class="kt">var</span> <span class="n">app</span> <span class="p">=</span> <span class="n">builder</span><span class="p">.</span><span class="nf">Build</span><span class="p">();</span>

<span class="n">app</span><span class="p">.</span><span class="nf">MapGet</span><span class="p">(</span><span class="s">"/blob"</span><span class="p">,</span> <span class="p">([</span><span class="n">FromServices</span><span class="p">]</span> <span class="n">BlobServiceClient</span> <span class="n">blobServiceClient</span><span class="p">)</span> <span class="p">=&gt;</span>
<span class="p">{</span>
  <span class="n">BlobContainerClient</span> <span class="n">blobContainerClient</span> <span class="p">=</span> <span class="n">blobServiceClient</span><span class="p">.</span><span class="nf">GetBlobContainerClient</span><span class="p">(</span><span class="s">"demo"</span><span class="p">);</span>
  <span class="n">blobContainerClient</span><span class="p">.</span><span class="nf">CreateIfNotExists</span><span class="p">();</span>

  <span class="kt">var</span> <span class="n">blob</span> <span class="p">=</span> <span class="n">blobContainerClient</span><span class="p">.</span><span class="nf">GetBlobs</span><span class="p">()?.</span><span class="nf">FirstOrDefault</span><span class="p">();</span>
  <span class="k">return</span> <span class="n">blob</span> <span class="k">is</span> <span class="k">null</span> <span class="p">?</span> <span class="n">Results</span><span class="p">.</span><span class="nf">Ok</span><span class="p">(</span><span class="s">"No blob item available"</span><span class="p">)</span> <span class="p">:</span> <span class="n">Results</span><span class="p">.</span><span class="nf">Ok</span><span class="p">(</span><span class="n">blob</span><span class="p">);</span>
<span class="p">});</span>
<span class="n">app</span><span class="p">.</span><span class="nf">MapGet</span><span class="p">(</span><span class="s">"/"</span><span class="p">,</span> <span class="p">()</span> <span class="p">=&gt;</span> <span class="s">"Hello World!"</span><span class="p">);</span>

<span class="n">app</span><span class="p">.</span><span class="nf">Run</span><span class="p">();</span>

</code></pre></div></div>

<p>Alright! Let’s try to run it.</p>

<p>When we type <code class="language-plaintext highlighter-rouge">dotnet run</code>, our application should start normally. Navigating to the homepage of the application will still give you <code class="language-plaintext highlighter-rouge">Hello World!</code> (unless you removed the endpoint, of course). However, when we navigate to our <code class="language-plaintext highlighter-rouge">/blob</code> endpoint, we are getting an exception:</p>

<div class="language-sh highlighter-rouge"><div class="highlight"><pre class="highlight"><code>fail: Microsoft.AspNetCore.Diagnostics.DeveloperExceptionPageMiddleware[1]
      An unhandled exception has occurred <span class="k">while </span>executing the request.
      System.ArgumentException: Cannot use TokenCredential without HTTPS.
</code></pre></div></div>

<p>The error message is crystal clear, we cannot use the <code class="language-plaintext highlighter-rouge">DefaultAzureCredential</code> (which is a <code class="language-plaintext highlighter-rouge">TokenCredential</code>) without using HTTPS!</p>

<h2 id="azurite-and-https">Azurite and HTTPS</h2>

<p>In order to properly connect Azurite with our Azure SDK and the Azure Storage Explorer, we’ll need to switch Azurite to HTTPS. To use HTTPS we are going to need a TLS certificate.</p>

<p>So far we can still follow along with <a href="https://learn.microsoft.com/en-us/azure/storage/common/storage-use-azurite?tabs=visual-studio%2Cblob-storage#connect-to-azurite-with-sdks-and-tools">Microsoft’s documentation on how to connect Azurite with the SDK</a>.</p>

<p>There are two steps we need to take in order to let Azurite play nice with the <code class="language-plaintext highlighter-rouge">DefaultAzureCredential</code>:</p>

<ul>
  <li>Enable OAuth authentication for Azurite via the –oauth switch. To learn more, see OAuth configuration.</li>
  <li>Enable HTTPS by using a self-signed certificate via the –cert and –key/–pwd options.</li>
</ul>

<p><a href="https://github.com/Azure/Azurite/blob/main/README.md#https-setup">Microsoft’s excellent documentation on Github</a> shows how to generate a self-signed certificate for this purpose. Let’s follow along.</p>

<p>Since I’m on WSL2 (Ubuntu), I’m going to use <a href="https://docs.openssl.org/master/man1/openssl-cmds/">OpenSSL</a> for generating my certificate. You can use anything else if you wish. <code class="language-plaintext highlighter-rouge">mkcert</code> is also covered by Microsoft’s instructions.</p>

<blockquote>
  <p>In Microsoft’s documentation they’ll refer to <code class="language-plaintext highlighter-rouge">mkcert</code>. This is fine as long as you’re on a host machine where you can easily trust the root certificate authority. <code class="language-plaintext highlighter-rouge">mkcert</code> only generates leaf certificates. If we intend to trust our certificate in a containerized application later on, it will be quite cumbersome to do so. Hence my choice of <code class="language-plaintext highlighter-rouge">OpenSSL</code>.</p>
</blockquote>

<p>The next steps assume you’ve installed and/or can interact with <code class="language-plaintext highlighter-rouge">openssl</code>.</p>

<p>In our project’s root directory (<code class="language-plaintext highlighter-rouge">~/azure-demo</code>), let’s create a folder called <code class="language-plaintext highlighter-rouge">certs</code> and generate a certificate for our Azurite endpoint. With <code class="language-plaintext highlighter-rouge">openssl</code> we can use the following command: <code class="language-plaintext highlighter-rouge">openssl req -newkey rsa:2048 -x509 -nodes -keyout key.pem -new -out cert.pem -sha256 -days 365 -addext "subjectAltName=IP:127.0.0.1" -subj "/C=CO/ST=ST/L=LO/O=OR/OU=OU/CN=CN"</code>.</p>

<p>This will give us two files:</p>

<ul>
  <li>cert.pem</li>
  <li>key.pem</li>
</ul>

<p>Now we can use these files in our Docker Compose file for Azurite to use.</p>

<p>Let’s update our Compose file with a volume bind to the <code class="language-plaintext highlighter-rouge">certs</code> folder previously created.
Don’t forget to update the parameters for the <code class="language-plaintext highlighter-rouge">azurite</code> launch command.</p>

<p>Our Compose file now looks like this:</p>

<div class="language-yml highlighter-rouge"><div class="highlight"><pre class="highlight"><code><span class="na">services</span><span class="pi">:</span>
  <span class="na">azurite</span><span class="pi">:</span>
    <span class="na">container_name</span><span class="pi">:</span> <span class="s">azurite</span>
    <span class="na">image</span><span class="pi">:</span> <span class="s">mcr.microsoft.com/azure-storage/azurite</span>
    <span class="na">ports</span><span class="pi">:</span>
      <span class="pi">-</span> <span class="s">10000:10000</span>
      <span class="pi">-</span> <span class="s">10001:10001</span>
      <span class="pi">-</span> <span class="s">10002:10002</span>
    <span class="na">volumes</span><span class="pi">:</span>
      <span class="pi">-</span> <span class="s">./certs:/certs</span>
      <span class="pi">-</span> <span class="s">blobs:/data</span>
    <span class="na">command</span><span class="pi">:</span>
      <span class="pi">[</span>
        <span class="s2">"</span><span class="s">azurite"</span><span class="pi">,</span>
        <span class="s2">"</span><span class="s">--blobHost"</span><span class="pi">,</span>
        <span class="s2">"</span><span class="s">0.0.0.0"</span><span class="pi">,</span>
        <span class="s2">"</span><span class="s">--queueHost"</span><span class="pi">,</span>
        <span class="s2">"</span><span class="s">0.0.0.0"</span><span class="pi">,</span>
        <span class="s2">"</span><span class="s">--tableHost"</span><span class="pi">,</span>
        <span class="s2">"</span><span class="s">0.0.0.0"</span><span class="pi">,</span>
        <span class="s2">"</span><span class="s">--cert"</span><span class="pi">,</span>
        <span class="s2">"</span><span class="s">/certs/cert.pem"</span><span class="pi">,</span>
        <span class="s2">"</span><span class="s">--key"</span><span class="pi">,</span>
        <span class="s2">"</span><span class="s">/certs/key.pem"</span><span class="pi">,</span>
        <span class="s2">"</span><span class="s">--oauth"</span><span class="pi">,</span>
        <span class="s2">"</span><span class="s">basic"</span><span class="pi">,</span>
        <span class="s2">"</span><span class="s">--location"</span><span class="pi">,</span>
        <span class="s2">"</span><span class="s">/data"</span><span class="pi">,</span>
      <span class="pi">]</span>

<span class="na">volumes</span><span class="pi">:</span>
  <span class="na">blobs</span><span class="pi">:</span>
</code></pre></div></div>

<p>As you can see we’ve added quite a few parameters to the Azurite launch command. First of all, we have bound the certificate and key for the TLS certificate to Azurite through the <code class="language-plaintext highlighter-rouge">--cert</code> and <code class="language-plaintext highlighter-rouge">--key</code> parameters. Additionally, if we want to make use of the <code class="language-plaintext highlighter-rouge">DefaultAzureCredential</code> mechanism, we also need to enable <a href="https://learn.microsoft.com/en-us/azure/storage/common/storage-use-azurite?tabs=visual-studio%2Cblob-storage#oauth-configuration">OAuth</a>.</p>

<p>Secondly, since we’re using a Docker container we will need the application te able to expose the certificate. If we simply let Azurite bind itself to <code class="language-plaintext highlighter-rouge">127.0.0.1</code>, we will not be able to access the certificate details from outside the container (for a handshake, for instance). To support this, we let Azurite listen on every IP address by specifying the <code class="language-plaintext highlighter-rouge">--blobHost</code> parameter (and queue and table, but those are not relevant for this blog post). For more information about the listening host configuration, check out <a href="https://github.com/Azure/Azurite/blob/main/README.md#listening-host-configuration">the documentation</a>.</p>

<p>And lastly, once we override the default Azurite launch command we need to make sure to point to the proper persistence location for data storage. In our case that’s the <code class="language-plaintext highlighter-rouge">/data</code> folder since that’s what we bind the <code class="language-plaintext highlighter-rouge">blobs</code> volume to.</p>

<p>Run <code class="language-plaintext highlighter-rouge">docker compose up -d</code> to recreate Azurite with these new parameters.</p>

<p>Verify Azurite now runs on HTTPS in your container logs:</p>

<div class="language-plaintext highlighter-rouge"><div class="highlight"><pre class="highlight"><code>Azurite Blob service is starting at https://0.0.0.0:10000
Azurite Blob service is successfully listening at https://0.0.0.0:10000
Azurite Queue service is starting at https://0.0.0.0:10001
Azurite Queue service is successfully listening at https://0.0.0.0:10001
Azurite Table service is starting at https://0.0.0.0:10002
Azurite Table service is successfully listening at https://0.0.0.0:10002
</code></pre></div></div>

<h2 id="verifying-the-connection">Verifying the connection</h2>

<p>Now that we’ve set up Azurite to accept HTTPS connections using our self-signed certificate, let’s update our demo application to reflect this in the storage URL.</p>

<p>Open the <code class="language-plaintext highlighter-rouge">Program.cs</code> file and change the protocol of the storage URL to <code class="language-plaintext highlighter-rouge">https</code>:</p>

<div class="language-csharp highlighter-rouge"><div class="highlight"><pre class="highlight"><code><span class="n">clientBuilder</span><span class="p">.</span><span class="nf">AddBlobServiceClient</span><span class="p">(</span><span class="k">new</span> <span class="nf">Uri</span><span class="p">(</span><span class="s">"https://127.0.0.1:10000/devstoreaccount1"</span><span class="p">));</span>
</code></pre></div></div>

<p>Keep in mind that if you’re trying to interact with the TLS certificate on <em>your</em> machine you’ll need to trust the certificate. You can trust the self-signed newly created Azurite certificate on WSL2/Linux by following these steps:</p>

<div class="language-sh highlighter-rouge"><div class="highlight"><pre class="highlight"><code><span class="nb">sudo cp</span> ~/azurite-demo/certs/cert.pem /usr/local/share/ca-certificates/cert.crt
<span class="nb">sudo </span>update-ca-certificates
</code></pre></div></div>

<blockquote>
  <p>On Linux, the file extension of the certificate located in the <code class="language-plaintext highlighter-rouge">ca-certificates</code> directory has to be <code class="language-plaintext highlighter-rouge">.crt</code>.</p>
</blockquote>

<p>Please refer to <a href="https://github.com/Azure/Azurite/blob/main/README.md#https-setup">Microsoft’s documentation</a> for more details.</p>

<p>Personally I’m using the Azure Storage Explorer on Windows, whilst all the other things live in WSL2. In this case I copy over self-signed <code class="language-plaintext highlighter-rouge">cert.pem</code> file. I then trust it on my Windows machine by running <code class="language-plaintext highlighter-rouge">certutil –addstore -enterprise –f "Root" cert.pem</code>.</p>

<blockquote>
  <p>You need an elevated terminal to execute the <code class="language-plaintext highlighter-rouge">certutil</code> command.</p>
</blockquote>

<p>Before we test our .NET application, let’s go to the Azure Storage Explorer.</p>

<p>If you try to open the Azurite emulator node now, you’ll receive an error. We’re now using Azurite over HTTPS so we’ll need to tell the Azure Storage Explorer to accept the TLS certificate and use that for the handshake.</p>

<p>Here’s an excerpt on how to configure the Azure Storage Explorer from Microsoft’s documentation:</p>

<div class="language-plaintext highlighter-rouge"><div class="highlight"><pre class="highlight"><code>1. Connect to Azurite using HTTPS
By default, Storage Explorer doesn't open an HTTPS endpoint that uses a self-signed certificate. If you're running Azurite with HTTPS, you're likely using a self-signed certificate. In Storage Explorer, import SSL certificates via the Edit -&gt; SSL Certificates -&gt; Import Certificates dialog.

2. Import Certificate to Storage Explorer
  a. Find the certificate on your local machine.
  b. In Storage Explorer, go to Edit -&gt; SSL Certificates -&gt; Import Certificates and import your certificate.

If you don't import a certificate, you get an error: unable to verify the first certificate or self signed certificate in chain

3. Add Azurite via HTTPS connection string
Follow these steps to add Azurite HTTPS to Storage Explorer:

  a. Select Toggle Explorer
  b. Select Local &amp; Attached
  c. Right-click on Storage Accounts and select Connect to Azure Storage.
  d. Select Use a connection string
  e. Select Next.
  f. Enter a value in the Display name field.
  g. Enter the HTTPS connection string from the previous section of this document
  h. Select Next
  i. Select Connect
</code></pre></div></div>

<p>In-depth information on how to do this can be found on <a href="https://learn.microsoft.com/en-us/azure/storage/common/storage-use-azurite?tabs=visual-studio%2Cblob-storage#connect-to-azurite-with-sdks-and-tools">Microsoft’s documentation on connecting Azurite with SDKs and tools</a>.</p>

<p>The connection string for the HTTPS Blob Storage is:</p>

<div class="language-plaintext highlighter-rouge"><div class="highlight"><pre class="highlight"><code>DefaultEndpointsProtocol=https;AccountName=devstoreaccount1;AccountKey=Eby8vdM02xNOcqFlqUwJPLlmEtlCDXJ1OUzFT50uSRZ6IFsuFq2UVErCz4I6tq/K1SZFPTOtr/KBHBeksoGMGw==;BlobEndpoint=https://127.0.0.1:10000/devstoreaccount1;
</code></pre></div></div>

<blockquote>
  <p>If you receive a certificate error, ensure both the Certificate Authority (CA) as well as the self-signed certificate are trusted on your machine.</p>
</blockquote>

<p>Once you’re connected, ensure there’s an image in the <code class="language-plaintext highlighter-rouge">demo</code> container.</p>

<p>The Azure Storage Explorer will look something like this. Notice the <code class="language-plaintext highlighter-rouge">Properties</code> in the lower left corner:
<img src="/assets/images/2024-08-07-azurite-with-https-in-docker/azure-storage-explorer-https.png" alt="Azure Storage Explorer with HTTPS" /></p>

<p>Now that we know our Azurite is working properly with HTTPS, let’s fire up our .NET application (<code class="language-plaintext highlighter-rouge">dotnet run</code> in the <code class="language-plaintext highlighter-rouge">~/azurite-demo/demo-app</code> directory) and navigate to the <code class="language-plaintext highlighter-rouge">/blob</code> endpoint.</p>

<p>You should see valid output returned by an HTTP 200 OK status code, similar to:
<img src="/assets/images/2024-08-07-azurite-with-https-in-docker/dotnet-succesfully-https-azurite.png" alt=".NET application calls Azurite through HTTPS" /></p>

<h2 id="almost-there">Almost there</h2>

<p>Very nice! You’ve made it this far.</p>

<p>We can now let our .NET application connect to Azurite running in Docker using HTTPS with a self-signed certificated created by us. Additionally, we’re capable of interacting with the Azurite container from our host machine through the sharing of the self-signed certificate.</p>

<p>In the next part we are going to containerize our .NET application. Since we’re no longer running the .NET application from a host, we will also make sure we can trust our self-signed certificate in our Docker container. If you have no intentions of containerizing your application for development purposes and do not want to follow along with our deployment to Azure, you can stop reading here.</p>

<p>Though of course the fun <em>really</em> only starts from part 4 onwards! 😉</p>

<p>Continue to <a href="https://blog.alexschouls.nl/azure/2024/08/07/azurite-with-https-in-docker-part-4.html">part 4 here</a>.</p>]]></content><author><name></name></author><category term="azure" /><summary type="html"><![CDATA[Introduction]]></summary></entry><entry><title type="html">Accessing Azure Storage services without storing secrets using Azurite, Docker, HTTPS and Azure - Part 4</title><link href="/azure/2024/08/07/azurite-with-https-in-docker-part-4.html" rel="alternate" type="text/html" title="Accessing Azure Storage services without storing secrets using Azurite, Docker, HTTPS and Azure - Part 4" /><published>2024-08-07T13:00:00+00:00</published><updated>2024-08-07T13:00:00+00:00</updated><id>/azure/2024/08/07/azurite-with-https-in-docker-part-4</id><content type="html" xml:base="/azure/2024/08/07/azurite-with-https-in-docker-part-4.html"><![CDATA[<h2 id="introduction">Introduction</h2>

<p>Welcome to part 4 of this blog series where we uncover how Azurite can emulate Azure Storage services using Docker, HTTPS and the DefaultAzureCredential!</p>

<p>In the previous parts we’ve covered setting up Azurite as a Docker container, setting up a sample .NET application to interact with the Azure Storage using the Azure SDKs and setting up the DefaultAzureCredential to simplify Azure access in code.</p>

<p>You can read the previous parts here:</p>

<ul>
  <li><a href="https://blog.alexschouls.nl/azure/2024/08/07/azurite-with-https-in-docker-part-1.html">Part 1</a></li>
  <li><a href="https://blog.alexschouls.nl/azure/2024/08/07/azurite-with-https-in-docker-part-2.html">Part 2</a></li>
  <li><a href="https://blog.alexschouls.nl/azure/2024/08/07/azurite-with-https-in-docker-part-3.html">Part 3</a></li>
</ul>

<p>In this part of the series we will focus on containerizing our application and allowing communication between our Azurite container and our .NET application’s container.</p>

<h2 id="containerizing-the-application">Containerizing the application</h2>

<p>We will start by containerizing our sample .NET application. We’re going to create a multi-stage Dockerfile to optimize the image the application will run on.</p>

<p>If you have been following along with another stack or programming language, you can just focus on the changes we do to the Dockerfile later on, don’t worry about specific .NET things here.</p>

<p>Let’s head over to our project root folder (<code class="language-plaintext highlighter-rouge">~/azurite-demo</code>) and create a Dockerfile by running <code class="language-plaintext highlighter-rouge">touch Dockerfile</code>.</p>

<blockquote>
  <p>If you prefer to use Visual Studio/dotnet’s generation of a Dockerfile, that’s perfectly fine as well.</p>
</blockquote>

<p>First up is creating a build stage where we can use the .NET SDK to build and publish our application. We’ll stick to a rather standard approach for this:</p>

<div class="language-Dockerfile highlighter-rouge"><div class="highlight"><pre class="highlight"><code><span class="k">FROM</span><span class="w"> </span><span class="s">mcr.microsoft.com/dotnet/sdk:8.0</span><span class="w"> </span><span class="k">AS</span><span class="w"> </span><span class="s">build-env</span>
<span class="k">WORKDIR</span><span class="s"> /app</span>

<span class="k">COPY</span><span class="s"> ./demo-app ./</span>
<span class="k">RUN </span>dotnet restore
<span class="k">RUN </span>dotnet publish <span class="nt">--no-restore</span> <span class="nt">-c</span> Release <span class="nt">-o</span> /publish
</code></pre></div></div>

<p>A stage called <code class="language-plaintext highlighter-rouge">build-env</code> will build and publish our application after copying the necessary source files into the Docker container.</p>

<p>The next stage will be the runtime stage, which will be responsible for running our application by using a slimmed-down image without the SDK.</p>

<blockquote>
  <p>Interested in more information about multi-stage builds? Check out <a href="https://docs.docker.com/build/building/multi-stage/">Docker’s documentation</a>.</p>
</blockquote>

<div class="language-Dockerfile highlighter-rouge"><div class="highlight"><pre class="highlight"><code><span class="k">FROM</span><span class="s"> mcr.microsoft.com/dotnet/aspnet:8.0</span>

<span class="k">WORKDIR</span><span class="s"> /app</span>
<span class="k">COPY</span><span class="s"> --from=build-env /publish .</span>

<span class="k">ENTRYPOINT</span><span class="s"> ["dotnet", "demo-app.dll"]</span>
</code></pre></div></div>

<p>Your entire Dockerfile should now look like this:</p>

<div class="language-Dockerfile highlighter-rouge"><div class="highlight"><pre class="highlight"><code><span class="k">FROM</span><span class="w"> </span><span class="s">mcr.microsoft.com/dotnet/sdk:8.0</span><span class="w"> </span><span class="k">AS</span><span class="w"> </span><span class="s">build-env</span>
<span class="k">WORKDIR</span><span class="s"> /app</span>

<span class="k">COPY</span><span class="s"> ./demo-app ./</span>
<span class="k">RUN </span>dotnet restore
<span class="k">RUN </span>dotnet publish <span class="nt">--no-restore</span> <span class="nt">-c</span> Release <span class="nt">-o</span> /publish

<span class="k">FROM</span><span class="s"> mcr.microsoft.com/dotnet/aspnet:8.0</span>

<span class="k">WORKDIR</span><span class="s"> /app</span>
<span class="k">COPY</span><span class="s"> --from=build-env /publish .</span>

<span class="k">ENTRYPOINT</span><span class="s"> ["dotnet", "demo-app.dll"]</span>
</code></pre></div></div>

<p>Now that we have our image ready for use, let’s add it to our Compose file. Navigate to <code class="language-plaintext highlighter-rouge">~/azure-demo/compose.yaml</code> and add the image to the file like so:</p>

<div class="language-yml highlighter-rouge"><div class="highlight"><pre class="highlight"><code><span class="na">demo_app</span><span class="pi">:</span>
  <span class="na">container_name</span><span class="pi">:</span> <span class="s">demo-app</span>
  <span class="na">build</span><span class="pi">:</span>
    <span class="na">context</span><span class="pi">:</span> <span class="s">.</span>
    <span class="na">dockerfile</span><span class="pi">:</span> <span class="s">Dockerfile</span>
  <span class="na">ports</span><span class="pi">:</span>
    <span class="pi">-</span> <span class="m">8080</span>
</code></pre></div></div>

<p>This Compose service will start a container using our Dockerfile on a random available host port binding to the container’s port of <code class="language-plaintext highlighter-rouge">8080</code>.</p>

<p>Run <code class="language-plaintext highlighter-rouge">docker compose up -d</code> to run the container.</p>

<p>Navigate to the exposed port (e.g. http://localhost:56659/) and verify you see the <code class="language-plaintext highlighter-rouge">Hello World!</code> output from the root endpoint:
<img src="/assets/images/2024-08-07-azurite-with-https-in-docker/containerized-hello-world.png" alt="containerized .NET application" /></p>

<p>Now let’s try the <code class="language-plaintext highlighter-rouge">/blob</code> endpoint. When we open that endpoint, we can see (a lot) of errors in our Docker logs. If we scroll through those errors we see something like this:</p>

<div class="language-plaintext highlighter-rouge"><div class="highlight"><pre class="highlight"><code>CredentialUnavailableException: DefaultAzureCredential failed to retrieve a token from the included credentials. See the troubleshooting guide for more information. https://aka.ms/azsdk/net/identity/defaultazurecredential/troubleshoot
- EnvironmentCredential authentication unavailable. Environment variables are not fully configured. See the troubleshooting guide for more information. https://aka.ms/azsdk/net/identity/environmentcredential/troubleshoot
- WorkloadIdentityCredential authentication unavailable. The workload options are not fully configured. See the troubleshooting guide for more information. https://aka.ms/azsdk/net/identity/workloadidentitycredential/troubleshoot
- ManagedIdentityCredential authentication unavailable. No response received from the managed identity endpoint.
- Visual Studio Token provider can't be accessed at /root/.IdentityService/AzureServiceAuth/tokenprovider.json
- Azure CLI not installed
- PowerShell is not installed.
- Azure Developer CLI could not be found.
</code></pre></div></div>

<p>Our <code class="language-plaintext highlighter-rouge">DefaultAzureCredential</code> can’t find a way to authenticate the container with Azure.</p>

<h2 id="connecting-our-container-to-azure">Connecting our container to Azure</h2>

<p>As described in <a href="https://blog.alexschouls.nl/azure/2024/08/07/azurite-with-https-in-docker-part-3.html">Part 3</a>, due to the nature of the <code class="language-plaintext highlighter-rouge">DefaultAzureCredential</code> mechanism, we will need a way to authenticate to Azure. There are several ways to do so (you can view the diagram in part 3).</p>

<p>The easiest way to do so through our Docker container is by setting environment variables.</p>

<p>There are several environment variables that can be set in order to authenticate to Azure.</p>

<p>For our purposes, the easiest way is by creating a service principal in Microsoft Entra ID by running the following command: <code class="language-plaintext highlighter-rouge">az ad sp create-for-rbac -n azurite-demo</code></p>

<p>Your should receive output similar to:</p>

<div class="language-json highlighter-rouge"><div class="highlight"><pre class="highlight"><code><span class="p">{</span><span class="w">
  </span><span class="nl">"appId"</span><span class="p">:</span><span class="w"> </span><span class="s2">"app-id-guid"</span><span class="p">,</span><span class="w">
  </span><span class="nl">"displayName"</span><span class="p">:</span><span class="w"> </span><span class="s2">"azurite-demo"</span><span class="p">,</span><span class="w">
  </span><span class="nl">"password"</span><span class="p">:</span><span class="w"> </span><span class="s2">"generated-password"</span><span class="p">,</span><span class="w">
  </span><span class="nl">"tenant"</span><span class="p">:</span><span class="w"> </span><span class="s2">"tenant-id-guid"</span><span class="w">
</span><span class="p">}</span><span class="w">
</span></code></pre></div></div>

<p>Let’s create a new file in our project root <code class="language-plaintext highlighter-rouge">~/azurite-demo</code> called <code class="language-plaintext highlighter-rouge">azure.env</code>. Run <code class="language-plaintext highlighter-rouge">touch azure.env</code>.</p>

<blockquote>
  <p>If you’re using a version control system, make sure you do not commit this file. Never share this environment file with someone else as it can hold sensitive information.</p>
</blockquote>

<p>Open up the file in your favorite editor and add the following code:</p>

<div class="language-plaintext highlighter-rouge"><div class="highlight"><pre class="highlight"><code>AZURE_TENANT_ID=tenant-id-guid
AZURE_CLIENT_ID=app-id-guid
AZURE_CLIENT_SECRET=generated-password
</code></pre></div></div>

<p>Replace <code class="language-plaintext highlighter-rouge">tenant-id-guid</code> with your Tenant ID, <code class="language-plaintext highlighter-rouge">app-id-guid</code> with your App ID and <code class="language-plaintext highlighter-rouge">generated-password</code> with your password.</p>

<blockquote>
  <p>Note that <code class="language-plaintext highlighter-rouge">appId</code> in the JSON output is also referred to as the <code class="language-plaintext highlighter-rouge">Client ID</code> and the <code class="language-plaintext highlighter-rouge">password</code> is also called the <code class="language-plaintext highlighter-rouge">Client secret</code>.</p>
</blockquote>

<p>For more information on the available environment variables and the options to configure the <code class="language-plaintext highlighter-rouge">DefaultAzureCredential</code> mechanism, view <a href="https://github.com/Azure/azure-sdk-for-go/wiki/Set-up-Your-Environment-for-Authentication#configure--defaultazurecredential">Microsoft’s documentation on the matter</a>.</p>

<h2 id="updating-the-compose-file">Updating the Compose file</h2>

<p>Now that we’ve got our file with a way to authenticate to Azure, let’s update our Compose file to actually use this.</p>

<p>In our Compose file (<code class="language-plaintext highlighter-rouge">~/azurite-demo/compose.yaml</code>), at our <code class="language-plaintext highlighter-rouge">demo-app</code> service, let’s add the following:</p>

<div class="language-yml highlighter-rouge"><div class="highlight"><pre class="highlight"><code><span class="na">env_file</span><span class="pi">:</span>
  <span class="pi">-</span> <span class="s">azure.env</span>
</code></pre></div></div>

<p>Resulting in the entire <code class="language-plaintext highlighter-rouge">demo-app</code> service to look something like this:</p>

<div class="language-yml highlighter-rouge"><div class="highlight"><pre class="highlight"><code><span class="na">demo_app</span><span class="pi">:</span>
  <span class="na">container_name</span><span class="pi">:</span> <span class="s">demo-app</span>
  <span class="na">build</span><span class="pi">:</span>
    <span class="na">context</span><span class="pi">:</span> <span class="s">.</span>
    <span class="na">dockerfile</span><span class="pi">:</span> <span class="s">Dockerfile</span>
  <span class="na">env_file</span><span class="pi">:</span>
    <span class="pi">-</span> <span class="s">azure.env</span>
  <span class="na">ports</span><span class="pi">:</span>
    <span class="pi">-</span> <span class="m">8080</span>
</code></pre></div></div>

<p>Be sure to run <code class="language-plaintext highlighter-rouge">docker compose up -d</code> to let the environment variables take effect.</p>

<p>Let’s try to run it! Go to the <code class="language-plaintext highlighter-rouge">/blob</code> endpoint of the Docker container. Again we’l see a lot of errors in our container logs…</p>

<p>If we scroll through the errors, eventually we come across this:</p>

<div class="language-plaintext highlighter-rouge"><div class="highlight"><pre class="highlight"><code>info: Azure.Core[18]
      Request [4976c2d9-39e7-43a2-8893-4d2d22cc2201] exception Azure.RequestFailedException: Connection refused (127.0.0.1:10000)
       ---&gt; System.Net.Http.HttpRequestException: Connection refused (127.0.0.1:10000)
       ---&gt; System.Net.Sockets.SocketException (111): Connection refused
</code></pre></div></div>

<h2 id="regenerating-our-self-signed-certificate">Regenerating our self-signed certificate</h2>

<p>In <a href="https://blog.alexschouls.nl/azure/2024/08/07/azurite-with-https-in-docker-part-3.html">Part 3</a> of this blog series, we have created a self-signed TLS certificate for our Azurite container so our machine could securely communicate with it. When we generated that certificate, we’ve done so for the IP address <code class="language-plaintext highlighter-rouge">127.0.0.1</code>. Due to how Docker’s networking is set up we can’t connect to our Azurite Docker container by this IP address: <code class="language-plaintext highlighter-rouge">127.0.0.1</code>. From the container’s point of view this would be their own loopback address. Not the place where Azurite is running.</p>

<p>The easiest way to fix this is to communicate with our Docker container using the container name. Docker automatically supports communication between containers by their name.</p>

<p>Before we update our code, we will create a new self-signed certificate for our container. We can remove our previously generated certificates from our <code class="language-plaintext highlighter-rouge">~/azurite-demo/certs</code> folder by running <code class="language-plaintext highlighter-rouge">rm ~/azurite-demo/certs/*.pem</code>. Now we’ll create a new self-signed certificate by running <code class="language-plaintext highlighter-rouge">openssl req -newkey rsa:2048 -x509 -nodes -keyout key.pem -new -out cert.pem -sha256 -days 365 -addext "subjectAltName=IP:127.0.0.1,DNS:azurite" -subj "/C=CO/ST=ST/L=LO/O=OR/OU=OU/CN=CN"</code>. This generates a certificate valid for the IP address <code class="language-plaintext highlighter-rouge">127.0.0.1</code> and the DNS name <code class="language-plaintext highlighter-rouge">azurite</code>.</p>

<p>Indeed, if we inspect the generated certificate you’ll see something along these lines:</p>

<div class="language-json highlighter-rouge"><div class="highlight"><pre class="highlight"><code><span class="p">{</span><span class="w">
  </span><span class="err">...</span><span class="w"> </span><span class="err">//</span><span class="w"> </span><span class="err">removed</span><span class="w"> </span><span class="err">for</span><span class="w"> </span><span class="err">brevity</span><span class="w">
  </span><span class="nl">"extensions"</span><span class="p">:</span><span class="w"> </span><span class="p">{</span><span class="w">
      </span><span class="nl">"subjectKeyIdentifier"</span><span class="p">:</span><span class="w"> </span><span class="s2">"5B:35:B5:AE:BF:DB:EA:D9:EC:8E:88:78:A2:9A:55:62:8F:BB:84:D7"</span><span class="p">,</span><span class="w">
      </span><span class="nl">"authorityKeyIdentifier"</span><span class="p">:</span><span class="w"> </span><span class="s2">"keyid:5B:35:B5:AE:BF:DB:EA:D9:EC:8E:88:78:A2:9A:55:62:8F:BB:84:D7</span><span class="se">\n</span><span class="s2">"</span><span class="p">,</span><span class="w">
      </span><span class="nl">"basicConstraints"</span><span class="p">:</span><span class="w"> </span><span class="s2">"CA:TRUE"</span><span class="p">,</span><span class="w">
      </span><span class="nl">"subjectAltName"</span><span class="p">:</span><span class="w"> </span><span class="s2">"IP Address:127.0.0.1, DNS:azurite"</span><span class="w">
  </span><span class="p">}</span><span class="w">
</span><span class="p">}</span><span class="w">
</span></code></pre></div></div>

<p>First off, we will clean up our stored certificates from the previous blog post. We can execute to following commands on Linux to reset the certificate store:</p>

<div class="language-sh highlighter-rouge"><div class="highlight"><pre class="highlight"><code><span class="nb">sudo rm</span> /usr/local/share/ca-certificates/<span class="k">*</span>
<span class="nb">sudo </span>update-ca-certificates <span class="nt">--fresh</span>
</code></pre></div></div>

<p>Once that’s done, we can trust our new certificate:</p>

<div class="language-sh highlighter-rouge"><div class="highlight"><pre class="highlight"><code><span class="nb">sudo cp</span> ~/azurite-demo/certs/cert.pem /usr/local/share/ca-certificates/cert.crt
<span class="nb">sudo </span>update-ca-certificates
</code></pre></div></div>

<p>And lastly, since we’ve updated our certificate we have to restart our Azurite container to accept the new file: <code class="language-plaintext highlighter-rouge">docker restart azurite</code>.</p>

<p>Let’s change our service URL. Go to our <code class="language-plaintext highlighter-rouge">Program.cs</code> class in <code class="language-plaintext highlighter-rouge">~/azurite-demo/demo-app</code>. Instead of <code class="language-plaintext highlighter-rouge">127.0.0.1</code>, we will use our Azurite’s container name: <code class="language-plaintext highlighter-rouge">azurite</code>.</p>

<p>Change your service URL to reflect this, like so:</p>

<div class="language-csharp highlighter-rouge"><div class="highlight"><pre class="highlight"><code><span class="n">builder</span><span class="p">.</span><span class="n">Services</span><span class="p">.</span><span class="nf">AddAzureClients</span><span class="p">(</span><span class="n">clientBuilder</span> <span class="p">=&gt;</span>
<span class="p">{</span>
  <span class="n">clientBuilder</span><span class="p">.</span><span class="nf">AddBlobServiceClient</span><span class="p">(</span><span class="k">new</span> <span class="nf">Uri</span><span class="p">(</span><span class="s">"https://azurite:10000/devstoreaccount1"</span><span class="p">));</span>
  <span class="n">clientBuilder</span><span class="p">.</span><span class="nf">UseCredential</span><span class="p">(</span><span class="k">new</span> <span class="nf">DefaultAzureCredential</span><span class="p">());</span>
<span class="p">});</span>
</code></pre></div></div>

<p>Alright! Let’s update our docker container by running <code class="language-plaintext highlighter-rouge">docker compose up -d --build</code> (we’ll use the <code class="language-plaintext highlighter-rouge">--build</code> flag to force our container to use a new image version).</p>

<p>Now we can navigate to our <code class="language-plaintext highlighter-rouge">/blob</code> endpoint. Let’s see what happens…</p>

<p>We’re getting exceptions <em>again</em>. Will this never end? Don’t worry though, it will.</p>

<p>If we take a look at our container logs, we can find an error like:</p>

<div class="language-plaintext highlighter-rouge"><div class="highlight"><pre class="highlight"><code>info: Azure.Core[18]
      Request [3eed15d1-0f09-42d3-b50e-aec55de2bcf1] exception Azure.RequestFailedException: The SSL connection could not be established, see inner exception.
       ---&gt; System.Net.Http.HttpRequestException: The SSL connection could not be established, see inner exception.
       ---&gt; System.Security.Authentication.AuthenticationException: The remote certificate is invalid according to the validation procedure: RemoteCertificateNameMismatch, RemoteCertificateChainErrors
</code></pre></div></div>

<blockquote>
  <p>Other SSL errors that can be caused by untrusted certificates are errors in the <code class="language-plaintext highlighter-rouge">PartialChain</code> or <code class="language-plaintext highlighter-rouge">UntrustedRoot</code> errors.</p>
</blockquote>

<p>This happens because our container does not trust the Azurite certificate. This certificate is self-signed after all and does not come from a trusted source.</p>

<h2 id="updating-the-dockerfile-to-support-our-certificate">Updating the Dockerfile to support our certificate</h2>

<p>In order to get the container to trust our certificate, we can update the Dockerfile.</p>

<p>Let’s head over to our previously created Dockerfile (<code class="language-plaintext highlighter-rouge">~/azurite-demo/Dockerfile</code>).</p>

<p>Since we’re interested in our container trusting the certificate when running, we’ll need to update the second stage (the runtime stage) of the Dockerfile.</p>

<p>We can copy our generated certificate into our image and tell Linux to trust it. Let’s add the code necessary to do so:</p>

<div class="language-Dockerfile highlighter-rouge"><div class="highlight"><pre class="highlight"><code><span class="k">WORKDIR</span><span class="s"> /certs</span>
<span class="k">COPY</span><span class="s"> ./certs/cert.pem .</span>
<span class="k">RUN </span><span class="nb">cp </span>cert.pem /usr/local/share/ca-certificates/cert.crt
<span class="k">RUN </span>update-ca-certificates
</code></pre></div></div>

<p>Your entire Dockerfile should now look like this:</p>

<div class="language-Dockerfile highlighter-rouge"><div class="highlight"><pre class="highlight"><code><span class="k">FROM</span><span class="w"> </span><span class="s">mcr.microsoft.com/dotnet/sdk:8.0</span><span class="w"> </span><span class="k">AS</span><span class="w"> </span><span class="s">build-env</span>
<span class="k">WORKDIR</span><span class="s"> /app</span>

<span class="k">COPY</span><span class="s"> ./demo-app ./</span>
<span class="k">RUN </span>dotnet restore
<span class="k">RUN </span>dotnet publish <span class="nt">--no-restore</span> <span class="nt">-c</span> Release <span class="nt">-o</span> /publish

<span class="k">FROM</span><span class="s"> mcr.microsoft.com/dotnet/aspnet:8.0</span>

<span class="k">WORKDIR</span><span class="s"> /certs</span>
<span class="k">COPY</span><span class="s"> ./certs/cert.pem .</span>
<span class="k">RUN </span><span class="nb">cp </span>cert.pem /usr/local/share/ca-certificates/cert.crt
<span class="k">RUN </span>update-ca-certificates

<span class="k">WORKDIR</span><span class="s"> /app</span>
<span class="k">COPY</span><span class="s"> --from=build-env /publish .</span>

<span class="k">ENTRYPOINT</span><span class="s"> ["dotnet", "demo-app.dll"]</span>
</code></pre></div></div>

<p>Okay! That should do the trick! Run <code class="language-plaintext highlighter-rouge">docker compose up -d --build</code> to rebuild our container with the new Dockerfile instructions.</p>

<p>Navigate to the <code class="language-plaintext highlighter-rouge">/blob</code> endpoint of the container’s URL and you should see your blob data (or a message you don’t have an item):
<img src="/assets/images/2024-08-07-azurite-with-https-in-docker/containerized-dotnet-succesfully-azurite.png" alt="successful azurite request" /></p>

<p>If you still encounter SSL errors in your container, make sure you’ve restarted the Azurite container (<code class="language-plaintext highlighter-rouge">docker restart azurite</code>) after you’ve updated the certificate with the new subject (<code class="language-plaintext highlighter-rouge">DNS:azurite</code>).</p>

<h2 id="next-steps">Next steps</h2>

<p>Alrighty then! Now we have both our application and Azurite running in containers and talking to each other!</p>

<p>Great! This also allows you to use the certificate on your host machine to inspect the data in the Azurite container using the Azure Service bus Explorer.</p>

<p>However, currently our Dockerfile always uses the certificates which is useless for an environment other than development. In the next part we’ll tidy up and optimize our Dockerfile as well as our code to use environment variables for the Azurite URL.</p>

<p>Continue to <a href="https://blog.alexschouls.nl/azure/2024/08/07/azurite-with-https-in-docker-part-5.html">part 5 here</a>.</p>]]></content><author><name></name></author><category term="azure" /><summary type="html"><![CDATA[Introduction]]></summary></entry><entry><title type="html">Accessing Azure Storage services without storing secrets using Azurite, Docker, HTTPS and Azure - Part 5</title><link href="/azure/2024/08/07/azurite-with-https-in-docker-part-5.html" rel="alternate" type="text/html" title="Accessing Azure Storage services without storing secrets using Azurite, Docker, HTTPS and Azure - Part 5" /><published>2024-08-07T13:00:00+00:00</published><updated>2024-08-07T13:00:00+00:00</updated><id>/azure/2024/08/07/azurite-with-https-in-docker-part-5</id><content type="html" xml:base="/azure/2024/08/07/azurite-with-https-in-docker-part-5.html"><![CDATA[<h2 id="introduction">Introduction</h2>

<p>Welcome to the 5th part of the blog series about setting up Azurite with a self-signed certificate in Docker.</p>

<p>In the previous parts we’ve assembled all the puzzle pieces necessary for communicating with Azurite over HTTPS through our containerized application.</p>

<p>In this part we will optimize our Dockerfile and code so this only becomes relevant for our development cycle, not our other environments.</p>

<p>You can read the previous parts here:</p>

<ul>
  <li><a href="https://blog.alexschouls.nl/azure/2024/08/07/azurite-with-https-in-docker-part-1.html">Part 1</a></li>
  <li><a href="https://blog.alexschouls.nl/azure/2024/08/07/azurite-with-https-in-docker-part-2.html">Part 2</a></li>
  <li><a href="https://blog.alexschouls.nl/azure/2024/08/07/azurite-with-https-in-docker-part-3.html">Part 3</a></li>
  <li><a href="https://blog.alexschouls.nl/azure/2024/08/07/azurite-with-https-in-docker-part-4.html">Part 4</a></li>
</ul>

<h2 id="using-environment-variables">Using environment variables</h2>

<p>Let’s start with moving our hard-coded service URL in our <code class="language-plaintext highlighter-rouge">~/azurite-demo/demo-app/Program.cs</code> file to the <code class="language-plaintext highlighter-rouge">appsettings.json</code> file.</p>

<p>I personally prefer to enter an empty string in my production appsettings and the actual value in my development settings where applicable so I get a reminder in case I forget a setting. Obviously this is completely up to you if you want to follow along.</p>

<p>Let’s open up our <code class="language-plaintext highlighter-rouge">appsettings.json</code> file and add the following JSON object:</p>

<div class="language-json highlighter-rouge"><div class="highlight"><pre class="highlight"><code><span class="nl">"Storage"</span><span class="p">:</span><span class="w"> </span><span class="p">{</span><span class="w">
  </span><span class="nl">"ServiceUri"</span><span class="p">:</span><span class="w"> </span><span class="s2">""</span><span class="w">
</span><span class="p">}</span><span class="w">
</span></code></pre></div></div>

<p>Then we’ll head over to our <code class="language-plaintext highlighter-rouge">appsettings.Development.json</code> file and add the same JSON but with the actual value for the Azurite URL now:</p>

<div class="language-json highlighter-rouge"><div class="highlight"><pre class="highlight"><code><span class="nl">"Storage"</span><span class="p">:</span><span class="w"> </span><span class="p">{</span><span class="w">
  </span><span class="nl">"ServiceUri"</span><span class="p">:</span><span class="w"> </span><span class="s2">"https://127.0.0.1:10000/devstoreaccount1"</span><span class="w">
</span><span class="p">}</span><span class="w">
</span></code></pre></div></div>

<blockquote>
  <p>Yes, we’re referring to <code class="language-plaintext highlighter-rouge">127.0.0.1</code> here, we’ll cover the Docker container name in a different environment variable later on.</p>
</blockquote>

<p>We’re not picking the <code class="language-plaintext highlighter-rouge">Storage</code> object with the <code class="language-plaintext highlighter-rouge">ServiceUri</code> randomly. These settings correspond with the <code class="language-plaintext highlighter-rouge">BlobServiceClient</code> constructor values as can be read in <a href="https://learn.microsoft.com/en-us/dotnet/azure/sdk/dependency-injection?tabs=web-app-builder#store-configuration-separately-from-code">Microsoft’s documentation</a>.</p>

<blockquote>
  <p>Note that if you <em>do</em> pick different values for your appsettings, the way we set up our <code class="language-plaintext highlighter-rouge">BlobServiceClient</code> next won’t work for you.</p>
</blockquote>

<p>Go to the <code class="language-plaintext highlighter-rouge">Program.cs</code> file and update the <code class="language-plaintext highlighter-rouge">AddBlobServiceClient</code> extension method:</p>

<div class="language-csharp highlighter-rouge"><div class="highlight"><pre class="highlight"><code><span class="n">clientBuilder</span><span class="p">.</span><span class="nf">AddBlobServiceClient</span><span class="p">(</span><span class="n">builder</span><span class="p">.</span><span class="n">Configuration</span><span class="p">.</span><span class="nf">GetSection</span><span class="p">(</span><span class="s">"Storage"</span><span class="p">));</span>
</code></pre></div></div>

<p>Since we’re using the JSON object of <code class="language-plaintext highlighter-rouge">Storage</code> with the <code class="language-plaintext highlighter-rouge">ServiceUri</code> property, we can simply tell the <code class="language-plaintext highlighter-rouge">AddBlobServiceClient</code> method to take this Configuration section. The Azure SDK will wire it up for us.</p>

<p>Run the application (<code class="language-plaintext highlighter-rouge">dotnet run</code>) and verify you still get a response from your <code class="language-plaintext highlighter-rouge">/blob</code> endpoint.</p>

<blockquote>
  <p>Run this on your machine, not through a Docker container.</p>
</blockquote>

<h2 id="setting-up-environment-variables-for-our-docker-container">Setting up environment variables for our Docker container</h2>

<p>Now that we’ve got our application ready to support different URLs based on appsettings, we can also add this to our containerized version of the application.</p>

<p>We have already done a similar thing for our Azure credentials using the <code class="language-plaintext highlighter-rouge">azure.env</code> file in <a href="https://blog.alexschouls.nl/azure/2024/08/07/azurite-with-https-in-docker-part-4.html">part 4</a> of this series.</p>

<p>Now let’s create a <code class="language-plaintext highlighter-rouge">app.env</code> file in the root directory of your project (<code class="language-plaintext highlighter-rouge">~/azurite-demo</code>) and add the storage URL appsetting.</p>

<blockquote>
  <p>Remember that if you’re on WSL2/Linux you should use <code class="language-plaintext highlighter-rouge">__</code> (double underscore) as a separater for nested settings as opposed to <code class="language-plaintext highlighter-rouge">:</code> on Windows machines.</p>
</blockquote>

<div class="language-plaintext highlighter-rouge"><div class="highlight"><pre class="highlight"><code>Storage__ServiceUri=https://azurite:10000/devstoreaccount1
</code></pre></div></div>

<p>After this we will update our Compose file (<code class="language-plaintext highlighter-rouge">~/azurite-demo/compose.yaml</code>) to read from this new environment file:</p>

<div class="language-yml highlighter-rouge"><div class="highlight"><pre class="highlight"><code><span class="na">demo_app</span><span class="pi">:</span>
  <span class="na">container_name</span><span class="pi">:</span> <span class="s">demo-app</span>
  <span class="na">build</span><span class="pi">:</span>
    <span class="na">context</span><span class="pi">:</span> <span class="s">.</span>
    <span class="na">dockerfile</span><span class="pi">:</span> <span class="s">Dockerfile</span>
  <span class="na">env_file</span><span class="pi">:</span>
    <span class="pi">-</span> <span class="s">azure.env</span>
    <span class="pi">-</span> <span class="s">app.env</span>
  <span class="na">ports</span><span class="pi">:</span>
    <span class="pi">-</span> <span class="m">8080</span>
</code></pre></div></div>

<p>Let’s run our applications: <code class="language-plaintext highlighter-rouge">docker compose up -d --build</code> and let’s navigate to the <code class="language-plaintext highlighter-rouge">/blob</code> endpoint of container’s URL. You should see your blob item.</p>

<h2 id="optimizing-our-dockerfile">Optimizing our Dockerfile</h2>

<p>Currently when we build our .NET application with our Dockerfile, it will always trust the certificate we’ve generated and self-signed for development purposes. Whilst this won’t hurt, it’s not optimal to execute this in any other environment than development. <em>Especially</em> when you’re using the same Dockerfile for automated builds to other environments, for instance using automated deployment pipelines (e.g. GitHub Actions).</p>

<p>We can use more <a href="https://docs.docker.com/build/building/multi-stage/">multi-stage magic</a> to make this happen only in situations where we want it. More specifically, by using targets.</p>

<p>Let’s open up our Dockerfile (<code class="language-plaintext highlighter-rouge">~/azurite-demo/Dockerfile</code>).</p>

<p>We’re going to change the stages a bit. First of all we’re going to add an alias to our second stage called <code class="language-plaintext highlighter-rouge">runtime</code>. To do so, add <code class="language-plaintext highlighter-rouge">AS runtime</code> after the second <code class="language-plaintext highlighter-rouge">FROM</code> statement:</p>

<div class="language-Dockerfile highlighter-rouge"><div class="highlight"><pre class="highlight"><code><span class="k">FROM</span><span class="w"> </span><span class="s">mcr.microsoft.com/dotnet/aspnet:8.0</span><span class="w"> </span><span class="k">AS</span><span class="w"> </span><span class="s">runtime</span>
</code></pre></div></div>

<p>Next, we’re going to make the <code class="language-plaintext highlighter-rouge">runtime</code> stage copy the files from the <code class="language-plaintext highlighter-rouge">build-env</code> stage to the <code class="language-plaintext highlighter-rouge">/app</code> directory. In other words, we’ll grab the two lines we have below the <code class="language-plaintext highlighter-rouge">RUN update-ca-certificates</code> statement and paste them below the <code class="language-plaintext highlighter-rouge">runtime</code> stage:</p>

<div class="language-Dockerfile highlighter-rouge"><div class="highlight"><pre class="highlight"><code><span class="k">FROM</span><span class="w"> </span><span class="s">mcr.microsoft.com/dotnet/aspnet:8.0</span><span class="w"> </span><span class="k">AS</span><span class="w"> </span><span class="s">runtime</span>

<span class="k">WORKDIR</span><span class="s"> /app</span>
<span class="k">COPY</span><span class="s"> --from=build-env /publish .</span>
</code></pre></div></div>

<p>Now we have a <code class="language-plaintext highlighter-rouge">runtime</code> stage available which has the slimmed down version of the .NET runtime, rather than the entire SDK and our .NET application’s published files available for reference.</p>

<p>Below these lines, we’ll create a new stage called <code class="language-plaintext highlighter-rouge">development</code>, based on the <code class="language-plaintext highlighter-rouge">runtime</code> stage like so:</p>

<div class="language-Dockerfile highlighter-rouge"><div class="highlight"><pre class="highlight"><code><span class="k">FROM</span><span class="w"> </span><span class="s">runtime</span><span class="w"> </span><span class="k">AS</span><span class="w"> </span><span class="s">development</span>
</code></pre></div></div>

<p>This stage will do the certificate work we’ve set-up previously, as well as switching to the <code class="language-plaintext highlighter-rouge">/app</code> directory later on and setting the <code class="language-plaintext highlighter-rouge">ENTRYPOINT</code> statement. It no longer needs to copy the files from the <code class="language-plaintext highlighter-rouge">/publish</code> directory from the other stage as we’re basing it off our <code class="language-plaintext highlighter-rouge">runtime</code> stage. Remove that code</p>

<p>Your <code class="language-plaintext highlighter-rouge">development</code> stage should then look like this:</p>

<div class="language-Dockerfile highlighter-rouge"><div class="highlight"><pre class="highlight"><code><span class="k">FROM</span><span class="w"> </span><span class="s">runtime</span><span class="w"> </span><span class="k">AS</span><span class="w"> </span><span class="s">development</span>

<span class="k">WORKDIR</span><span class="s"> /certs</span>
<span class="k">COPY</span><span class="s"> ./certs/cert.pem .</span>
<span class="k">RUN </span><span class="nb">cp </span>cert.pem /usr/local/share/ca-certificates/cert.crt
<span class="k">RUN </span>update-ca-certificates

<span class="k">WORKDIR</span><span class="s"> /app</span>
<span class="k">ENTRYPOINT</span><span class="s"> ["dotnet", "demo-app.dll"]</span>
</code></pre></div></div>

<p>Finally, below the <code class="language-plaintext highlighter-rouge">ENTRYPOINT</code> of the <code class="language-plaintext highlighter-rouge">development</code> stage, we’ll create a new unnamed stage also based off the <code class="language-plaintext highlighter-rouge">runtime</code> stage. This simply points to the <code class="language-plaintext highlighter-rouge">/app</code> directory and executes (the same) <code class="language-plaintext highlighter-rouge">ENTRYPOINT</code> statement as our <code class="language-plaintext highlighter-rouge">development</code> stage.</p>

<div class="language-Dockerfile highlighter-rouge"><div class="highlight"><pre class="highlight"><code><span class="k">FROM</span><span class="s"> runtime</span>

<span class="k">WORKDIR</span><span class="s"> /app</span>
<span class="k">ENTRYPOINT</span><span class="s"> ["dotnet", "demo-app.dll"]</span>
</code></pre></div></div>

<p>Your entire Dockerfile now looks like:</p>

<div class="language-Dockerfile highlighter-rouge"><div class="highlight"><pre class="highlight"><code><span class="k">FROM</span><span class="w"> </span><span class="s">mcr.microsoft.com/dotnet/sdk:8.0</span><span class="w"> </span><span class="k">AS</span><span class="w"> </span><span class="s">build-env</span>
<span class="k">WORKDIR</span><span class="s"> /app</span>

<span class="k">COPY</span><span class="s"> ./demo-app ./</span>
<span class="k">RUN </span>dotnet restore
<span class="k">RUN </span>dotnet publish <span class="nt">--no-restore</span> <span class="nt">-c</span> Release <span class="nt">-o</span> /publish

<span class="k">FROM</span><span class="w"> </span><span class="s">mcr.microsoft.com/dotnet/aspnet:8.0</span><span class="w"> </span><span class="k">AS</span><span class="w"> </span><span class="s">runtime</span>

<span class="k">WORKDIR</span><span class="s"> /app</span>
<span class="k">COPY</span><span class="s"> --from=build-env /publish .</span>

<span class="k">FROM</span><span class="w"> </span><span class="s">runtime</span><span class="w"> </span><span class="k">AS</span><span class="w"> </span><span class="s">development</span>

<span class="k">WORKDIR</span><span class="s"> /certs</span>
<span class="k">COPY</span><span class="s"> ./certs/cert.pem .</span>
<span class="k">RUN </span><span class="nb">cp </span>cert.pem /usr/local/share/ca-certificates/cert.crt
<span class="k">RUN </span>update-ca-certificates

<span class="k">WORKDIR</span><span class="s"> /app</span>
<span class="k">ENTRYPOINT</span><span class="s"> ["dotnet", "demo-app.dll"]</span>

<span class="k">FROM</span><span class="s"> runtime</span>

<span class="k">WORKDIR</span><span class="s"> /app</span>
<span class="k">ENTRYPOINT</span><span class="s"> ["dotnet", "demo-app.dll"]</span>
</code></pre></div></div>

<p>If we would now run our Compose services (<code class="language-plaintext highlighter-rouge">docker compose up -d --build</code>), you’ll see it will no longer import and trust the self-signed certificate (causing an HTTP 500 error when navigating to the <code class="language-plaintext highlighter-rouge">/blob</code> endpoint, by the way).</p>

<p>We can remedy this by updating our Compose file (<code class="language-plaintext highlighter-rouge">~/azurite-demo/compose.yaml</code>).</p>

<p>At our <code class="language-plaintext highlighter-rouge">demo_app</code> service, in the <code class="language-plaintext highlighter-rouge">build</code> property we can add the <code class="language-plaintext highlighter-rouge">target</code> property and set this to <code class="language-plaintext highlighter-rouge">development</code> like so:</p>

<div class="language-yml highlighter-rouge"><div class="highlight"><pre class="highlight"><code><span class="na">build</span><span class="pi">:</span>
  <span class="na">context</span><span class="pi">:</span> <span class="s">.</span>
  <span class="na">dockerfile</span><span class="pi">:</span> <span class="s">Dockerfile</span>
  <span class="na">target</span><span class="pi">:</span> <span class="s">development</span>
</code></pre></div></div>

<blockquote>
  <p>If you intend to use the same Compose file for deployments or for other environments, it might be a good idea to move this target to an environment variable.</p>
</blockquote>

<p>If we run our Compose services now (<code class="language-plaintext highlighter-rouge">docker compose up -d --build</code>), everything works like it used to do.</p>

<h2 id="next">Next</h2>

<p>Great! We now have an optimized Dockerfile with support from Compose to have the option to import and trust the self-signed certificate or not.</p>

<p>We also have updated our code to let the Blob Service Client be registered based on an app setting rather than a hardcoded URL.</p>

<p>In the next part we’ll deploy a real storage account in Azure, upload a blob to it and deploy our .NET application to Azure and allow it to read the file using managed identities and the <em>same</em> code as we’ve written all the way back in <a href="https://blog.alexschouls.nl/azure/2024/08/07/azurite-with-https-in-docker-part-3.html">part 3</a> - excluding the environment variables, but that was a minor change 😉!</p>

<p>If you want to clean up your local Docker files you can run <code class="language-plaintext highlighter-rouge">docker compose down --rmi all</code>. If you want to clean your entire Docker environment afterwards, you can run: <code class="language-plaintext highlighter-rouge">docker system prune -af &amp;&amp; docker volume prune -af &amp;&amp; docker builder prune -af</code>.</p>

<p>Continue to <a href="https://blog.alexschouls.nl/azure/2024/08/07/azurite-with-https-in-docker-part-6.html">part 6 here</a>.</p>]]></content><author><name></name></author><category term="azure" /><summary type="html"><![CDATA[Introduction]]></summary></entry><entry><title type="html">Accessing Azure Storage services without storing secrets using Azurite, Docker, HTTPS and Azure - Part 6</title><link href="/azure/2024/08/07/azurite-with-https-in-docker-part-6.html" rel="alternate" type="text/html" title="Accessing Azure Storage services without storing secrets using Azurite, Docker, HTTPS and Azure - Part 6" /><published>2024-08-07T13:00:00+00:00</published><updated>2024-08-07T13:00:00+00:00</updated><id>/azure/2024/08/07/azurite-with-https-in-docker-part-6</id><content type="html" xml:base="/azure/2024/08/07/azurite-with-https-in-docker-part-6.html"><![CDATA[<h2 id="introduction">Introduction</h2>

<p>Part 6! The final part of this <em>slightly</em> overblown series on how to use the DefaultAzureCredential with Azurite and Azure over HTTPS!</p>

<p>Welcome to this post and thank you for taking the time to read this series.</p>

<p>In this final part we’re going to set up the Azure resources for our blob storage, our .NET application and deploy our code. We will use managed identities to connect from our .NET application to Azure. All the while without storing any kind of access tokens or credentials in our code or environment variables (such as a connection string).</p>

<blockquote>
  <p>This part of the series requires you to have an Azure account with a valid subscription.</p>
</blockquote>

<p>You can read the previous parts here:</p>

<ul>
  <li><a href="https://blog.alexschouls.nl/azure/2024/08/07/azurite-with-https-in-docker-part-1.html">Part 1</a></li>
  <li><a href="https://blog.alexschouls.nl/azure/2024/08/07/azurite-with-https-in-docker-part-2.html">Part 2</a></li>
  <li><a href="https://blog.alexschouls.nl/azure/2024/08/07/azurite-with-https-in-docker-part-3.html">Part 3</a></li>
  <li><a href="https://blog.alexschouls.nl/azure/2024/08/07/azurite-with-https-in-docker-part-4.html">Part 4</a></li>
  <li><a href="https://blog.alexschouls.nl/azure/2024/08/07/azurite-with-https-in-docker-part-5.html">Part 5</a></li>
</ul>

<h2 id="setting-up-azure-resources">Setting up Azure resources</h2>

<p>Make sure you’re installed the <a href="https://learn.microsoft.com/en-us/cli/azure/install-azure-cli">Azure CLI</a>.</p>

<p>Log in to your Azure account by running <code class="language-plaintext highlighter-rouge">az login</code>. Don’t forget to select the right subscription after logging in (if applicable).</p>

<p>Next up we’ll create a resource group by running <code class="language-plaintext highlighter-rouge">az group create --location westeurope --name rg-azurite</code>.</p>

<blockquote>
  <p>If you want to create a resource group in a different location or with a different name, you’re of course free to do so.</p>
</blockquote>

<p>The rest of the resources will be created through <a href="https://learn.microsoft.com/en-us/azure/azure-resource-manager/bicep/overview?tabs=bicep">Bicep</a>. I highly recommend using Visual Studio Code with the <a href="https://marketplace.visualstudio.com/items?itemName=ms-azuretools.visualstudiobicep">Bicep extension</a> from Microsoft, this makes it a breeze to author Bicep files.</p>

<p>Create a new Bicep file in the root folder of your project called <code class="language-plaintext highlighter-rouge">main.bicep</code> (<code class="language-plaintext highlighter-rouge">~/azurite-demo/main.bicep</code>). Once created, we’ll add our Storage Account resource definition to it.</p>

<pre><code class="language-Bicep">resource storageAccount 'Microsoft.Storage/storageAccounts@2023-05-01' = {
  name: 'stazurite${uniqueString(resourceGroup().id)}'
  location: resourceGroup().location
  sku: {
    name: 'Standard_LRS'
  }
  kind: 'StorageV2'
}
</code></pre>

<p>Due to a storage account requiring a globally unique name, I prefer to append the hashed version of the resource group ID to it. If you prefer to use a different name, or different values for the SKU - that’s completely fine.</p>

<p>Next up, we’ll create the resource definitions for our .NET application. We’re going to use an <a href="https://learn.microsoft.com/en-us/azure/app-service/">Azure App Service</a> in this tutorial. You could also use an Azure Container Instance, or an Azure Container App if you so desire.</p>

<pre><code class="language-Bicep">resource demoAppPlan 'Microsoft.Web/serverfarms@2023-12-01' = {
  name: 'asp-demo-app-${uniqueString(resourceGroup().id)}'
  location: resourceGroup().location
  sku: {
    name: 'B1'
  }
  kind: 'linux'
  properties: {
    reserved: true
  }
}

resource demoApp 'Microsoft.Web/sites@2023-12-01' = {
  name: 'app-demo-app-${uniqueString(resourceGroup().id)}'
  location: resourceGroup().location
  identity: {
    type: 'SystemAssigned'
  }
  properties: {
    serverFarmId: demoAppPlan.id
    httpsOnly: true
    siteConfig: {
      linuxFxVersion: 'DOTNETCORE|8.0'
      appSettings: [
        {
          name: 'Storage__ServiceUri'
          value: storageAccount.properties.primaryEndpoints.blob
        }
      ]
    }
  }
}
</code></pre>

<p>I’m choosing a Linux app service plan on the B1 SKU. The web app itself will have a system-assigned identity enabled and our Blob endpoint set to the value of the <code class="language-plaintext highlighter-rouge">Storage__ServiceUri</code> environment variable. Note that if you wish to create a Linux app service plan, it’s important that you set both the <code class="language-plaintext highlighter-rouge">kind</code> value to <code class="language-plaintext highlighter-rouge">linux</code> as well as the <code class="language-plaintext highlighter-rouge">reserved</code> property to <code class="language-plaintext highlighter-rouge">true</code>. Additionally, make sure you set <a href="https://learn.microsoft.com/en-us/azure/app-service/quickstart-arm-template?pivots=platform-linux#review-the-template">the <code class="language-plaintext highlighter-rouge">linuxFxVersion</code> property</a> to the stack version you’re currently working on. For our .NET application, that’s .NET 8 (written as <code class="language-plaintext highlighter-rouge">DOTNETCORE|8.0</code>).</p>

<p>With our App Service, we’ve created a system-assigned identity. Contrary to user-assigned managed identities, system-assigned identities are managed by Azure and bound to a specific resource. For more information about the different types of managed identities, take a look at <a href="https://learn.microsoft.com/en-us/entra/identity/managed-identities-azure-resources/overview#managed-identity-types">Microsoft’s documentation</a>.</p>

<p>Now that we have our App Service with our system-assigned managed identity in place, we can assign a contributor role on the Blob storage for our identity. You can find a list of built-in role definitions over at <a href="https://learn.microsoft.com/en-us/azure/role-based-access-control/built-in-roles">Microsoft’s documentation</a>.</p>

<pre><code class="language-Bicep">resource storageAccountDataContributorDefinition 'Microsoft.Authorization/roleDefinitions@2022-05-01-preview' existing = {
  scope: subscription()
  name: 'ba92f5b4-2d11-453d-a403-e96b0029c9fe'
}

resource appServiceRoleAssignment 'Microsoft.Authorization/roleAssignments@2022-04-01' = {
  scope: storageAccount
  name: guid(storageAccount.id, demoApp.id, storageAccountDataContributorDefinition.id)
  properties: {
    principalId: demoApp.identity.principalId
    roleDefinitionId: storageAccountDataContributorDefinition.id
    principalType: 'ServicePrincipal'
  }
}
</code></pre>

<p>Your final Bicep file should look something like this:</p>

<pre><code class="language-bicep">resource storageAccount 'Microsoft.Storage/storageAccounts@2023-05-01' = {
  name: 'stazurite${uniqueString(resourceGroup().id)}'
  location: resourceGroup().location
  sku: {
    name: 'Standard_LRS'
  }
  kind: 'StorageV2'
}

resource demoAppPlan 'Microsoft.Web/serverfarms@2023-12-01' = {
  name: 'asp-demo-app-${uniqueString(resourceGroup().id)}'
  location: resourceGroup().location
  sku: {
    name: 'B1'
  }
  kind: 'linux'
  properties: {
    reserved: true
  }
}

resource demoApp 'Microsoft.Web/sites@2023-12-01' = {
  name: 'app-demo-app-${uniqueString(resourceGroup().id)}'
  location: resourceGroup().location
  identity: {
    type: 'SystemAssigned'
  }
  properties: {
    serverFarmId: demoAppPlan.id
    httpsOnly: true
    siteConfig: {
      linuxFxVersion: 'DOTNETCORE|8.0'
      appSettings: [
        {
          name: 'Storage__ServiceUri'
          value: storageAccount.properties.primaryEndpoints.blob
        }
      ]
    }
  }
}

resource storageAccountDataContributorDefinition 'Microsoft.Authorization/roleDefinitions@2022-05-01-preview' existing = {
  scope: subscription()
  name: 'ba92f5b4-2d11-453d-a403-e96b0029c9fe'
}

resource appServiceRoleAssignment 'Microsoft.Authorization/roleAssignments@2022-04-01' = {
  scope: storageAccount
  name: guid(storageAccount.id, demoApp.id, storageAccountDataContributorDefinition.id)
  properties: {
    principalId: demoApp.identity.principalId
    roleDefinitionId: storageAccountDataContributorDefinition.id
    principalType: 'ServicePrincipal'
  }
}
</code></pre>

<p>After creating our Bicep file with our resource declarations, it’s time to deploy our resources to Azure. Run the following command: <code class="language-plaintext highlighter-rouge">az deployment group create --resource-group rg-azurite --template-file ./main.bicep</code>. If you get errors deploying your resources, try a different resource group name.</p>

<p>For more information about these Bicep declarations, see <a href="https://learn.microsoft.com/en-us/azure/templates/">Microsoft’s Bicep reference</a>.</p>

<blockquote>
  <p>Of course you don’t have to use Bicep. You can use the AZ CLI, as well as the Portal or any other method you prefer!</p>
</blockquote>

<h2 id="deploying-the-net-application">Deploying the .NET application</h2>

<p>Now that we have all our resources in place, let’s deploy our application to Azure. In this scenario I’ll be using the <code class="language-plaintext highlighter-rouge">dotnet</code> CLI to publish the application to my local file system after which I’ll be using the <a href="https://learn.microsoft.com/en-us/azure/app-service/deploy-zip?tabs=cli#create-a-project-zip-package">ZIP deploy</a> functionality to upload it to the Azure App Service. If you wish to use a different way of deploying your application, e.g. through Visual Studio, that will work just as well.</p>

<p>Let’s navigate to our <code class="language-plaintext highlighter-rouge">demo-app</code> folder: <code class="language-plaintext highlighter-rouge">~/azurite-demo/demo-app</code>. Publish the application by running the <code class="language-plaintext highlighter-rouge">publish</code> command with the <code class="language-plaintext highlighter-rouge">dotnet</code> CLI: <code class="language-plaintext highlighter-rouge">dotnet publish --configuration Release --output ./publish</code></p>

<p>Navigate to the newly created <code class="language-plaintext highlighter-rouge">publish</code> folder (<code class="language-plaintext highlighter-rouge">~/azurite-demo/demo-app/publish</code>) and ZIP all the files in this directory: <code class="language-plaintext highlighter-rouge">zip -r demo-app.zip .</code>.</p>

<blockquote>
  <p>You might need to install <code class="language-plaintext highlighter-rouge">zip</code> on your machine (<code class="language-plaintext highlighter-rouge">sudo apt install zip -y</code>).</p>
</blockquote>

<p>Once all the published files are zipped, we can use the Azure CLI to deploy our application to our previously created Azure App Service: <code class="language-plaintext highlighter-rouge">az webapp deploy --resource-group rg-azurite --name app-demo-app-mf53zb5hnqgto --src-path ./demo-app.zip --type zip</code>. Be sure to replace the name of the web app with the name of your web app.</p>

<blockquote>
  <p>If you want to retrieve the name of your web app, you can run the following command: <code class="language-plaintext highlighter-rouge">az resource list --resource-group rg-azurite --resource-type Microsoft.Web/sites --query [0].name</code>.</p>
</blockquote>

<p>Wait for the command to complete and head over to your newly deployed Azure app service! You can find the URL for you app service by running this command: <code class="language-plaintext highlighter-rouge">az webapp show --resource-group rg-azurite --name app-demo-app-mf53zb5hnqgto --query defaultHostName</code>.</p>

<blockquote>
  <p>Replace the name of App Service with your app’s name.</p>
</blockquote>

<p>You should see the <code class="language-plaintext highlighter-rouge">Hello World!</code> output from the default endpoint. Navigate to the <code class="language-plaintext highlighter-rouge">/blob</code> endpoint. Since this is the first time we’re looking at this endpoint, it will create the Blob container for us and show <code class="language-plaintext highlighter-rouge">No blob item available</code>:
<img src="/assets/images/2024-08-07-azurite-with-https-in-docker/azure-managed-identity-connection.png" alt="successful call to Azure Blob Storage with managed identity" /></p>

<p>If you want you can upload an item to the Blob container using any of the preferred methods. I’ll be using the Azure Storage Explorer built-in to the Azure Portal.
<img src="/assets/images/2024-08-07-azurite-with-https-in-docker/azure-portal-storage-browser.png" alt="Azure Portal's Storage Browser" /></p>

<p>After uploading an item and upon refreshing the <code class="language-plaintext highlighter-rouge">/blob</code> endpoint, you’ll see data regarding the uploaded blob!
<img src="/assets/images/2024-08-07-azurite-with-https-in-docker/azure-successful-blob-data.png" alt="Successful Azure managed identity call with Blob data" /></p>

<p>If you want to clean up your Azure resources after this blog post, you can remove the entire resource group by executing <code class="language-plaintext highlighter-rouge">az group delete --name rg-azurite --yes</code>.</p>

<h2 id="result-and-recap">Result and recap</h2>

<p>And there you have it!</p>

<p>We have a working version of a .NET application interacting with Azure Storage services. Whether that’s emulated through Azurite or on a real Azure Storage Account.</p>

<p>We have accomplished this by running Azurite in Docker, generating a self-signed certificate, trusting said certificate and leveraging Azure’s <code class="language-plaintext highlighter-rouge">DefaultAzureCredential</code> mechanism. After the application was working in our containerized Azurite environment, we’ve set up the infrastructure required for an Azure Blob Storage service in the cloud as well as a place to host our .NET demo application. By using managed identities, we are able to communicate with our Azure Storage Account without storing any kind of credentials in our code. We no longer have to think about key rotation, security comprises or any other kind of password security issue.</p>

<p>We have followed these steps:</p>

<ol>
  <li>Set up Azurite in Docker</li>
  <li>Set up a small .NET application capable of interacting with the blobs using the Azure SDKs</li>
  <li>Using the <code class="language-plaintext highlighter-rouge">DefaultAzureCredential</code> mechanism to authenticate to Azure services</li>
  <li>Changing Azurite to support HTTPS</li>
  <li>Containerizing our .NET application</li>
  <li>Optimizing our containerization process and make use of environment variables</li>
  <li>Setting up, deploying to and interacting with an actual Azure Storage Account in the cloud</li>
</ol>

<h2 id="finishing-up">Finishing up</h2>

<p>I hope you have enjoyed our journey through Azure’s wondrous worlds of SDKs, authentication and managed identities. Thank you for taking the time to read my blog posts and I hope it will help you out on your cloud endeavors!</p>

<p>As with all my blog posts, the full code is available in the repository of this site: <a href="https://github.com/Physer/physer.github.io/tree/main/code/2024-07-08-azurite-https-in-docker">physer.github.io</a>.</p>

<p>Thank you and I’ll see you in the next one!</p>

<h2 id="references">References</h2>

<blockquote>
  <p>In order of appearance in the blog series.</p>
</blockquote>

<ul>
  <li><a href="https://learn.microsoft.com/en-us/azure/storage/common/storage-use-azurite?tabs=visual-studio%2Cblob-storage">Azurite emulator</a></li>
  <li><a href="https://learn.microsoft.com/en-us/dotnet/api/overview/azure/identity-readme?view=azure-dotnet#defaultazurecredential">DefaultAzureCredential</a></li>
  <li><a href="https://www.cloudflare.com/learning/ssl/what-is-https/">What is HTTPS</a></li>
  <li><a href="https://www.docker.com/products/docker-desktop/">Docker Desktop</a></li>
  <li><a href="https://docs.docker.com/compose/">Docker Compose</a></li>
  <li><a href="https://docs.openssl.org/master/man1/openssl/">OpenSSL</a></li>
  <li><a href="https://slproweb.com/products/Win32OpenSSL.html">OpenSSL Windows Binaries</a></li>
  <li><a href="https://azure.microsoft.com/en-us/products/storage/storage-explorer">Azure Storage Explorer</a></li>
  <li><a href="https://azure.microsoft.com/en-us/free">Azure account</a></li>
  <li><a href="https://learn.microsoft.com/en-us/cli/azure/get-started-with-azure-cli">Azure CLI</a></li>
  <li><a href="https://docs.docker.com/storage/">Docker storage documentation</a></li>
  <li><a href="https://docs.docker.com/guides/docker-concepts/running-containers/sharing-local-files/">Docker’s documentation on persisting data</a></li>
  <li><a href="https://learn.microsoft.com/en-us/azure/storage/common/storage-introduction#storage-apis-libraries-and-tools">Azure Storage Client Libraries</a></li>
  <li><a href="https://learn.microsoft.com/en-us/dotnet/azure/sdk/dependency-injection?tabs=web-app-builder">Dependency injection for the Azure SDK</a></li>
  <li><a href="https://learn.microsoft.com/en-us/entra/identity/managed-identities-azure-resources/overview">Azure’s managed identities</a></li>
  <li><a href="https://github.com/Azure/Azurite/blob/main/README.md">Azurite’s documentation on Github</a></li>
  <li><a href="https://docs.docker.com/build/building/multi-stage/">Docker’s multi-stage documentation</a></li>
  <li><a href="https://learn.microsoft.com/en-us/azure/azure-resource-manager/bicep/overview?tabs=bicep">Bicep documentation</a></li>
  <li><a href="https://learn.microsoft.com/en-us/azure/app-service/">Azure App Service</a></li>
  <li><a href="https://learn.microsoft.com/en-us/azure/role-based-access-control/built-in-roles">Azure’s built-in role definitions</a></li>
  <li><a href="https://learn.microsoft.com/en-us/azure/templates/">Bicep SDK reference</a></li>
  <li><a href="https://learn.microsoft.com/en-us/azure/app-service/deploy-zip?tabs=cli#create-a-project-zip-package">App Service ZIP deploy documentation</a></li>
</ul>]]></content><author><name></name></author><category term="azure" /><summary type="html"><![CDATA[Introduction]]></summary></entry><entry><title type="html">Using Tailwind in .NET projects with MSBuild and the Tailwind CLI</title><link href="/tailwind/2024/06/13/tailwind-using-msbuild-in-dotnet.html" rel="alternate" type="text/html" title="Using Tailwind in .NET projects with MSBuild and the Tailwind CLI" /><published>2024-06-13T10:00:00+00:00</published><updated>2024-06-13T10:00:00+00:00</updated><id>/tailwind/2024/06/13/tailwind-using-msbuild-in-dotnet</id><content type="html" xml:base="/tailwind/2024/06/13/tailwind-using-msbuild-in-dotnet.html"><![CDATA[<h2 id="introduction">Introduction</h2>

<p>Hi!</p>

<p>Welcome to this blogpost about Tailwind CSS and .NET projects.</p>

<p><a href="https://tailwindcss.com/">Tailwind CSS</a> is a utility-first CSS framework that allows developers to style their websites without writing any (or at the very least, barely any) custom CSS. Tailwind CSS has a ton of classes that developers can add to their HTML elements in order to style their application.</p>

<p>Usually Tailwind CSS is used in combination with front-end libraries and frameworks such as React, Vue or Angular.
In a case like that, you’ll most likely have an NPM project that you can install Tailwind into.</p>

<p>However, perhaps there’s a case where you’re using a more back-end oriented language like C# for your web development. In these cases, usage of an NPM project is rarer and usually only done to support one or two libraries or packages.</p>

<p>In this blogpost we’re going to find out how we can set up Tailwind CSS with a .NET project such as ASP.NET MVC, ASP.NET Razor Pages or a Blazor project using the standalone Tailwind CLI and MSBuild. <strong>This way we don’t need an NPM project and no <code class="language-plaintext highlighter-rouge">package.json</code> file is needed, and no NodeJS is required to be installed.</strong></p>

<h3 id="table-of-contents">Table of contents</h3>

<ul>
  <li><a href="#introduction">Introduction</a></li>
  <li><a href="#setting-up-a-net-project">Setting up a .NET project</a></li>
  <li><a href="#getting-the-tailwind-cli">Getting the Tailwind CLI</a></li>
  <li><a href="#preparing-the-project-for-tailwind">Preparing the project for Tailwind</a></li>
  <li><a href="#setting-up-an-msbuild-action">Setting up an MSBuild action</a></li>
  <li><a href="#supporting-multiple-operating-systems-and-architectures">Supporting multiple operating systems and architectures</a></li>
  <li><a href="#conclusion">Conclusion</a></li>
  <li><a href="#references">References</a></li>
</ul>

<h2 id="setting-up-a-net-project">Setting up a .NET project</h2>

<p>In this blogpost I’m going to use ASP.NET Core MVC as an example but what you’ll see applies to Razor Pages and Blazor or any other MSBuild supported project as well.</p>

<p>Let’s create <a href="https://learn.microsoft.com/en-us/aspnet/core/tutorials/first-mvc-app/start-mvc?view=aspnetcore-8.0">a new ASP.NET Core MVC project</a>:</p>

<p><code class="language-plaintext highlighter-rouge">dotnet new mvc -o TailwindDotnet</code></p>

<p>You can open the project in your favorite editor, e.g. Visual Studio Code:</p>

<p><code class="language-plaintext highlighter-rouge">code TailwindDotnet</code></p>

<p>Since the scaffolded MVC project contains Bootstrap and several other files that are not interesting for us at the moment, let’s remove those references from our CSHTML files.</p>

<p>After the clean up, the <code class="language-plaintext highlighter-rouge">_Layout.cshtml</code> file in <code class="language-plaintext highlighter-rouge">~/Views/Shared</code> now looks like this:</p>

<div class="language-html highlighter-rouge"><div class="highlight"><pre class="highlight"><code><span class="cp">&lt;!DOCTYPE html&gt;</span>
<span class="nt">&lt;html</span> <span class="na">lang=</span><span class="s">"en"</span><span class="nt">&gt;</span>
  <span class="nt">&lt;head&gt;</span>
    <span class="nt">&lt;meta</span> <span class="na">charset=</span><span class="s">"utf-8"</span> <span class="nt">/&gt;</span>
    <span class="nt">&lt;meta</span> <span class="na">name=</span><span class="s">"viewport"</span> <span class="na">content=</span><span class="s">"width=device-width, initial-scale=1.0"</span> <span class="nt">/&gt;</span>
    <span class="nt">&lt;title&gt;</span>@ViewData["Title"] - TailwindDotnet<span class="nt">&lt;/title&gt;</span>
    <span class="nt">&lt;link</span> <span class="na">rel=</span><span class="s">"stylesheet"</span> <span class="na">href=</span><span class="s">"~/css/site.css"</span> <span class="na">asp-append-version=</span><span class="s">"true"</span> <span class="nt">/&gt;</span>
    <span class="nt">&lt;link</span>
      <span class="na">rel=</span><span class="s">"stylesheet"</span>
      <span class="na">href=</span><span class="s">"~/TailwindDotnet.styles.css"</span>
      <span class="na">asp-append-version=</span><span class="s">"true"</span>
    <span class="nt">/&gt;</span>
  <span class="nt">&lt;/head&gt;</span>
  <span class="nt">&lt;body&gt;</span>
    <span class="nt">&lt;div&gt;</span>
      <span class="nt">&lt;main&gt;</span>@RenderBody()<span class="nt">&lt;/main&gt;</span>
    <span class="nt">&lt;/div&gt;</span>
    <span class="nt">&lt;script </span><span class="na">src=</span><span class="s">"~/js/site.js"</span> <span class="na">asp-append-version=</span><span class="s">"true"</span><span class="nt">&gt;&lt;/script&gt;</span>
  <span class="nt">&lt;/body&gt;</span>
<span class="nt">&lt;/html&gt;</span>
</code></pre></div></div>

<p>My <code class="language-plaintext highlighter-rouge">Index.cshtml</code> file in <code class="language-plaintext highlighter-rouge">~/Views/Home</code> now looks like:</p>

<div class="language-html highlighter-rouge"><div class="highlight"><pre class="highlight"><code>@{ ViewData["Title"] = "Home Page"; }

<span class="nt">&lt;div&gt;</span>
  <span class="nt">&lt;h1&gt;</span>Welcome<span class="nt">&lt;/h1&gt;</span>
  <span class="nt">&lt;p&gt;</span>
    Learn about
    <span class="nt">&lt;a</span> <span class="na">href=</span><span class="s">"https://learn.microsoft.com/aspnet/core"</span>
      <span class="nt">&gt;</span>building Web apps with ASP.NET Core<span class="nt">&lt;/a</span>
    <span class="nt">&gt;</span>.
  <span class="nt">&lt;/p&gt;</span>
<span class="nt">&lt;/div&gt;</span>
</code></pre></div></div>

<p>This should give a rather empty index page to look at. When you run the application, it will look something like this:
<img src="/assets/images/2024-06-13-tailwind-using-msbuild-in-dotnet/empty-mvc.png" alt="empty-mvc" /></p>

<p>Alright, now that we have our empty MVC project set up, let’s get Tailwind!</p>

<h2 id="getting-the-tailwind-cli">Getting the Tailwind CLI</h2>

<p>As mentioned in the <a href="#introduction">Introduction</a>, Tailwind CSS is usually installed as an NPM package. However, for projects where Node will otherwise not be required, such as our case here, there’s a standalone CLI available that does not require Node JS.</p>

<p>You can find more information in this blogpost, including a download link to the CLI: https://tailwindcss.com/blog/standalone-cli.</p>

<p>Grab the CLI for your operating system and architecture from <a href="https://github.com/tailwindlabs/tailwindcss/releases">their Github release page</a>.</p>

<p>For now I’m going to grab the 64-bit Windows executable but we’ll take a look on how to support multiple operating systems and architectures in <a href="#supporting-multiple-operating-systems-and-architectures">Supporting multiple operating systems and architectures</a> later.</p>

<p>After downloading <code class="language-plaintext highlighter-rouge">tailwindcss-windows-x64.exe</code>, let’s rename it to <code class="language-plaintext highlighter-rouge">tailwindcss.exe</code> for simplicity.
Let’s add the <code class="language-plaintext highlighter-rouge">tailwindcss.exe</code> file to the root of our project (<code class="language-plaintext highlighter-rouge">~</code>).</p>

<h2 id="preparing-the-project-for-tailwind">Preparing the project for Tailwind</h2>

<p>Now that we have the Tailwind CLI available for us, let’s navigate to the root of our project and initiate the Tailwind CSS configuration, by running: <code class="language-plaintext highlighter-rouge">.\tailwindcss init</code>.</p>

<p>This will create an empty <code class="language-plaintext highlighter-rouge">tailwind.config.js</code> file at the root of our project (or wherever you ran the previous command), looking like this:</p>

<div class="language-js highlighter-rouge"><div class="highlight"><pre class="highlight"><code><span class="cm">/** @type {import('tailwindcss').Config} */</span>
<span class="nx">module</span><span class="p">.</span><span class="nx">exports</span> <span class="o">=</span> <span class="p">{</span>
  <span class="na">content</span><span class="p">:</span> <span class="p">[],</span>
  <span class="na">theme</span><span class="p">:</span> <span class="p">{</span>
    <span class="na">extend</span><span class="p">:</span> <span class="p">{},</span>
  <span class="p">},</span>
  <span class="na">plugins</span><span class="p">:</span> <span class="p">[],</span>
<span class="p">};</span>
</code></pre></div></div>

<p>For a more in-depth look into the configuration on Tailwind, please take a look at <a href="https://tailwindcss.com/docs/configuration">their documentation</a>.</p>

<p>At the core of this configuration file is the <code class="language-plaintext highlighter-rouge">content</code> property. This is an array of glob-supported paths where Tailwind should scan files for utility classes.</p>

<p>This means that we need to update this property with our Razor files. Let’s add the following path to this property:
<code class="language-plaintext highlighter-rouge">"./Views/**/*.cshtml"</code>. This tells the Tailwind CLI to scan all CSHTML files in all subdirectories of the <code class="language-plaintext highlighter-rouge">~/Views</code> directory.</p>

<p>Your Tailwind config should now look like:</p>

<div class="language-js highlighter-rouge"><div class="highlight"><pre class="highlight"><code><span class="cm">/** @type {import('tailwindcss').Config} */</span>
<span class="nx">module</span><span class="p">.</span><span class="nx">exports</span> <span class="o">=</span> <span class="p">{</span>
  <span class="na">content</span><span class="p">:</span> <span class="p">[</span><span class="dl">"</span><span class="s2">./Views/**/*.cshtml</span><span class="dl">"</span><span class="p">],</span>
  <span class="na">theme</span><span class="p">:</span> <span class="p">{</span>
    <span class="na">extend</span><span class="p">:</span> <span class="p">{},</span>
  <span class="p">},</span>
  <span class="na">plugins</span><span class="p">:</span> <span class="p">[],</span>
<span class="p">};</span>
</code></pre></div></div>

<p>Next we have to update our CSS file to include the Tailwind directives so Tailwind can compile the CSS.
Let’s head over to our <code class="language-plaintext highlighter-rouge">site.css</code> file in <code class="language-plaintext highlighter-rouge">~/wwwroot/css</code>.</p>

<p>We’ll have to add the following directives:</p>

<div class="language-css highlighter-rouge"><div class="highlight"><pre class="highlight"><code><span class="k">@tailwind</span> <span class="n">base</span><span class="p">;</span>
<span class="k">@tailwind</span> <span class="n">components</span><span class="p">;</span>
<span class="k">@tailwind</span> <span class="n">utilities</span><span class="p">;</span>
</code></pre></div></div>

<p>Let’s add those to the top, my <code class="language-plaintext highlighter-rouge">site.css</code> file now looks like this:</p>

<div class="language-css highlighter-rouge"><div class="highlight"><pre class="highlight"><code><span class="k">@tailwind</span> <span class="n">base</span><span class="p">;</span>
<span class="k">@tailwind</span> <span class="n">components</span><span class="p">;</span>
<span class="k">@tailwind</span> <span class="n">utilities</span><span class="p">;</span>

<span class="nt">html</span> <span class="p">{</span>
  <span class="nl">font-size</span><span class="p">:</span> <span class="m">14px</span><span class="p">;</span>
<span class="p">}</span>

<span class="k">@media</span> <span class="p">(</span><span class="n">min-width</span><span class="p">:</span> <span class="m">768px</span><span class="p">)</span> <span class="p">{</span>
  <span class="nt">html</span> <span class="p">{</span>
    <span class="nl">font-size</span><span class="p">:</span> <span class="m">16px</span><span class="p">;</span>
  <span class="p">}</span>
<span class="p">}</span>

<span class="nc">.btn</span><span class="nd">:focus</span><span class="o">,</span>
<span class="nc">.btn</span><span class="nd">:active:focus</span><span class="o">,</span>
<span class="nc">.btn-link.nav-link</span><span class="nd">:focus</span><span class="o">,</span>
<span class="nc">.form-control</span><span class="nd">:focus</span><span class="o">,</span>
<span class="nc">.form-check-input</span><span class="nd">:focus</span> <span class="p">{</span>
  <span class="nl">box-shadow</span><span class="p">:</span> <span class="m">0</span> <span class="m">0</span> <span class="m">0</span> <span class="m">0.1rem</span> <span class="no">white</span><span class="p">,</span> <span class="m">0</span> <span class="m">0</span> <span class="m">0</span> <span class="m">0.25rem</span> <span class="m">#258cfb</span><span class="p">;</span>
<span class="p">}</span>

<span class="nt">html</span> <span class="p">{</span>
  <span class="nl">position</span><span class="p">:</span> <span class="nb">relative</span><span class="p">;</span>
  <span class="nl">min-height</span><span class="p">:</span> <span class="m">100%</span><span class="p">;</span>
<span class="p">}</span>

<span class="nt">body</span> <span class="p">{</span>
  <span class="nl">margin-bottom</span><span class="p">:</span> <span class="m">60px</span><span class="p">;</span>
<span class="p">}</span>
</code></pre></div></div>

<p>We’re almost there! Now let’s add some utility classes so Tailwind has something to do.</p>

<p>Head over to our <code class="language-plaintext highlighter-rouge">_Layout.cshtml</code> file in <code class="language-plaintext highlighter-rouge">~/Views/Shared</code> and add some Tailwind classes.
I have added some background color and a container to our body and div elements.</p>

<p>My file now looks like:</p>

<div class="language-html highlighter-rouge"><div class="highlight"><pre class="highlight"><code><span class="cp">&lt;!DOCTYPE html&gt;</span>
<span class="nt">&lt;html</span> <span class="na">lang=</span><span class="s">"en"</span><span class="nt">&gt;</span>
  <span class="nt">&lt;head&gt;</span>
    <span class="nt">&lt;meta</span> <span class="na">charset=</span><span class="s">"utf-8"</span> <span class="nt">/&gt;</span>
    <span class="nt">&lt;meta</span> <span class="na">name=</span><span class="s">"viewport"</span> <span class="na">content=</span><span class="s">"width=device-width, initial-scale=1.0"</span> <span class="nt">/&gt;</span>
    <span class="nt">&lt;title&gt;</span>@ViewData["Title"] - TailwindDotnet<span class="nt">&lt;/title&gt;</span>
    <span class="nt">&lt;link</span> <span class="na">rel=</span><span class="s">"stylesheet"</span> <span class="na">href=</span><span class="s">"~/css/site.css"</span> <span class="na">asp-append-version=</span><span class="s">"true"</span> <span class="nt">/&gt;</span>
    <span class="nt">&lt;link</span>
      <span class="na">rel=</span><span class="s">"stylesheet"</span>
      <span class="na">href=</span><span class="s">"~/TailwindDotnet.styles.css"</span>
      <span class="na">asp-append-version=</span><span class="s">"true"</span>
    <span class="nt">/&gt;</span>
  <span class="nt">&lt;/head&gt;</span>
  <span class="nt">&lt;body</span> <span class="na">class=</span><span class="s">"bg-slate-900"</span><span class="nt">&gt;</span>
    <span class="nt">&lt;div</span> <span class="na">class=</span><span class="s">"container mx-auto text-white"</span><span class="nt">&gt;</span>
      <span class="nt">&lt;main&gt;</span>@RenderBody()<span class="nt">&lt;/main&gt;</span>
    <span class="nt">&lt;/div&gt;</span>
    <span class="nt">&lt;script </span><span class="na">src=</span><span class="s">"~/js/site.js"</span> <span class="na">asp-append-version=</span><span class="s">"true"</span><span class="nt">&gt;&lt;/script&gt;</span>
  <span class="nt">&lt;/body&gt;</span>
<span class="nt">&lt;/html&gt;</span>
</code></pre></div></div>

<p>Okay, so now we have some classes for Tailwind to transform. Let’s run the CLI to generate our output CSS:</p>

<p><code class="language-plaintext highlighter-rouge">.\tailwindcss -i .\wwwroot\css\site.css -o .\wwwroot\css\output.css --minify</code></p>

<p>If everything went well, you should see a new file popup in your <code class="language-plaintext highlighter-rouge">~/wwwroot/css</code> folder: <code class="language-plaintext highlighter-rouge">output.css</code>.</p>

<p>Let’s link our new generated file in our <code class="language-plaintext highlighter-rouge">_Layout.cshtml</code> file by adding the following line as the first stylesheet:</p>

<div class="language-html highlighter-rouge"><div class="highlight"><pre class="highlight"><code><span class="nt">&lt;link</span> <span class="na">rel=</span><span class="s">"stylesheet"</span> <span class="na">href=</span><span class="s">"~/css/output.css"</span> <span class="na">asp-append-version=</span><span class="s">"true"</span> <span class="nt">/&gt;</span>
</code></pre></div></div>

<p>Making your <code class="language-plaintext highlighter-rouge">_Layout.cshtml</code> file now look like:</p>

<div class="language-html highlighter-rouge"><div class="highlight"><pre class="highlight"><code><span class="cp">&lt;!DOCTYPE html&gt;</span>
<span class="nt">&lt;html</span> <span class="na">lang=</span><span class="s">"en"</span><span class="nt">&gt;</span>
  <span class="nt">&lt;head&gt;</span>
    <span class="nt">&lt;meta</span> <span class="na">charset=</span><span class="s">"utf-8"</span> <span class="nt">/&gt;</span>
    <span class="nt">&lt;meta</span> <span class="na">name=</span><span class="s">"viewport"</span> <span class="na">content=</span><span class="s">"width=device-width, initial-scale=1.0"</span> <span class="nt">/&gt;</span>
    <span class="nt">&lt;title&gt;</span>@ViewData["Title"] - TailwindDotnet<span class="nt">&lt;/title&gt;</span>
    <span class="nt">&lt;link</span> <span class="na">rel=</span><span class="s">"stylesheet"</span> <span class="na">href=</span><span class="s">"~/css/output.css"</span> <span class="na">asp-append-version=</span><span class="s">"true"</span> <span class="nt">/&gt;</span>
    <span class="nt">&lt;link</span> <span class="na">rel=</span><span class="s">"stylesheet"</span> <span class="na">href=</span><span class="s">"~/css/site.css"</span> <span class="na">asp-append-version=</span><span class="s">"true"</span> <span class="nt">/&gt;</span>
    <span class="nt">&lt;link</span>
      <span class="na">rel=</span><span class="s">"stylesheet"</span>
      <span class="na">href=</span><span class="s">"~/TailwindDotnet.styles.css"</span>
      <span class="na">asp-append-version=</span><span class="s">"true"</span>
    <span class="nt">/&gt;</span>
  <span class="nt">&lt;/head&gt;</span>
  <span class="nt">&lt;body</span> <span class="na">class=</span><span class="s">"bg-slate-900"</span><span class="nt">&gt;</span>
    <span class="nt">&lt;div</span> <span class="na">class=</span><span class="s">"container mx-auto text-white"</span><span class="nt">&gt;</span>
      <span class="nt">&lt;main&gt;</span>@RenderBody()<span class="nt">&lt;/main&gt;</span>
    <span class="nt">&lt;/div&gt;</span>
    <span class="nt">&lt;script </span><span class="na">src=</span><span class="s">"~/js/site.js"</span> <span class="na">asp-append-version=</span><span class="s">"true"</span><span class="nt">&gt;&lt;/script&gt;</span>
  <span class="nt">&lt;/body&gt;</span>
<span class="nt">&lt;/html&gt;</span>
</code></pre></div></div>

<p>Let’s run the project and you should see something like:</p>

<p><img src="/assets/images/2024-06-13-tailwind-using-msbuild-in-dotnet/tailwind-mvc.png" alt="tailwind-mvc" /></p>

<p>Congratulations! You now have Tailwind running without Node JS in an ASP.NET Core MVC application.</p>

<p>However, it’s rather annoying to generate the Tailwind CSS output manually every time you make a change. No way we’re going to do that!</p>

<p>Let’s take a look how to <a href="#setting-up-an-msbuild-action">automate it with MSBuild</a> in the next step.</p>

<h2 id="setting-up-an-msbuild-action">Setting up an MSBuild action</h2>

<p>Open up the project file or your web project (e.g. <code class="language-plaintext highlighter-rouge">~/TailwindDotnet.csproj</code>).</p>

<p>It looks something like this:</p>

<div class="language-xml highlighter-rouge"><div class="highlight"><pre class="highlight"><code><span class="nt">&lt;Project</span> <span class="na">Sdk=</span><span class="s">"Microsoft.NET.Sdk.Web"</span><span class="nt">&gt;</span>

  <span class="nt">&lt;PropertyGroup&gt;</span>
    <span class="nt">&lt;TargetFramework&gt;</span>net8.0<span class="nt">&lt;/TargetFramework&gt;</span>
    <span class="nt">&lt;Nullable&gt;</span>enable<span class="nt">&lt;/Nullable&gt;</span>
    <span class="nt">&lt;ImplicitUsings&gt;</span>enable<span class="nt">&lt;/ImplicitUsings&gt;</span>
  <span class="nt">&lt;/PropertyGroup&gt;</span>

<span class="nt">&lt;/Project&gt;</span>
</code></pre></div></div>

<p>We’re going to add a <a href="https://learn.microsoft.com/en-us/visualstudio/msbuild/target-element-msbuild?view=vs-2022">Target</a> that executes before the building of the project.</p>

<p>Add the following Target to the CSPROJ file:</p>

<div class="language-xml highlighter-rouge"><div class="highlight"><pre class="highlight"><code><span class="nt">&lt;Target</span> <span class="na">Name=</span><span class="s">"Tailwind"</span> <span class="na">BeforeTargets=</span><span class="s">"Build"</span><span class="nt">&gt;</span>
  <span class="nt">&lt;Exec</span> <span class="na">Command=</span><span class="s">"tailwindcss.exe -i ./wwwroot/css/site.css -o ./wwwroot/css/output.css --minify"</span> <span class="nt">/&gt;</span>
<span class="nt">&lt;/Target&gt;</span>
</code></pre></div></div>

<p>This target will run before the build of the project and executes the command we were running manually in the previous step.</p>

<p>To make things complete, we can tell MSBuild to always execute the targets when doing a fast build (e.g. when there are not a lot of changes). So when our <code class="language-plaintext highlighter-rouge">output.css</code> or our <code class="language-plaintext highlighter-rouge">tailwind.config.js</code> is changed, we’d like to make sure that our Tailwind Target gets executed.</p>

<p>We can do so by adding an <a href="https://learn.microsoft.com/en-us/visualstudio/msbuild/itemgroup-element-msbuild?view=vs-2022">ItemGroup</a> with two <a href="https://github.com/dotnet/project-system/blob/main/docs/up-to-date-check.md">UpToDateCheckBuilt</a> elements:</p>

<div class="language-xml highlighter-rouge"><div class="highlight"><pre class="highlight"><code><span class="nt">&lt;ItemGroup&gt;</span>
  <span class="nt">&lt;UpToDateCheckBuilt</span> <span class="na">Include=</span><span class="s">"wwwroot/css/site.css"</span> <span class="na">Set=</span><span class="s">"Css"</span> <span class="nt">/&gt;</span>
  <span class="nt">&lt;UpToDateCheckBuilt</span> <span class="na">Include=</span><span class="s">"wwwroot/css/output.css"</span> <span class="na">Set=</span><span class="s">"Css"</span> <span class="nt">/&gt;</span>
  <span class="nt">&lt;UpToDateCheckBuilt</span> <span class="na">Include=</span><span class="s">"Tailwind/tailwind.config.js"</span> <span class="na">Set=</span><span class="s">"Css"</span> <span class="nt">/&gt;</span>
<span class="nt">&lt;/ItemGroup&gt;</span>
</code></pre></div></div>

<p>To verify things work, let’s change our background color in our <code class="language-plaintext highlighter-rouge">_Layout.cshtml</code> file to <code class="language-plaintext highlighter-rouge">bg-zinc-600</code>. After that, build and run the project and verify you see the new background color:</p>

<p><img src="/assets/images/2024-06-13-tailwind-using-msbuild-in-dotnet/zinc-mvc.png" alt="zinc-mvc" /></p>

<p>Nice!</p>

<p>We now have a working Tailwind CSS framework using ASP.NET Core MVC without using NodeJS or NPM. Every time the <code class="language-plaintext highlighter-rouge">output.css</code> or <code class="language-plaintext highlighter-rouge">site.css</code> is changed due to a change in utility classes or the <code class="language-plaintext highlighter-rouge">tailwind.config.js</code> is changed, MSBuild will automatically recompile the Tailwind output CSS.</p>

<blockquote>
  <p>“But Alex, do I look like Bill Gates? I’d like to do this on Linux or my Mac!”</p>

  <blockquote>
    <p>“No worries, I got you covered, in the next step we’ll support different operating systems and architectures through MSBuild!”</p>
  </blockquote>
</blockquote>

<h2 id="supporting-multiple-operating-systems-and-architectures">Supporting multiple operating systems and architectures</h2>

<p>Now that we know how to set everything up for Windows (❤️ Microsoft), let’s also take a look on how to make this generic in such a way that we can support Windows, Linux and OSX through MSBuild and the different CLI executables from Tailwind.</p>

<p>Let’s grab all the executables we’d like to support from <a href="https://github.com/tailwindlabs/tailwindcss/releases">their Github release page</a>.</p>

<p>In case of this demo, I’m going to support the following:</p>

<table>
  <thead>
    <tr>
      <th>Operating system</th>
      <th>Architecture</th>
      <th>Tailwind executable</th>
    </tr>
  </thead>
  <tbody>
    <tr>
      <td>Linux</td>
      <td>x64</td>
      <td>tailwindcss-linux-x64</td>
    </tr>
    <tr>
      <td>Linux</td>
      <td>Arm64</td>
      <td>tailwindcss-linux-arm64</td>
    </tr>
    <tr>
      <td>OSX</td>
      <td>x64</td>
      <td>tailwindcss-macos-x64</td>
    </tr>
    <tr>
      <td>OSX</td>
      <td>Arm64</td>
      <td>tailwindcss-macos-arm64</td>
    </tr>
    <tr>
      <td>Windows</td>
      <td>x64</td>
      <td>tailwindcss-windows-x64.exe</td>
    </tr>
    <tr>
      <td>Windows</td>
      <td>Arm64</td>
      <td>tailwindcss-windows-arm64.exe</td>
    </tr>
  </tbody>
</table>

<p>We’ll create a new folder in the root of our ASP.NET Core MVC project called: <code class="language-plaintext highlighter-rouge">Tailwind</code>.</p>

<p>If you’ve followed along with all the other steps, let’s remove our existing <code class="language-plaintext highlighter-rouge">tailwindcss.exe</code> file in our project root (<code class="language-plaintext highlighter-rouge">~</code>). Copy the <code class="language-plaintext highlighter-rouge">tailwind.config.js</code> file to this new folder and update the <code class="language-plaintext highlighter-rouge">content</code> property so that the path is now properly pointing to the Views:</p>

<div class="language-js highlighter-rouge"><div class="highlight"><pre class="highlight"><code><span class="cm">/** @type {import('tailwindcss').Config} */</span>
<span class="nx">module</span><span class="p">.</span><span class="nx">exports</span> <span class="o">=</span> <span class="p">{</span>
  <span class="na">content</span><span class="p">:</span> <span class="p">[</span><span class="dl">"</span><span class="s2">./../Views/**/*.cshtml</span><span class="dl">"</span><span class="p">],</span>
  <span class="na">theme</span><span class="p">:</span> <span class="p">{</span>
    <span class="na">extend</span><span class="p">:</span> <span class="p">{},</span>
  <span class="p">},</span>
  <span class="na">plugins</span><span class="p">:</span> <span class="p">[],</span>
<span class="p">};</span>
</code></pre></div></div>

<p>If you haven’t followed along, generate a Tailwind config. Take a look at <a href="#preparing-the-project-for-tailwind">Preparing the project for Tailwind</a> if you want to know how.</p>

<p>Place all the downloaded executables from the Tailwind Github page in the <code class="language-plaintext highlighter-rouge">~/Tailwind</code> folder. Note that this time we won’t rename the executables.</p>

<p>Open up the project file or your web project (e.g. <code class="language-plaintext highlighter-rouge">~/TailwindDotnet.csproj</code>) again. If you’ve followed along previously, remove the existing Tailwind target from the file.</p>

<p>Before we create any targets, we’re first going to make some variables to determine the operating system and architecture of our system.</p>

<p>You can do so by creating a <a href="https://learn.microsoft.com/en-us/visualstudio/msbuild/propertygroup-element-msbuild?view=vs-2022">PropertyGroup</a> with custom properties.</p>

<p>For each property, we’ll return <code class="language-plaintext highlighter-rouge">true</code> if a certain <code class="language-plaintext highlighter-rouge">Condition</code> is met. We can add properties for every operating system and architecture combination:</p>

<div class="language-xml highlighter-rouge"><div class="highlight"><pre class="highlight"><code><span class="nt">&lt;PropertyGroup&gt;</span>
  <span class="nt">&lt;IsLinuxX64</span> <span class="na">Condition=</span><span class="s">"$([MSBuild]::IsOsPlatform('Linux')) And $([System.Runtime.InteropServices.RuntimeInformation]::OSArchitecture) == X64"</span><span class="nt">&gt;</span>true<span class="nt">&lt;/IsLinuxX64&gt;</span>
  <span class="nt">&lt;IsLinuxArm64</span> <span class="na">Condition=</span><span class="s">"$([MSBuild]::IsOsPlatform('Linux')) And $([System.Runtime.InteropServices.RuntimeInformation]::OSArchitecture) == Arm64"</span><span class="nt">&gt;</span>true<span class="nt">&lt;/IsLinuxArm64&gt;</span>
  <span class="nt">&lt;IsOsxX64</span> <span class="na">Condition=</span><span class="s">"$([MSBuild]::IsOsPlatform('OSX')) And $([System.Runtime.InteropServices.RuntimeInformation]::OSArchitecture) == X64"</span><span class="nt">&gt;</span>true<span class="nt">&lt;/IsOsxX64&gt;</span>
  <span class="nt">&lt;IsOsxArm64</span> <span class="na">Condition=</span><span class="s">"$([MSBuild]::IsOsPlatform('OSX')) And $([System.Runtime.InteropServices.RuntimeInformation]::OSArchitecture) == Arm64"</span><span class="nt">&gt;</span>true<span class="nt">&lt;/IsOsxArm64&gt;</span>
  <span class="nt">&lt;IsWindowsX64</span> <span class="na">Condition=</span><span class="s">"$([MSBuild]::IsOsPlatform('Windows')) And $([System.Runtime.InteropServices.RuntimeInformation]::OSArchitecture) == X64"</span><span class="nt">&gt;</span>true<span class="nt">&lt;/IsWindowsX64&gt;</span>
  <span class="nt">&lt;IsWindowsArm64</span> <span class="na">Condition=</span><span class="s">"$([MSBuild]::IsOsPlatform('Windows')) And $([System.Runtime.InteropServices.RuntimeInformation]::OSArchitecture) == Arm64"</span><span class="nt">&gt;</span>true<span class="nt">&lt;/IsWindowsArm64&gt;</span>
<span class="nt">&lt;/PropertyGroup&gt;</span>
</code></pre></div></div>

<p><sub><em>You don’t need these property groups, you can also set these conditions inline on the targets, but this way it’s a bit easier to maintain in my opinion.</em></sub></p>

<p>Once we have the property groups, we can create the targets like we did before. However, for Linux and OSX we’ll also need to give the executable the proper permissions, so we’ll need an additional <a href="https://learn.microsoft.com/en-us/visualstudio/msbuild/exec-task?view=vs-2022">Exec</a> property for these targets.</p>

<p>The targets can be defined like this:</p>

<div class="language-xml highlighter-rouge"><div class="highlight"><pre class="highlight"><code><span class="nt">&lt;Target</span> <span class="na">Name=</span><span class="s">"TailwindLinuxX64"</span> <span class="na">BeforeTargets=</span><span class="s">"Build"</span> <span class="na">Condition=</span><span class="s">"$(IsLinuxX64) == true"</span><span class="nt">&gt;</span>
  <span class="nt">&lt;Exec</span> <span class="na">WorkingDirectory=</span><span class="s">"./Tailwind"</span> <span class="na">Command=</span><span class="s">"chmod +x ./tailwindcss-linux-x64"</span> <span class="nt">/&gt;</span>
  <span class="nt">&lt;Exec</span> <span class="na">WorkingDirectory=</span><span class="s">"./Tailwind"</span> <span class="na">Command=</span><span class="s">"./tailwindcss-linux-x64 -i ./../wwwroot/css/site.css -o ./../wwwroot/css/output.css --minify"</span> <span class="nt">/&gt;</span>
<span class="nt">&lt;/Target&gt;</span>
<span class="nt">&lt;Target</span> <span class="na">Name=</span><span class="s">"TailwindLinuxArm64"</span> <span class="na">BeforeTargets=</span><span class="s">"Build"</span> <span class="na">Condition=</span><span class="s">"$(IsLinuxArm64) == true"</span><span class="nt">&gt;</span>
  <span class="nt">&lt;Exec</span> <span class="na">WorkingDirectory=</span><span class="s">"./Tailwind"</span> <span class="na">Command=</span><span class="s">"chmod +x ./tailwindcss-linux-arm64"</span> <span class="nt">/&gt;</span>
  <span class="nt">&lt;Exec</span> <span class="na">WorkingDirectory=</span><span class="s">"./Tailwind"</span> <span class="na">Command=</span><span class="s">"./tailwindcss-linux-arm64 -i ./../wwwroot/css/site.css -o ./../wwwroot/css/output.css --minify"</span> <span class="nt">/&gt;</span>
<span class="nt">&lt;/Target&gt;</span>
<span class="nt">&lt;Target</span> <span class="na">Name=</span><span class="s">"TailwindOsxX64"</span> <span class="na">BeforeTargets=</span><span class="s">"Build"</span> <span class="na">Condition=</span><span class="s">"$(IsOsxX64) == true"</span><span class="nt">&gt;</span>
  <span class="nt">&lt;Exec</span> <span class="na">WorkingDirectory=</span><span class="s">"./Tailwind"</span> <span class="na">Command=</span><span class="s">"chmod +x ./tailwindcss-osx-x64"</span> <span class="nt">/&gt;</span>
  <span class="nt">&lt;Exec</span> <span class="na">WorkingDirectory=</span><span class="s">"./Tailwind"</span> <span class="na">Command=</span><span class="s">"./tailwindcss-osx-x64 -i ./../wwwroot/css/site.css -o ./../wwwroot/css/output.css --minify"</span> <span class="nt">/&gt;</span>
<span class="nt">&lt;/Target&gt;</span>
<span class="nt">&lt;Target</span> <span class="na">Name=</span><span class="s">"TailwindOsxArm64"</span> <span class="na">BeforeTargets=</span><span class="s">"Build"</span> <span class="na">Condition=</span><span class="s">"$(IsOsxArm64) == true"</span><span class="nt">&gt;</span>
  <span class="nt">&lt;Exec</span> <span class="na">WorkingDirectory=</span><span class="s">"./Tailwind"</span> <span class="na">Command=</span><span class="s">"chmod +x ./tailwindcss-osx-arm64"</span> <span class="nt">/&gt;</span>
  <span class="nt">&lt;Exec</span> <span class="na">WorkingDirectory=</span><span class="s">"./Tailwind"</span> <span class="na">Command=</span><span class="s">"./tailwindcss-osx-arm64 -i ./../wwwroot/css/site.css -o ./../wwwroot/css/output.css --minify"</span> <span class="nt">/&gt;</span>
<span class="nt">&lt;/Target&gt;</span>
<span class="nt">&lt;Target</span> <span class="na">Name=</span><span class="s">"TailwindWindowsX64"</span> <span class="na">BeforeTargets=</span><span class="s">"Build"</span> <span class="na">Condition=</span><span class="s">"$(IsWindowsX64) == true"</span><span class="nt">&gt;</span>
  <span class="nt">&lt;Exec</span> <span class="na">WorkingDirectory=</span><span class="s">"./Tailwind"</span> <span class="na">Command=</span><span class="s">"tailwindcss-windows-x64.exe -i ./../wwwroot/css/site.css -o ./../wwwroot/css/output.css --minify"</span> <span class="nt">/&gt;</span>
<span class="nt">&lt;/Target&gt;</span>
<span class="nt">&lt;Target</span> <span class="na">Name=</span><span class="s">"TailwindWindowsArm64"</span> <span class="na">BeforeTargets=</span><span class="s">"Build"</span> <span class="na">Condition=</span><span class="s">"$(IsWindowsArm64) == true"</span><span class="nt">&gt;</span>
  <span class="nt">&lt;Exec</span> <span class="na">WorkingDirectory=</span><span class="s">"./Tailwind"</span> <span class="na">Command=</span><span class="s">"tailwindcss-windows-arm64.exe -i ./../wwwroot/css/site.css -o ./../wwwroot/css/output.css --minify"</span> <span class="nt">/&gt;</span>
<span class="nt">&lt;/Target&gt;</span>
</code></pre></div></div>

<p>If you now build on your machine, whether it’s OSX, Linux or Windows, you should still see the same result.
You can try and change some utility classes to verify it’s working.</p>

<p>Your final <code class="language-plaintext highlighter-rouge">csproj</code> XML file should look like this:</p>

<div class="language-xml highlighter-rouge"><div class="highlight"><pre class="highlight"><code><span class="nt">&lt;Project</span> <span class="na">Sdk=</span><span class="s">"Microsoft.NET.Sdk.Web"</span><span class="nt">&gt;</span>

	<span class="nt">&lt;PropertyGroup&gt;</span>
		<span class="nt">&lt;TargetFramework&gt;</span>net8.0<span class="nt">&lt;/TargetFramework&gt;</span>
		<span class="nt">&lt;Nullable&gt;</span>enable<span class="nt">&lt;/Nullable&gt;</span>
		<span class="nt">&lt;ImplicitUsings&gt;</span>enable<span class="nt">&lt;/ImplicitUsings&gt;</span>
	<span class="nt">&lt;/PropertyGroup&gt;</span>

	<span class="nt">&lt;ItemGroup&gt;</span>
		<span class="nt">&lt;UpToDateCheckBuilt</span> <span class="na">Include=</span><span class="s">"wwwroot/css/site.css"</span> <span class="na">Set=</span><span class="s">"Css"</span> <span class="nt">/&gt;</span>
		<span class="nt">&lt;UpToDateCheckBuilt</span> <span class="na">Include=</span><span class="s">"wwwroot/css/output.css"</span> <span class="na">Set=</span><span class="s">"Css"</span> <span class="nt">/&gt;</span>
		<span class="nt">&lt;UpToDateCheckBuilt</span> <span class="na">Include=</span><span class="s">"Tailwind/tailwind.config.js"</span> <span class="na">Set=</span><span class="s">"Css"</span> <span class="nt">/&gt;</span>
	<span class="nt">&lt;/ItemGroup&gt;</span>

	<span class="nt">&lt;PropertyGroup&gt;</span>
		<span class="nt">&lt;IsLinuxX64</span> <span class="na">Condition=</span><span class="s">"$([MSBuild]::IsOsPlatform('Linux')) And $([System.Runtime.InteropServices.RuntimeInformation]::OSArchitecture) == X64"</span><span class="nt">&gt;</span>true<span class="nt">&lt;/IsLinuxX64&gt;</span>
		<span class="nt">&lt;IsLinuxArm64</span> <span class="na">Condition=</span><span class="s">"$([MSBuild]::IsOsPlatform('Linux')) And $([System.Runtime.InteropServices.RuntimeInformation]::OSArchitecture) == Arm64"</span><span class="nt">&gt;</span>true<span class="nt">&lt;/IsLinuxArm64&gt;</span>
		<span class="nt">&lt;IsOsxX64</span> <span class="na">Condition=</span><span class="s">"$([MSBuild]::IsOsPlatform('OSX')) And $([System.Runtime.InteropServices.RuntimeInformation]::OSArchitecture) == X64"</span><span class="nt">&gt;</span>true<span class="nt">&lt;/IsOsxX64&gt;</span>
		<span class="nt">&lt;IsOsxArm64</span> <span class="na">Condition=</span><span class="s">"$([MSBuild]::IsOsPlatform('OSX')) And $([System.Runtime.InteropServices.RuntimeInformation]::OSArchitecture) == Arm64"</span><span class="nt">&gt;</span>true<span class="nt">&lt;/IsOsxArm64&gt;</span>
		<span class="nt">&lt;IsWindowsX64</span> <span class="na">Condition=</span><span class="s">"$([MSBuild]::IsOsPlatform('Windows')) And $([System.Runtime.InteropServices.RuntimeInformation]::OSArchitecture) == X64"</span><span class="nt">&gt;</span>true<span class="nt">&lt;/IsWindowsX64&gt;</span>
		<span class="nt">&lt;IsWindowsArm64</span> <span class="na">Condition=</span><span class="s">"$([MSBuild]::IsOsPlatform('Windows')) And $([System.Runtime.InteropServices.RuntimeInformation]::OSArchitecture) == Arm64"</span><span class="nt">&gt;</span>true<span class="nt">&lt;/IsWindowsArm64&gt;</span>
	<span class="nt">&lt;/PropertyGroup&gt;</span>

	<span class="nt">&lt;Target</span> <span class="na">Name=</span><span class="s">"TailwindLinuxX64"</span> <span class="na">BeforeTargets=</span><span class="s">"Build"</span> <span class="na">Condition=</span><span class="s">"$(IsLinuxX64) == true"</span><span class="nt">&gt;</span>
		<span class="nt">&lt;Exec</span> <span class="na">WorkingDirectory=</span><span class="s">"./Tailwind"</span> <span class="na">Command=</span><span class="s">"chmod +x ./tailwindcss-linux-x64"</span> <span class="nt">/&gt;</span>
		<span class="nt">&lt;Exec</span> <span class="na">WorkingDirectory=</span><span class="s">"./Tailwind"</span> <span class="na">Command=</span><span class="s">"./tailwindcss-linux-x64 -i ./../wwwroot/css/site.css -o ./../wwwroot/css/output.css --minify"</span> <span class="nt">/&gt;</span>
	<span class="nt">&lt;/Target&gt;</span>
	<span class="nt">&lt;Target</span> <span class="na">Name=</span><span class="s">"TailwindLinuxArm64"</span> <span class="na">BeforeTargets=</span><span class="s">"Build"</span> <span class="na">Condition=</span><span class="s">"$(IsLinuxArm64) == true"</span><span class="nt">&gt;</span>
		<span class="nt">&lt;Exec</span> <span class="na">WorkingDirectory=</span><span class="s">"./Tailwind"</span> <span class="na">Command=</span><span class="s">"chmod +x ./tailwindcss-linux-arm64"</span> <span class="nt">/&gt;</span>
		<span class="nt">&lt;Exec</span> <span class="na">WorkingDirectory=</span><span class="s">"./Tailwind"</span> <span class="na">Command=</span><span class="s">"./tailwindcss-linux-arm64 -i ./../wwwroot/css/site.css -o ./../wwwroot/css/output.css --minify"</span> <span class="nt">/&gt;</span>
	<span class="nt">&lt;/Target&gt;</span>
	<span class="nt">&lt;Target</span> <span class="na">Name=</span><span class="s">"TailwindOsxX64"</span> <span class="na">BeforeTargets=</span><span class="s">"Build"</span> <span class="na">Condition=</span><span class="s">"$(IsOsxX64) == true"</span><span class="nt">&gt;</span>
		<span class="nt">&lt;Exec</span> <span class="na">WorkingDirectory=</span><span class="s">"./Tailwind"</span> <span class="na">Command=</span><span class="s">"chmod +x ./tailwindcss-osx-x64"</span> <span class="nt">/&gt;</span>
		<span class="nt">&lt;Exec</span> <span class="na">WorkingDirectory=</span><span class="s">"./Tailwind"</span> <span class="na">Command=</span><span class="s">"./tailwindcss-osx-x64 -i ./../wwwroot/css/site.css -o ./../wwwroot/css/output.css --minify"</span> <span class="nt">/&gt;</span>
	<span class="nt">&lt;/Target&gt;</span>
	<span class="nt">&lt;Target</span> <span class="na">Name=</span><span class="s">"TailwindOsxArm64"</span> <span class="na">BeforeTargets=</span><span class="s">"Build"</span> <span class="na">Condition=</span><span class="s">"$(IsOsxArm64) == true"</span><span class="nt">&gt;</span>
		<span class="nt">&lt;Exec</span> <span class="na">WorkingDirectory=</span><span class="s">"./Tailwind"</span> <span class="na">Command=</span><span class="s">"chmod +x ./tailwindcss-osx-arm64"</span> <span class="nt">/&gt;</span>
		<span class="nt">&lt;Exec</span> <span class="na">WorkingDirectory=</span><span class="s">"./Tailwind"</span> <span class="na">Command=</span><span class="s">"./tailwindcss-osx-arm64 -i ./../wwwroot/css/site.css -o ./../wwwroot/css/output.css --minify"</span> <span class="nt">/&gt;</span>
	<span class="nt">&lt;/Target&gt;</span>
	<span class="nt">&lt;Target</span> <span class="na">Name=</span><span class="s">"TailwindWindowsX64"</span> <span class="na">BeforeTargets=</span><span class="s">"Build"</span> <span class="na">Condition=</span><span class="s">"$(IsWindowsX64) == true"</span><span class="nt">&gt;</span>
		<span class="nt">&lt;Exec</span> <span class="na">WorkingDirectory=</span><span class="s">"./Tailwind"</span> <span class="na">Command=</span><span class="s">"tailwindcss-windows-x64.exe -i ./../wwwroot/css/site.css -o ./../wwwroot/css/output.css --minify"</span> <span class="nt">/&gt;</span>
	<span class="nt">&lt;/Target&gt;</span>
	<span class="nt">&lt;Target</span> <span class="na">Name=</span><span class="s">"TailwindWindowsArm64"</span> <span class="na">BeforeTargets=</span><span class="s">"Build"</span> <span class="na">Condition=</span><span class="s">"$(IsWindowsArm64) == true"</span><span class="nt">&gt;</span>
		<span class="nt">&lt;Exec</span> <span class="na">WorkingDirectory=</span><span class="s">"./Tailwind"</span> <span class="na">Command=</span><span class="s">"tailwindcss-windows-arm64.exe -i ./../wwwroot/css/site.css -o ./../wwwroot/css/output.css --minify"</span> <span class="nt">/&gt;</span>
	<span class="nt">&lt;/Target&gt;</span>

<span class="nt">&lt;/Project&gt;</span>
</code></pre></div></div>

<h2 id="conclusion">Conclusion</h2>

<p>In this blogpost we’ve seen how to set up the Tailwind CLI for .NET projects using MSBuild and even how to support different platforms through conditional targets.</p>

<p>This allows developers that would otherwise install NodeJS and create NPM projects to easily use Tailwind CSS in their projects without installing extra dependencies.</p>

<p>As always with my blogposts, the full code is available in the repository of this site: <a href="https://github.com/Physer/physer.github.io/tree/main/code/2024-06-13-tailwind-using-msbuild-in-dotnet">physer.github.io</a>.</p>

<h2 id="references">References</h2>

<ul>
  <li><a href="https://tailwindcss.com/">Tailwind CSS</a></li>
  <li><a href="https://learn.microsoft.com/en-us/visualstudio/msbuild/msbuild?view=vs-2022">MSBuild</a></li>
</ul>]]></content><author><name></name></author><category term="tailwind" /><summary type="html"><![CDATA[Introduction]]></summary></entry><entry><title type="html">Mocking HTTP calls in typed clients in Unit Tests - Part 1</title><link href="/unit-testing/2023/10/31/unit-testing-mocking-httpclient-part-1.html" rel="alternate" type="text/html" title="Mocking HTTP calls in typed clients in Unit Tests - Part 1" /><published>2023-10-31T13:33:00+00:00</published><updated>2023-10-31T13:33:00+00:00</updated><id>/unit-testing/2023/10/31/unit-testing-mocking-httpclient-part-1</id><content type="html" xml:base="/unit-testing/2023/10/31/unit-testing-mocking-httpclient-part-1.html"><![CDATA[<h2 id="introduction">Introduction</h2>

<p>We all know and love our unit tests. They’re excellent for providing your code with maintainability and separation of concerns.
Obviously, unit tests are also great to prevent changes from breaking existing code.</p>

<p>One of the more interesting parts of unit testing is to mock HTTP calls in <a href="https://learn.microsoft.com/en-us/dotnet/architecture/microservices/implement-resilient-applications/use-httpclientfactory-to-implement-resilient-http-requests#how-to-use-typed-clients-with-ihttpclientfactory">Typed HTTP Clients</a>.</p>

<p>In this series of blog posts, I will explain how we can easily mock any HTTP call made in a typed HTTP client.
We will create a basic implementation in these series. In a future blog post, we’ll refactor it to a reusable utility for one or multiple projects.</p>

<p>This blog post will assume you have basic knowledge about unit testing and mocking, including mocking frameworks such as Moq (not version 4.20! 😉) or NSubstitute.
Additionally, this blog post assumes you understand how the Arrange, Act and Assert pattern works.
In case any of these concepts are new to you, I’ll make a blog post in the future about the basics of unit testing and how to properly structure them.</p>

<p>In this first part of the series, we’ll focus on building an implementation of an API that retrieves user information.</p>

<p>In my examples I will use the following libraries and frameworks:</p>

<ul>
  <li><a href="https://xunit.net/">XUnit</a></li>
  <li><a href="https://fluentassertions.com/">FluentAssertions</a></li>
</ul>

<p>A quick table of contents:</p>

<ul>
  <li><a href="#introduction">Introduction</a></li>
  <li><a href="#terminology">Terminology</a></li>
  <li><a href="#user-api-implementation">User API implementation</a></li>
</ul>

<h2 id="terminology">Terminology</h2>

<p>Let’s make sure we’re all on the same page here when we’re referring to things using the words ‘fake’, ‘stub’ or ‘mock’.
According to <a href="https://learn.microsoft.com/en-us/dotnet/core/testing/unit-testing-best-practices#lets-speak-the-same-language">Microsoft’s best practices on Unit Testing</a>, the following definitions apply:</p>

<blockquote>
  <p>Fake - A fake is a generic term that can be used to describe either a stub or a mock object. Whether it’s a stub or a mock depends on the context in which it’s used. So in other words, a fake can be a stub or a mock.</p>

  <p>Mock - A mock object is a fake object in the system that decides whether or not a unit test has passed or failed. A mock starts out as a Fake until it’s asserted against.</p>

  <p>Stub - A stub is a controllable replacement for an existing dependency (or collaborator) in the system. By using a stub, you can test your code without dealing with the dependency directly. By default, a stub starts out as a fake.</p>
</blockquote>

<p>We will proceed using these definitions for our components.</p>

<h2 id="user-api-implementation">User API implementation</h2>

<p>Let’s take a look at how we would typically implement a Typed HTTP Client.
For this example, we’ll create an API that retrieves some user information from an online datastore with fake data.</p>

<p>If you’re following along but you’d like to use different templates, frameworks or libraries - feel free to do so.
I’ll explain the things I do in code to make it tool-agnostic.</p>

<p>We’ll begin by creating an empty ASP.NET Core project: <code class="language-plaintext highlighter-rouge">dotnet new web --name API</code>.</p>

<p>Now that we have our empty project, let’s add a Unit Test project with XUnit: <code class="language-plaintext highlighter-rouge">dotnet new xunit --name UnitTests</code>.
Additionally, we’ll install NSubstitute and its analyzers in our <code class="language-plaintext highlighter-rouge">UnitTests</code> project: <code class="language-plaintext highlighter-rouge">dotnet add package NSubstitute</code> and <code class="language-plaintext highlighter-rouge">dotnet add package NSubstitute.Analyzers.CSharp</code>.
Note that these analyzers aren’t mandatory by any means, I just like having them in my project because they can warn me upfront when I’m trying something funky.
We’ll also place a reference to our <code class="language-plaintext highlighter-rouge">API</code> project in our <code class="language-plaintext highlighter-rouge">UnitTests</code> project so we can access our ‘system under test’.</p>

<p>Cool! Now that we’ve got our projects set up and ready to go, let’s create something to retrieve user data with.
When dealing with retrieving data over HTTP, I like to use <a href="https://jsonplaceholder.typicode.com/">JSONPlaceholder</a>. This is a free online REST API that you can use to get fake data with different data sets.</p>

<p>In our <code class="language-plaintext highlighter-rouge">API</code> project, let’s create a <code class="language-plaintext highlighter-rouge">UsersRepository</code> class. This <code class="language-plaintext highlighter-rouge">UsersRepository</code> is going to be a typed HTTP client.
Since it’s a typed client, we will have direct access to the HTTP Client class through constructor injection.
We’ll do the set-up a typed client later, so for now go ahead and add a field for the HTTP Client in the <code class="language-plaintext highlighter-rouge">UsersRepository</code> like so:</p>

<div class="language-csharp highlighter-rouge"><div class="highlight"><pre class="highlight"><code><span class="k">namespace</span> <span class="nn">API</span><span class="p">;</span>

<span class="k">public</span> <span class="k">class</span> <span class="nc">UsersRepository</span>
<span class="p">{</span>
    <span class="k">private</span> <span class="k">readonly</span> <span class="n">HttpClient</span> <span class="n">_httpClient</span><span class="p">;</span>

    <span class="k">public</span> <span class="nf">UsersRepository</span><span class="p">(</span><span class="n">HttpClient</span> <span class="n">httpClient</span><span class="p">)</span> <span class="p">=&gt;</span> <span class="n">_httpClient</span> <span class="p">=</span> <span class="n">httpClient</span><span class="p">;</span>
<span class="p">}</span>

</code></pre></div></div>

<p>Okay! Now let’s create a small model for our user data.
The data we’ll be using is located at this endpoint: <a href="https://jsonplaceholder.typicode.com/users">https://jsonplaceholder.typicode.com/users</a>.
We won’t need everything for this exercise, so just get a couple of properties here and there.
I’ll be using this model:</p>

<div class="language-csharp highlighter-rouge"><div class="highlight"><pre class="highlight"><code><span class="k">namespace</span> <span class="nn">API</span><span class="p">;</span>

<span class="k">public</span> <span class="n">record</span> <span class="k">struct</span> <span class="nc">User</span><span class="p">(</span><span class="kt">string</span> <span class="n">Name</span><span class="p">,</span> <span class="kt">string</span> <span class="n">Email</span><span class="p">);</span>
</code></pre></div></div>

<p>Next up, let’s create a method to actually get some users from JSONPlaceholder.
We’ll create a method called: <code class="language-plaintext highlighter-rouge">GetUsersAsync</code>.
This method will be responsible for retrieving and deserializing the HTTP response from JSONPlaceholder.
I’ve implemented it like this:</p>

<div class="language-csharp highlighter-rouge"><div class="highlight"><pre class="highlight"><code><span class="k">public</span> <span class="k">async</span> <span class="n">Task</span><span class="p">&lt;</span><span class="n">IEnumerable</span><span class="p">&lt;</span><span class="n">User</span><span class="p">&gt;&gt;</span> <span class="nf">GetUsersAsync</span><span class="p">()</span> <span class="p">=&gt;</span> <span class="k">await</span> <span class="n">_httpClient</span><span class="p">.</span><span class="n">GetFromJsonAsync</span><span class="p">&lt;</span><span class="n">IEnumerable</span><span class="p">&lt;</span><span class="n">User</span><span class="p">&gt;&gt;(</span><span class="s">"/users"</span><span class="p">)</span> <span class="p">??</span> <span class="n">Array</span><span class="p">.</span><span class="n">Empty</span><span class="p">&lt;</span><span class="n">User</span><span class="p">&gt;();</span>
</code></pre></div></div>

<p>Okay! Now that we’ve got our logic set, let’s create an endpoint in our API that actually uses this.
Let’s go to our <code class="language-plaintext highlighter-rouge">Program.cs</code> file and create an endpoint for retrieving users.
First we’ll have to wire up our <code class="language-plaintext highlighter-rouge">UsersRepository</code> as a typed HTTP client, as mentioned before!
We can do so using an extension method on the <code class="language-plaintext highlighter-rouge">IServiceCollection</code> interface:</p>

<div class="language-csharp highlighter-rouge"><div class="highlight"><pre class="highlight"><code><span class="n">builder</span><span class="p">.</span><span class="n">Services</span><span class="p">.</span><span class="n">AddHttpClient</span><span class="p">&lt;</span><span class="n">UsersRepository</span><span class="p">&gt;(</span><span class="n">configuration</span> <span class="p">=&gt;</span> <span class="n">configuration</span><span class="p">.</span><span class="n">BaseAddress</span> <span class="p">=</span> <span class="k">new</span> <span class="nf">Uri</span><span class="p">(</span><span class="s">"https://jsonplaceholder.typicode.com"</span><span class="p">));</span>
</code></pre></div></div>

<p>Next, we’ll create an endpoint that leverages our service through Dependency Injection and calls the <code class="language-plaintext highlighter-rouge">GetUsersAsync</code> method:</p>

<div class="language-csharp highlighter-rouge"><div class="highlight"><pre class="highlight"><code><span class="n">app</span><span class="p">.</span><span class="nf">MapGet</span><span class="p">(</span><span class="s">"/users"</span><span class="p">,</span> <span class="k">async</span> <span class="p">([</span><span class="n">FromServices</span><span class="p">]</span><span class="n">UsersRepository</span> <span class="n">usersRepository</span><span class="p">)</span> <span class="p">=&gt;</span> <span class="k">await</span> <span class="n">usersRepository</span><span class="p">.</span><span class="nf">GetUsersAsync</span><span class="p">());</span>
</code></pre></div></div>

<p>This should get you to the point where you can run the API locally, navigate to <code class="language-plaintext highlighter-rouge">/users</code> and see some user data on your screen.
If you’ve followed along with me, you should see something along the lines of:</p>

<div class="language-json highlighter-rouge"><div class="highlight"><pre class="highlight"><code><span class="p">[</span><span class="w">
  </span><span class="p">{</span><span class="w">
    </span><span class="nl">"name"</span><span class="p">:</span><span class="w"> </span><span class="s2">"Leanne Graham"</span><span class="p">,</span><span class="w">
    </span><span class="nl">"email"</span><span class="p">:</span><span class="w"> </span><span class="s2">"Sincere@april.biz"</span><span class="w">
  </span><span class="p">},</span><span class="w">
  </span><span class="p">{</span><span class="w">
    </span><span class="nl">"name"</span><span class="p">:</span><span class="w"> </span><span class="s2">"Ervin Howell"</span><span class="p">,</span><span class="w">
    </span><span class="nl">"email"</span><span class="p">:</span><span class="w"> </span><span class="s2">"Shanna@melissa.tv"</span><span class="w">
  </span><span class="p">},</span><span class="w">
  </span><span class="p">{</span><span class="w">
    </span><span class="nl">"name"</span><span class="p">:</span><span class="w"> </span><span class="s2">"Clementine Bauch"</span><span class="p">,</span><span class="w">
    </span><span class="nl">"email"</span><span class="p">:</span><span class="w"> </span><span class="s2">"Nathan@yesenia.net"</span><span class="w">
  </span><span class="p">},</span><span class="w">
  </span><span class="p">{</span><span class="w">
    </span><span class="nl">"name"</span><span class="p">:</span><span class="w"> </span><span class="s2">"Patricia Lebsack"</span><span class="p">,</span><span class="w">
    </span><span class="nl">"email"</span><span class="p">:</span><span class="w"> </span><span class="s2">"Julianne.OConner@kory.org"</span><span class="w">
  </span><span class="p">},</span><span class="w">
  </span><span class="p">{</span><span class="w">
    </span><span class="nl">"name"</span><span class="p">:</span><span class="w"> </span><span class="s2">"Chelsey Dietrich"</span><span class="p">,</span><span class="w">
    </span><span class="nl">"email"</span><span class="p">:</span><span class="w"> </span><span class="s2">"Lucio_Hettinger@annie.ca"</span><span class="w">
  </span><span class="p">},</span><span class="w">
  </span><span class="p">{</span><span class="w">
    </span><span class="nl">"name"</span><span class="p">:</span><span class="w"> </span><span class="s2">"Mrs. Dennis Schulist"</span><span class="p">,</span><span class="w">
    </span><span class="nl">"email"</span><span class="p">:</span><span class="w"> </span><span class="s2">"Karley_Dach@jasper.info"</span><span class="w">
  </span><span class="p">},</span><span class="w">
  </span><span class="p">{</span><span class="w">
    </span><span class="nl">"name"</span><span class="p">:</span><span class="w"> </span><span class="s2">"Kurtis Weissnat"</span><span class="p">,</span><span class="w">
    </span><span class="nl">"email"</span><span class="p">:</span><span class="w"> </span><span class="s2">"Telly.Hoeger@billy.biz"</span><span class="w">
  </span><span class="p">},</span><span class="w">
  </span><span class="p">{</span><span class="w">
    </span><span class="nl">"name"</span><span class="p">:</span><span class="w"> </span><span class="s2">"Nicholas Runolfsdottir V"</span><span class="p">,</span><span class="w">
    </span><span class="nl">"email"</span><span class="p">:</span><span class="w"> </span><span class="s2">"Sherwood@rosamond.me"</span><span class="w">
  </span><span class="p">},</span><span class="w">
  </span><span class="p">{</span><span class="w">
    </span><span class="nl">"name"</span><span class="p">:</span><span class="w"> </span><span class="s2">"Glenna Reichert"</span><span class="p">,</span><span class="w">
    </span><span class="nl">"email"</span><span class="p">:</span><span class="w"> </span><span class="s2">"Chaim_McDermott@dana.io"</span><span class="w">
  </span><span class="p">},</span><span class="w">
  </span><span class="p">{</span><span class="w">
    </span><span class="nl">"name"</span><span class="p">:</span><span class="w"> </span><span class="s2">"Clementina DuBuque"</span><span class="p">,</span><span class="w">
    </span><span class="nl">"email"</span><span class="p">:</span><span class="w"> </span><span class="s2">"Rey.Padberg@karina.biz"</span><span class="w">
  </span><span class="p">}</span><span class="w">
</span><span class="p">]</span><span class="w">
</span></code></pre></div></div>

<p>Alright! Whether you’ve followed along with me for the implementation is actually not very relevant.
The important thing is that you have a method somewhere that uses an <em>injected</em> <code class="language-plaintext highlighter-rouge">HttpClient</code> class to retrieve some data.
That’s what we’re going to mock in our Unit Test. Whether you use <code class="language-plaintext highlighter-rouge">GetAsync</code>, <code class="language-plaintext highlighter-rouge">SendAsync</code>, <code class="language-plaintext highlighter-rouge">PostAsync</code> or any other method from the injected <code class="language-plaintext highlighter-rouge">HttpClient</code> class doesn’t matter either.</p>

<p>That’s it! We now have an implementation that we can start to write some tests for.</p>

<p>Go to part 2: <a href="https://blog.alexschouls.nl/unit-testing/2023/10/31/unit-testing-mocking-httpclient-part-2.html">Mocking HTTP calls in typed clients in Unit Tests - Part 2</a>.</p>]]></content><author><name></name></author><category term="unit-testing" /><summary type="html"><![CDATA[Introduction]]></summary></entry><entry><title type="html">Mocking HTTP calls in typed clients in Unit Tests - Part 2</title><link href="/unit-testing/2023/10/31/unit-testing-mocking-httpclient-part-2.html" rel="alternate" type="text/html" title="Mocking HTTP calls in typed clients in Unit Tests - Part 2" /><published>2023-10-31T13:33:00+00:00</published><updated>2023-10-31T13:33:00+00:00</updated><id>/unit-testing/2023/10/31/unit-testing-mocking-httpclient-part-2</id><content type="html" xml:base="/unit-testing/2023/10/31/unit-testing-mocking-httpclient-part-2.html"><![CDATA[<h2 id="introduction">Introduction</h2>

<p>Welcome to the second part of the series on how to mock HTTP calls in typed HTTP clients.
In case you missed part 1, here’s a link: <a href="https://blog.alexschouls.nl/unit-testing/2023/10/31/unit-testing-mocking-httpclient-part-1.html">Mocking HTTP calls in typed clients in Unit Tests - Part 1</a>.</p>

<p>In this part we’ll try to write a unit test the way we would normally do with dependencies.
We’ll dive deeper into the problem and why it doesn’t work.</p>

<p>In part 3 and the last part of this series, we’ll fix this problem and change our unit test so it’s mocking an HTTP response.</p>

<p>A quick table of contents:</p>

<ul>
  <li><a href="#introduction">Introduction</a></li>
  <li><a href="#writing-a-unit-test---the-regular-way">Writing a unit test - the regular way</a></li>
  <li><a href="#the-problem">The problem</a></li>
</ul>

<h2 id="writing-a-unit-test---the-regular-way">Writing a unit test - the regular way</h2>

<p>Now we’re going to take a look at what we want to test and what we should have to mock.
Since this is a demo project, our code isn’t very complicated and doesn’t have some business logic.
Regardless of the complexity though, our steps to determine what to test and what to mock will be the same.</p>

<p>We have one file with logic in it: our <code class="language-plaintext highlighter-rouge">UsersRepository</code> class.
This class has a single method inside of it: <code class="language-plaintext highlighter-rouge">GetUsersAsync</code>.</p>

<p>This method has no parameters and doesn’t depend on any input other than the injected HTTP client.
We’re dealing with unit tests. These tests should always be isolated and testing code units as small as possible.
Since all our method does is retrieving some user data from an external source and transforming it our user model, we can state that our test should verify that, when we retrieve data from an external source, it will be transformed into our user model and returned as a collection of <code class="language-plaintext highlighter-rouge">User</code> objects.</p>

<p>We can write some other tests for our code, like what happens when there is no HTTP connection, or when the data cannot be deserialized but those are out of scope for the purpose of this post.</p>

<p>As we’re dealing with a unit test, we want to leave the actual HTTP connection out of scope and ‘pretend’ like it’s been successful. After all, we’re testing if we’re able to get the right data back when the external API call is giving us the data. That’s our hypothesis.</p>

<p>This does mean that we want to mock our HTTP client.
If we look at our method that we’re unit testing we can determine we’ll have to mock the <code class="language-plaintext highlighter-rouge">GetFromJsonAsync</code> method:</p>

<div class="language-csharp highlighter-rouge"><div class="highlight"><pre class="highlight"><code><span class="k">public</span> <span class="k">async</span> <span class="n">Task</span><span class="p">&lt;</span><span class="n">IEnumerable</span><span class="p">&lt;</span><span class="n">User</span><span class="p">&gt;&gt;</span> <span class="nf">GetUsersAsync</span><span class="p">()</span> <span class="p">=&gt;</span> <span class="k">await</span> <span class="n">_httpClient</span><span class="p">.</span><span class="n">GetFromJsonAsync</span><span class="p">&lt;</span><span class="n">IEnumerable</span><span class="p">&lt;</span><span class="n">User</span><span class="p">&gt;&gt;(</span><span class="s">"/users"</span><span class="p">)</span> <span class="p">??</span> <span class="n">Array</span><span class="p">.</span><span class="n">Empty</span><span class="p">&lt;</span><span class="n">User</span><span class="p">&gt;();</span>
</code></pre></div></div>

<p>The way I like to write unit tests is by declaring what is being tested, with any potential data and what it should do.
We’ll name our unit test: <code class="language-plaintext highlighter-rouge">GetUsersAsync_WithSuccessResponse_ShouldReturnUsers</code>.</p>

<p>This naming convention makes it clear what we’re testing, under which condition and what it should do.
Let’s get to work!</p>

<p>We’ll open our <code class="language-plaintext highlighter-rouge">UnitTests</code> project and create a new file: <code class="language-plaintext highlighter-rouge">UsersRepositoryTests</code>.
In every test, I always like to put in the AAA comments to make sure I divide my test up properly.
Our test skeleton looks something like this:</p>

<div class="language-csharp highlighter-rouge"><div class="highlight"><pre class="highlight"><code><span class="k">namespace</span> <span class="nn">UnitTests</span><span class="p">;</span>

<span class="k">public</span> <span class="k">class</span> <span class="nc">UsersRepositoryTests</span>
<span class="p">{</span>
    <span class="k">public</span> <span class="k">async</span> <span class="n">Task</span> <span class="nf">GetUsersAsync_WithSuccessResponse_ShouldReturnUsers</span><span class="p">()</span>
    <span class="p">{</span>
        <span class="c1">// Arrange</span>

        <span class="c1">// Act</span>

        <span class="c1">// Assert</span>
    <span class="p">}</span>
<span class="p">}</span>

</code></pre></div></div>

<h2 id="the-problem">The problem</h2>

<p>As the comments already suggest, we’ll start by arranging our test.
We’ll do this by creating a ‘system under test’ object.
When dealing with a unit test (without any specific patterns - we’ll cover things like the builder pattern in a later post), we’ll just instantiate the class itself.
If we’d like to do so with our <code class="language-plaintext highlighter-rouge">UsersRepository</code> class, we want to write something like this in our test:</p>

<div class="language-csharp highlighter-rouge"><div class="highlight"><pre class="highlight"><code><span class="kt">var</span> <span class="n">usersRepository</span> <span class="p">=</span> <span class="k">new</span> <span class="nf">UsersRepository</span><span class="p">();</span>
</code></pre></div></div>

<p>However, our UsersRepository has a dependency on the <code class="language-plaintext highlighter-rouge">HttpClient</code> class, since it’s leveraging constructor injection as a typed HTTP client.
Usually, when dealing with constructor injection in your classes, you’re injecting interfaces (e.g. <code class="language-plaintext highlighter-rouge">ILogger&lt;T&gt;</code> or <code class="language-plaintext highlighter-rouge">IHttpClientFactory</code>).
These <em>dependencies</em> are generally mocked.</p>

<p>Here we arrive at a crucial point with mocking in general. Mocking frameworks are capable of building a fake object of your choice by implementing an interface during runtime. However, our <code class="language-plaintext highlighter-rouge">HttpClient</code> class is an actual concrete class and not an interface.</p>

<p>This means that our mocking frameworks such as Moq or NSubstitute won’t take kindly to creating a mocked object out of this.</p>

<p><sub><em>There are exceptions to this on virtual methods and some frameworks will support it in a limited way, but it’s considered bad practice to mock a concrete class due to unexpected side effects affecting your unit test and potential code being executed whilst you don’t expect it.</em></sub></p>

<p>This means that, whilst you might be tempted to do something like this, there is a better way of mocking the result of an HTTP client’s request.</p>

<div class="language-csharp highlighter-rouge"><div class="highlight"><pre class="highlight"><code><span class="k">using</span> <span class="nn">API</span><span class="p">;</span>
<span class="k">using</span> <span class="nn">NSubstitute</span><span class="p">;</span>

<span class="k">namespace</span> <span class="nn">UnitTests</span><span class="p">;</span>

<span class="k">public</span> <span class="k">class</span> <span class="nc">UsersRepositoryTests</span>
<span class="p">{</span>
    <span class="k">private</span> <span class="k">readonly</span> <span class="n">HttpClient</span> <span class="n">_httpClient</span><span class="p">;</span>

    <span class="k">public</span> <span class="nf">UsersRepositoryTests</span><span class="p">()</span> <span class="p">=&gt;</span> <span class="n">_httpClient</span> <span class="p">=</span> <span class="n">Substitute</span><span class="p">.</span><span class="n">For</span><span class="p">&lt;</span><span class="n">HttpClient</span><span class="p">&gt;();</span>

    <span class="k">public</span> <span class="k">async</span> <span class="n">Task</span> <span class="nf">GetUsersAsync_WithSuccessResponse_ShouldReturnUsers</span><span class="p">()</span>
    <span class="p">{</span>
        <span class="c1">// Arrange</span>
        <span class="kt">var</span> <span class="n">response</span> <span class="p">=</span> <span class="k">new</span> <span class="nf">HttpResponseMessage</span><span class="p">();</span>
        <span class="n">_httpClient</span><span class="p">.</span><span class="nf">SendAsync</span><span class="p">(</span><span class="n">Arg</span><span class="p">.</span><span class="n">Any</span><span class="p">&lt;</span><span class="n">HttpRequestMessage</span><span class="p">&gt;()).</span><span class="nf">Returns</span><span class="p">(</span><span class="n">response</span><span class="p">);</span>
        <span class="kt">var</span> <span class="n">usersRepository</span> <span class="p">=</span> <span class="k">new</span> <span class="nf">UsersRepository</span><span class="p">(</span><span class="n">_httpClient</span><span class="p">);</span>

        <span class="c1">// Act</span>

        <span class="c1">// Assert</span>
    <span class="p">}</span>
<span class="p">}</span>
</code></pre></div></div>

<p>In case you’re using NSubstitute and the analyzers, it’ll warn you about using a concrete class’ method in your mock: <code class="language-plaintext highlighter-rouge">Member SendAsync can not be intercepted. Only interface members and virtual, overriding, and abstract members can be intercepted.</code>.</p>

<p>As you can see from this approach, this won’t work the way we want to!
Now we’re stuck with a non-working unit test that doesn’t really do anything for us.</p>

<p>Let’s take a look in the next part of the series on how to properly fix this and turn this around!</p>

<p>Go to part 3: <a href="https://blog.alexschouls.nl/unit-testing/2023/10/31/unit-testing-mocking-httpclient-part-3.html">Mocking HTTP calls in typed clients in Unit Tests - Part 3</a>.</p>]]></content><author><name></name></author><category term="unit-testing" /><summary type="html"><![CDATA[Introduction]]></summary></entry></feed>